Situatie
Solutie
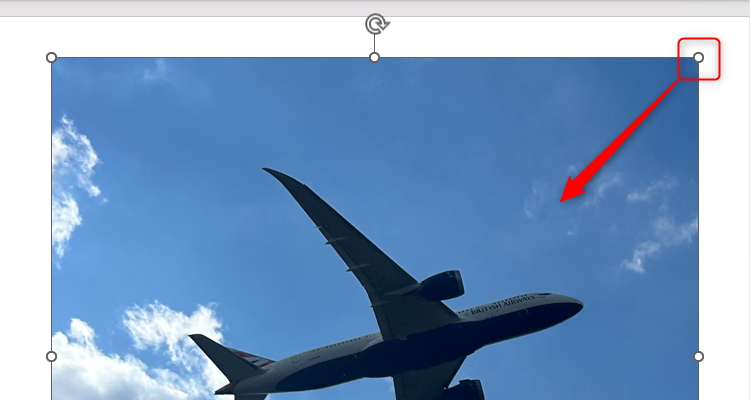
The question to ask is whether you need so many images in the first place. Go through your slides and remove any images that don’t add any true value to your presentation. If you still find that you have lots of images, consider making them smaller by dragging the corner image handle towards the center of the picture.
Hold Ctrl to select many images on a slide at the same time, and then adjust one of those images to make them all smaller.
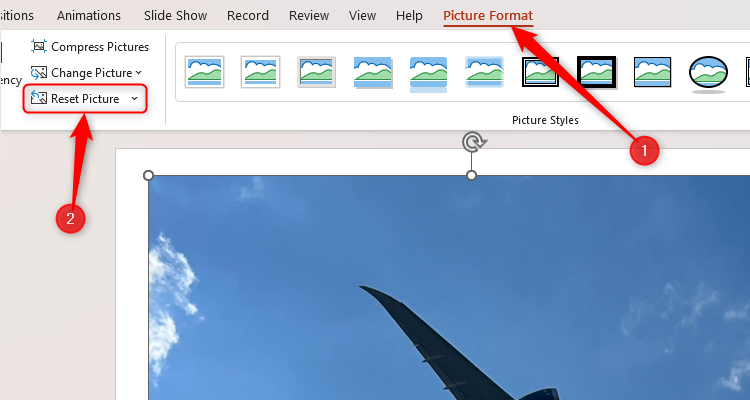
A second option is to remove artistic effects from images. It might be tempting to use PowerPoint’s built-in picture editor, but adding shadows, reflections, and borders instantly adds kilobytes to your file. To revert the image to its original formatting, first select the image, and then click “Reset Picture” in the Picture Format tab on the ribbon.
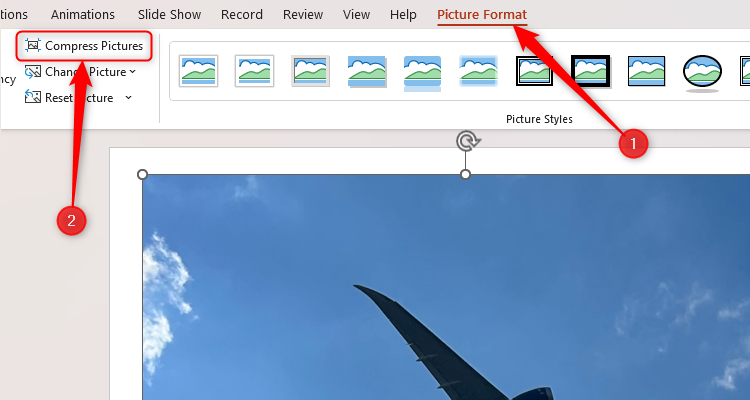
Finally, consider compressing your images. While this will reduce their quality, using a lower resolution will mean that PowerPoint won’t have to work as hard to display them in both the Normal and Slide Show views. Select an image in your slideshow, and click “Compress Pictures” in the Picture Format tab.
Then, you can either choose to compress the image you selected or all images in your file. If you plan to project your finished presentation onto a screen, 150 PPI is the optimal choice for reducing your file size without lowering the image quality too much.
The other way to compress your images, and all future pictures you add, is to first click File > Options. Then, click “Advanced” in the left-hand menu, and change “Default Resolution” to 150 PPT or 220 PPI in the Image Size And Quality options.
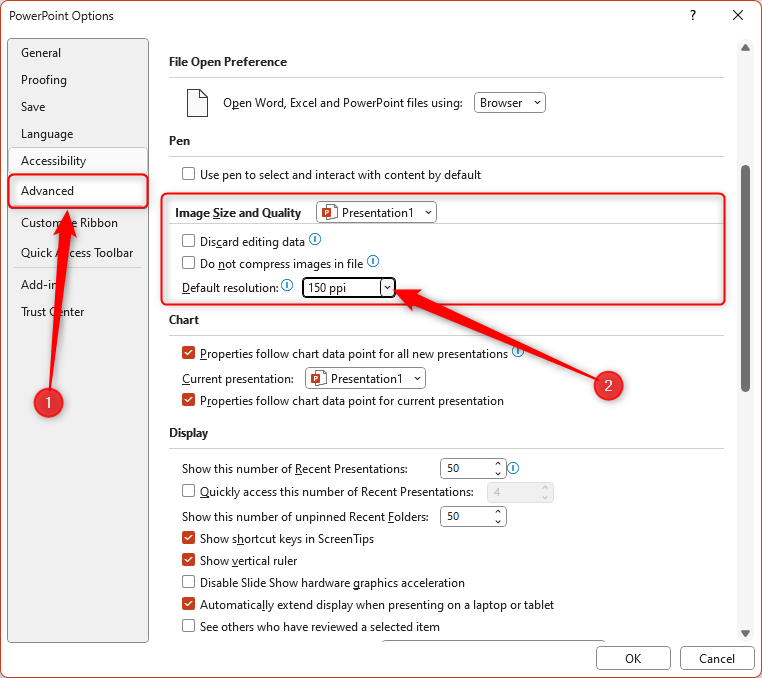
Then, click “OK.”
Removing backgrounds and watermarks from your slides will also help to speed up your file.
Audio and Videos
As well as compressing images, you can also compress the media within your presentation, but the method differs slightly. Click File > Info, and choose the “Compress Media” drop-down button. There, click “HD” or “Standard” as alternatives to the Full HD option.
Compressing the media in your presentation will also remove embedded subtitles and alternate audio tracks.
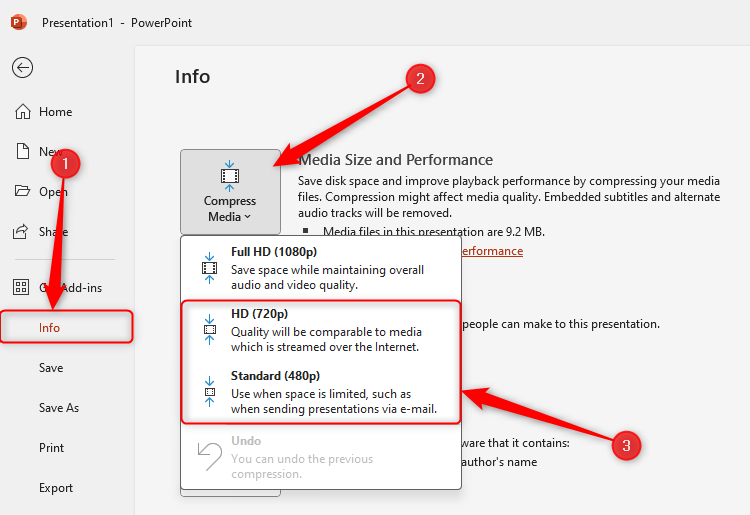
If this doesn’t speed up your file, consider removing the media from your PowerPoint file altogether. This doesn’t mean you have to lose that feature from your slideshow, however—adding a link to the video or audio, which you can click when delivering your presentation, is a good alternative.
Animations and Transitions
Animations are a good way to emphasize details in your PowerPoint presentation or gradually introduce information step-by-step, and transitions between slides can look professional and slick. However, overusing these features not only distracts your audience and looks tacky, but also reduces your PowerPoint’s performance efficiency. Keeping animations and transitions to a minimum, in terms of both quantity and type, will make a big difference. If possible, try to stick to these rules:
- Ask yourself, “Does this make my presentation better?” If the answer is no, don’t put it in.
- Use slick effects that last less than one second without you having to change the speed of the animation. Fade and Cut are professional and quick transition effects, and Appear and Fade are optimal entrance animations.
- Use the same transition effect for each slide, and the same animation for each item.
- Try to avoid adding more than one animation to each item, and avoid animating individual words and letters.
Review the Master Slides
You might think that the slides in the thumbnail pane on the left-hand side are the only slides in your file. However, the Slide Master contains hidden information that dictates how your presentation is designed. You can see the master slides by clicking “Slide Master” in the View tab on the ribbon.
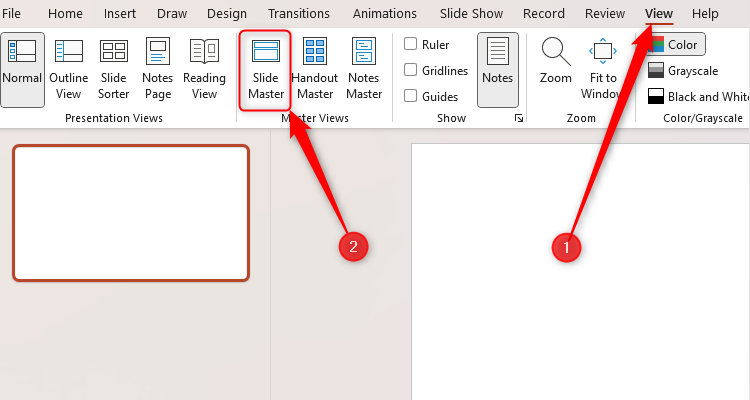
First, scroll through the Slide Master, and right-click and delete any of the layouts you don’t need.
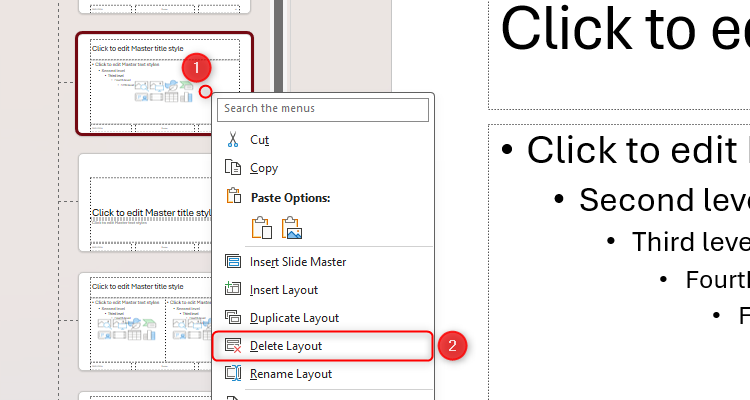
Second, you might see objects (such as pictures or formatted text) that don’t add any value to your PowerPoint. Click the relevant master slides and remove those items.
Macros
Macros let you automate a series of commands to execute a task with a single click or keyboard shortcut. To check which macros you have enabled in your PowerPoint, click the “Macros” button in the View tab. This will bring up a dialog box, where you can view, edit, and—importantly—delete any macros.
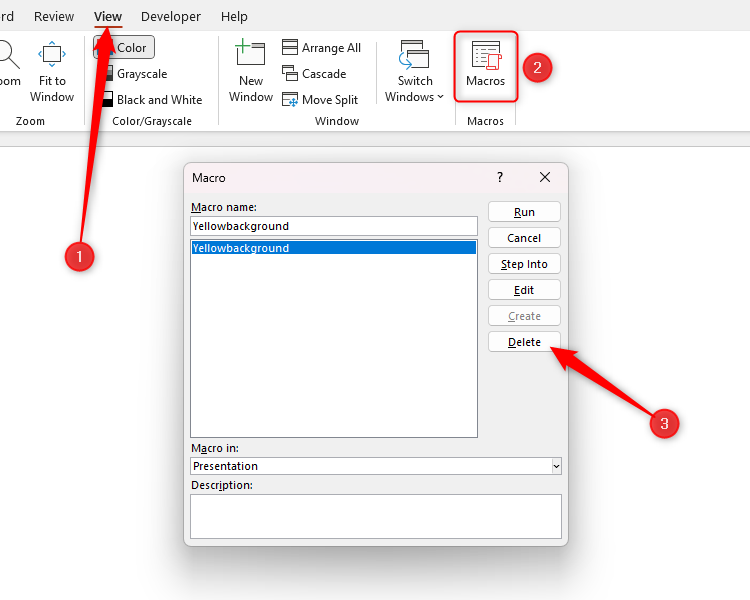
Even though deleting a macro means you might lose some automation, it will likely speed up your file significantly.
Add-ins
Add-ins are custom tools you can add to PowerPoint that enable you to do more with the program. For example, you can add more customized charts or interactive elements to take your presentation to the next level. However, since you’re effectively adding another program to PowerPoint, these affect its performance hugely.
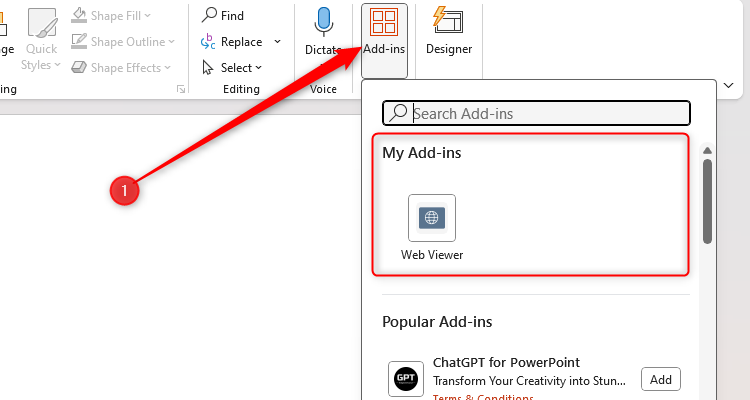
To see whether you have add-ins installed, click the “Add-ins” icon on the Home tab, and any add-ins will show under My Add-ins in the drop-down dialog box.
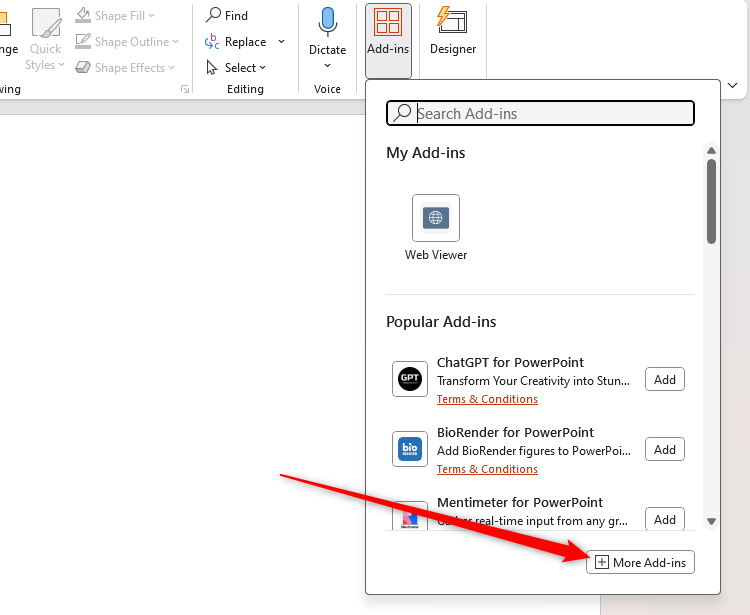
Then, to remove an add-in, click “More Add-ins.”
In the Office Add-ins window, click “My Add-ins,” and click the three dots next to whichever add-in you want to delete. Finally, click “Remove.”
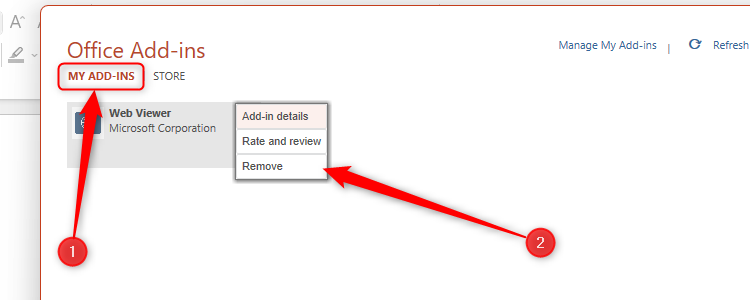
This will remove the add-in from your Microsoft account, affecting all Office applications compatible with this add-in.
Disable AutoSave
This tip is somewhat of a last resort, as Microsoft 365’s AutoSave is a great way to ensure you don’t lose your work if something unexpected happens, such as an impromptu update or the dreaded blue screen of death.

However, because AutoSave uploads the latest version of your PowerPoint file to your OneDrive account every few seconds, it’s always working in the background and might slow down the program’s performance.
Providing you’re sure that you’ll remember to press Ctrl+S every few minutes to save your work manually, try disabling AutoSave to speed up your file.
If you can’t see the AutoSave icon, right-click any of the tabs and click “Show Quick Access Toolbar.”

If you still can’t see it, click the “Customize Quick Access Toolbar” down arrow, and check “Automatically Save.”

Then, click the AutoSave toggle to “Off,” and the AutoSave function will stop working away in the background.

Leave A Comment?