Situatie
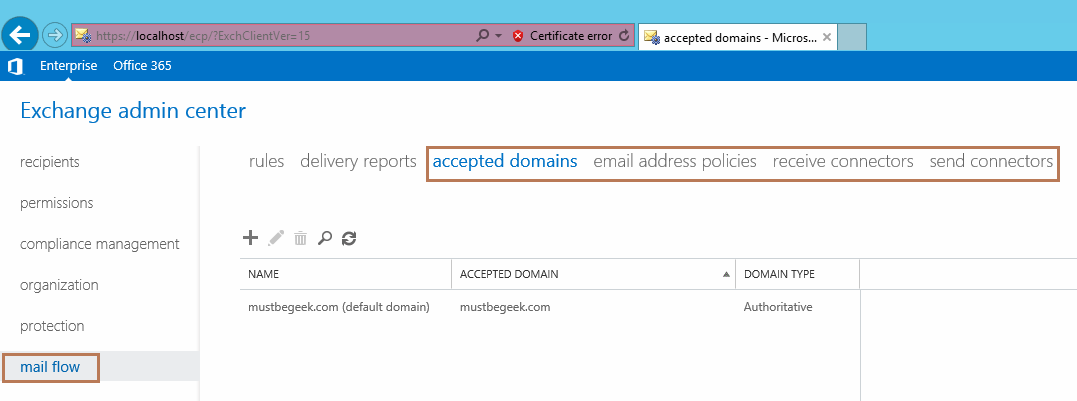
Click mail flow in the features pane. You can see the tabs for accepted domains, email address policies, receive connectors and send connectors. To setup mail flow this is where most of the configuration is done.
Solutie
Pasi de urmat
Accepted Domains
In accepted domains tab you can define more than one domain names for which this Mail server will accept emails from. As you can see below, mustbegeek.com is default domain because Exchange picks the forest root domain by default. So, forest root domain name is the default authoritative domain name. You can double-click the domain name to view default domain configuration.
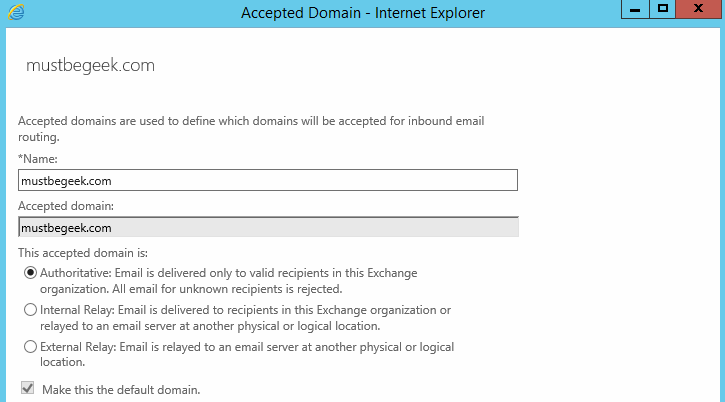
Type simple name to recognize domain. Type accepted domain name abc.com as shown above. Choose authoritative option. You also need to configure MX record of domain abc.com to point to this Exchange server. You do this by going into domain control panel of hosting provider for example, GoDaddy. This is how email routing actually works. Email servers use DNS servers and MX records to route emails.
Email Address Policies
Email address policies define the email address format. By default, the default email address policy is alias@contoso.com and is applied to all recipient types. Default email address policy state that if user has logon name as bgiri@mustbegeek.com then the email format will also be the same. The default email address policy is mostly fine, so I will leave the default. You can add different email address policy and apply to recipients based on different criteria.

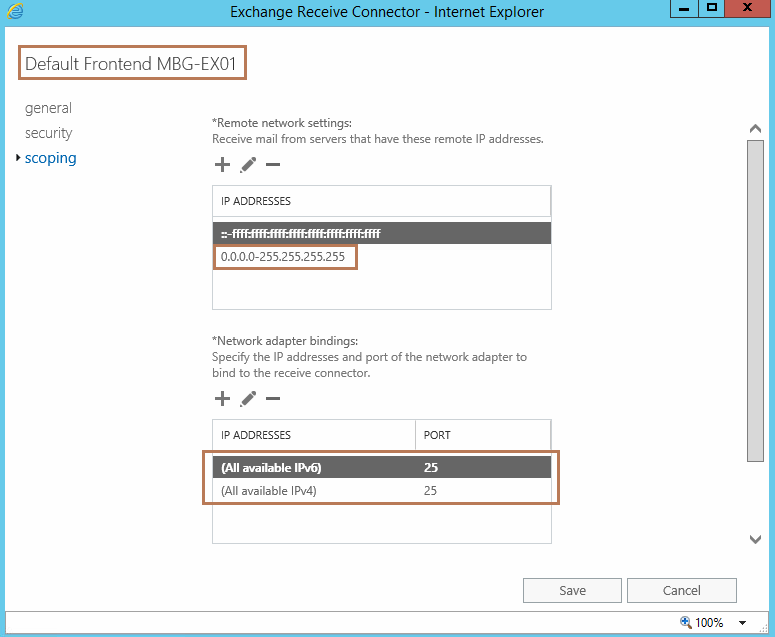
Receive Connector
Receive connector is the point where Exchange server will receive emails from various sources. By default, five receive connectors are created by default. Default Frontend MBG-EX01 connector is the one that receives emails on port 25 from Internet.
Send Connector
Send connector allows Exchange server to send emails out on the Internet. If your Exchange server is unable to send emails out on the Internet, then this where you should look. By default, send connector is empty so let’s configure a send connector. Select send connectors tab.

Click + “New” to add new send connector.

Type name of send connector. There are four different types of send connector. Choose Internet to route emails out on the Internet. Click next.
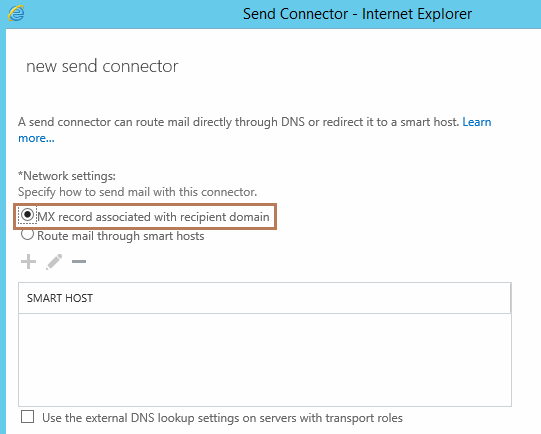
You have two methods to route emails. You can route emails using smart hosts or use MX records. Smart hosts can be SMTP server of your Internet provider or any other SMTP server. Here I will choose MX routing option. Choose MX record associated with recipient domainoption as method send mail with this connector. Using MX record as email routing option, the Exchange server will try to find destination email server using DNS lookups. So, make sure your internal DNS server can resolve external domain names. Click next.
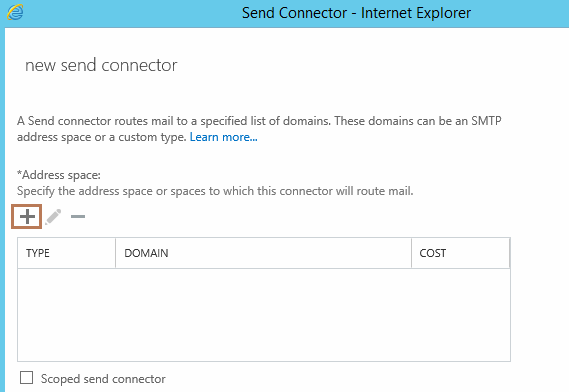
Click + “Add” to add new address space.

Since we want to send emails to all destination domain names, type * as FQDN. Click save.
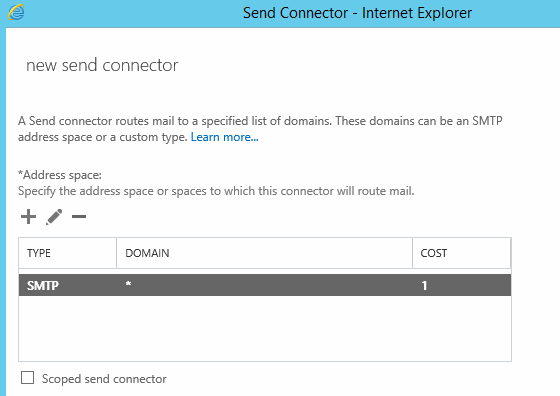
You can review the configuration. Click next.

Click + “Add” to choose source server. Select the Mailbox server from the list and click add. Click OK.

Review the configuration. Click finish.

Send connector has now been configured as shown above. Now, you should be able to send and receive emails both internally and externally.
Leave A Comment?