Situatie
Gmail users may configure their Gmail Account in IncrediMail very easily using the ‘Email Setup Wizard’:
Solutie
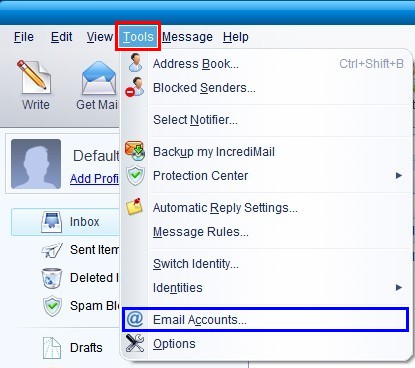
- Click the ‘Tools’ menu (shown in red) and then select ‘Email Accounts…’ (shown in blue).

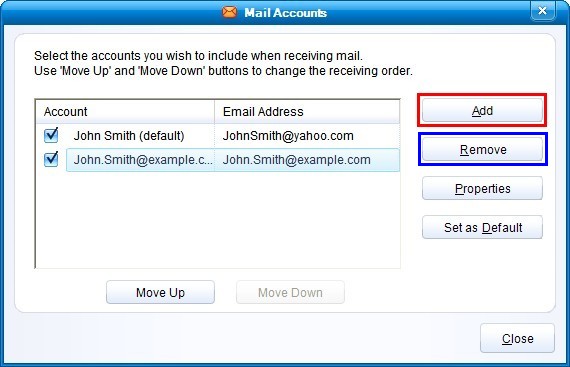
- In the Mail Accounts dialog, click ‘Add’ (shown in red). If your account is already listed, first choose your account and then click ‘Remove’ before clicking ‘Add’.

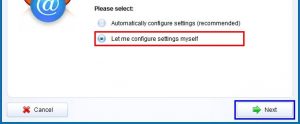
- Please choose ‘Let me configure settings myself’ (marked in red), and click ‘Next’ (marked in blue). Please Note: If you do not see the ‘Let me configure…’ option, continue to Step 4.
- Click ‘Gmail’ (shown in red).


5.Type in your username just as you would to access your Gmail account (marked in blue) and password (marked in green).
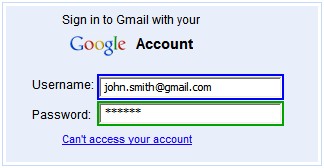
Note: Make sure that the password you entered is identical to the one your Email Provider has provided you.6. To finish, press ‘Next‘ and then ‘Ok’.
Your Gmail account may need to be configured from the Gmail site in order to work correctly with IncrediMail. If you are unable to receive messages, or receive all your old messages, please check and adjust these settings:
- Click here to open the Gmail website. Enter your Gmail Username and Password in the appropriate fields (marked in red below) and click ‘Sign in’ (marked in blue).

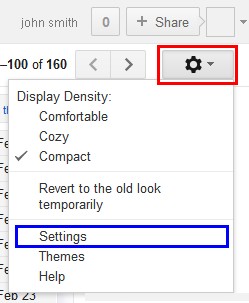
- Click the “gear” icon (marked in red below) in the top-right corner of your Gmail Account page, and then select ‘Settings’ (marked in blue).

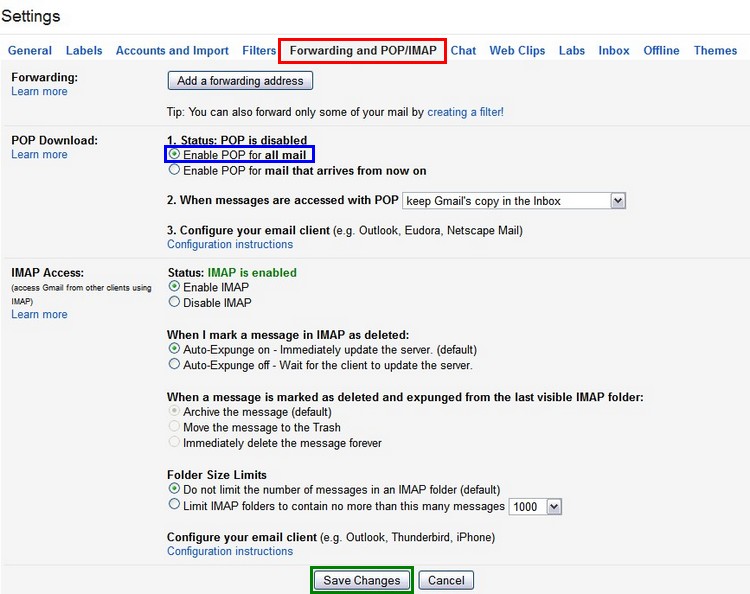
- Click the ‘Forwarding and POP/IMAP’ tab (marked in red below), and select the ‘Enable POP for all mail’ option (marked in blue).
 Please Note: To receive only NEW messages, choose ‘Enable POP for mail that arrives from now on’.
 - Click ‘Save Changes’ (marked above in green) and close the browser window.
If none of these works, please try configuring your Email Account in another Email Client to test your settings. For instructions on doing so, please click here.
Leave A Comment?