Situatie
If you don’t fancy the default Ubuntu alert sound, it’s easy to replace it with a custom notification sound that you like. Ubuntu’s classic alert sound is iconic, but you’re not alone if you’re sick of hearing it. Luckily, Ubuntu offers four other amazing alert sounds that you can choose from—and you can even replace the files for these sounds to add custom alert sounds if you’re feeling creative.
Solutie
How to Change the Ubuntu Alert Sound
Changing the notification alert sound in Ubuntu is a simple process. To start, you should click the menu icon at the bottom left corner of your screen and enter Sound in the search bar. Then, click on Sound > Change sound levels, inputs, outputs, and alert sounds.
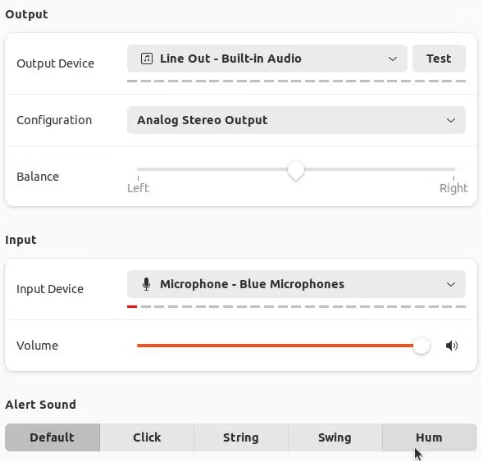
You will be taken to the Sounds section of the Settings app. Scroll to the bottom of the page until you see a header that reads Alert Sound. Click through the five options—Default, Click, String, Swing, and Hum—and pick the alert sound of your choice.
Add a Custom Alert Sound in Ubuntu
There isn’t any straightforward way to add a custom alert sound to your Ubuntu system, but you can replace one of the files used for the five default sounds if you would prefer a custom sound. To start, you should create a backup file of the default sounds so that you can easily use them again later.
Open the Files application and click through Other Locations > Ubuntu. Next, head over to /usr/share/sounds/gnome/default/alerts. You will find a folder containing the files used as the default alert sounds in Ubuntu. Copy them to a separate folder on your PC.
Next, choose a new alert sound. You can use a sound from a personal file or download an interesting audio clip from a sound datebase website. Save the file to your computer and then use an online audio converter to convert your sound clip into an OGG file.
Download the new OGG file to your computer and then rename it as one of the default sound clips that you would like to replace—click.ogg, string.ogg, swing.ogg, or hum.ogg. Drag and drop the file into your Home directory.
Finally, open the terminal. You will enter the following command to move your sound file into the default alert sounds folder and replace the existing file with the same name:
– sudo mv hum.ogg /usr/share/sounds/gnome/default/alerts
The file will disappear from the Home directory. If you open the Sound settings menu, scroll down to the Alert Sound options menu, and click on the sound that you replaced, it will play the sound that you chose instead of the default sound.
Select the sound that you would like to use and close the Sounds menu. If you ever wish to use the default sound again, you can move the backup sound file to the Home directory and use the same command to replace the custom file.
Leave A Comment?