Situatie
Microsoft has stated that Windows 11 may only be used on computers that have TPM 2.0 installed.Clearing it results in the loss of all TPM-associated keys and the information they protect. Make sure to have a backup and recovery method for any data that is encrypted.
Solutie
Pasi de urmat
The Trusted Platform Module (TPM) is a cryptographic module that improves the security and privacy of computer systems. TPMs are passive devices that only accept commands and respond to them. When it comes to realizing the full potential of a TPM, the OEM must properly integrate system hardware and firmware with the TPM, allowing it to receive commands from the system and respond to its answers.
- Press Windows + S on your keyboard, then type Windows Security and select the most relevant result.
- From the left panel, select the Device security option. Under the Security processor section, select Security processor details.
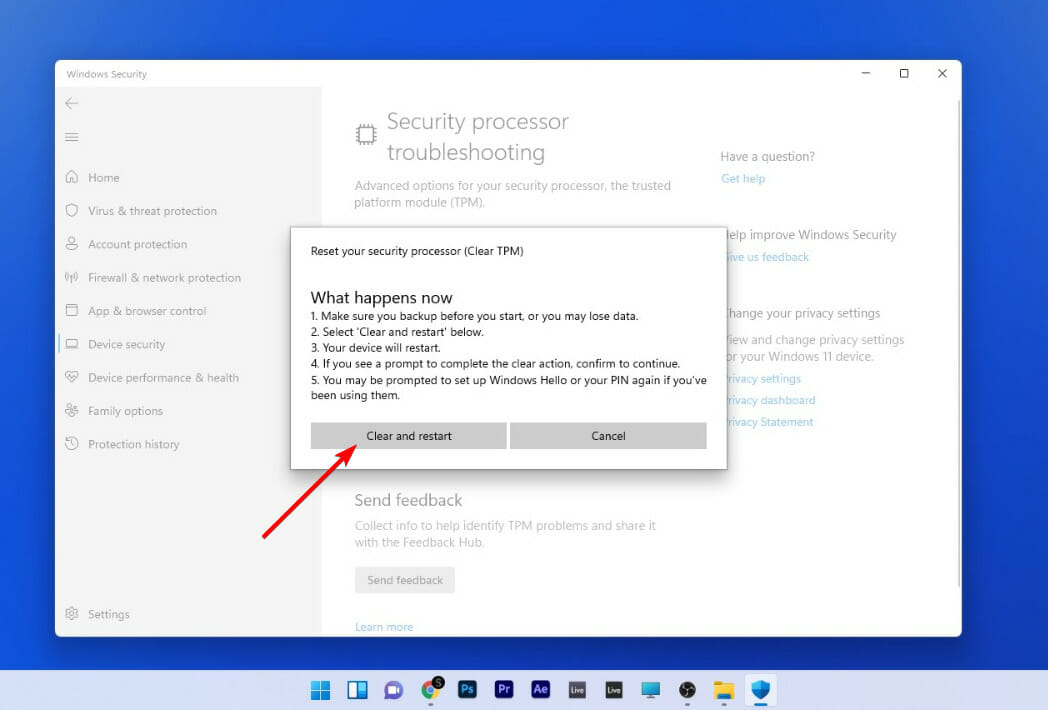
- Click on Security processor troubleshooting. Next, click on Clear TPM.Lastly tap on the Clear and restart button.
- Open the TPM MMC
- Press Windows + S on your keyboard, then type tpm.msc and select the most relevant result.
- If the User Account Control dialog box appears, confirm that the action it displays is what you want, and then click Yes.
- Click on Actions and select Clear TPM.
Clear from the BIOS menu
- Boot your computer and press the F2 key to enter the BIOS setup mode.
- Locate the Security option on the left side and expand it.
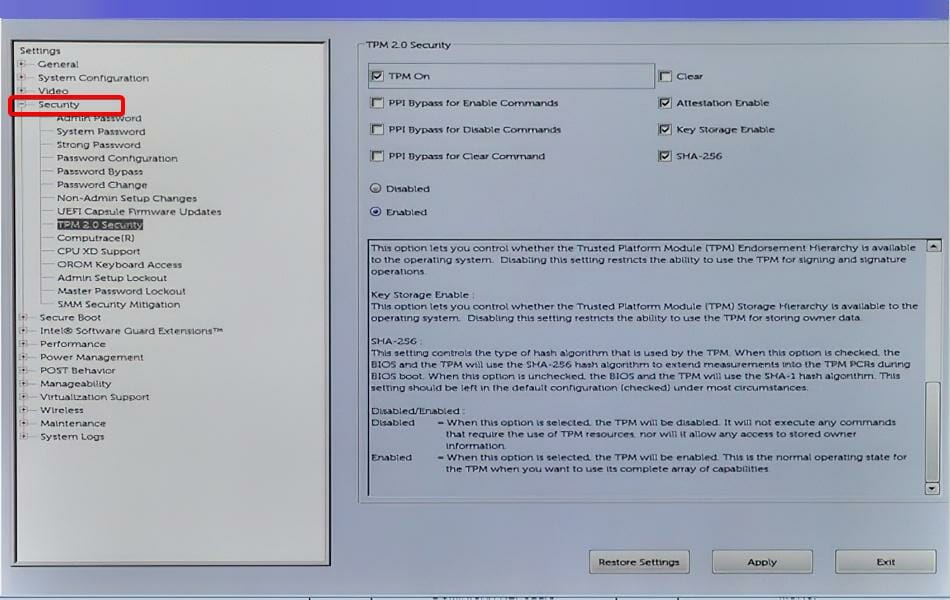
Click on the TPM option nested under the Security setting, and check the Clear box.
Reboot your computer and re-enter into the BIOS menu, again by pressing the F2 key. Ensure the Enabled radio button is checked in order to activate the TPM.
Leave A Comment?