
Situatie
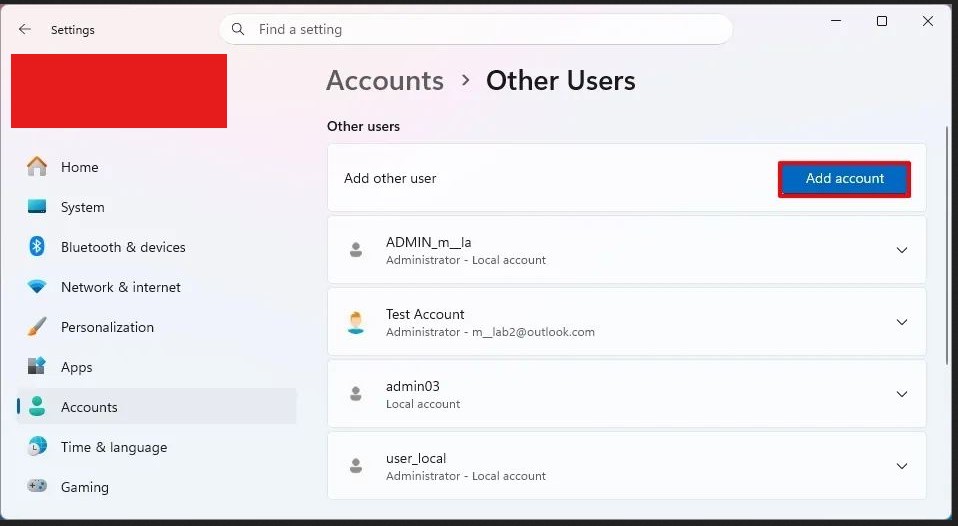
To create a local account from the Settings app on Windows 11, follow these steps:
Solutie
1. Open Settings on Windows 11
2. Click on Accounts
3. Click the Other users tab
4. Click the Add account button under the “Other users” section
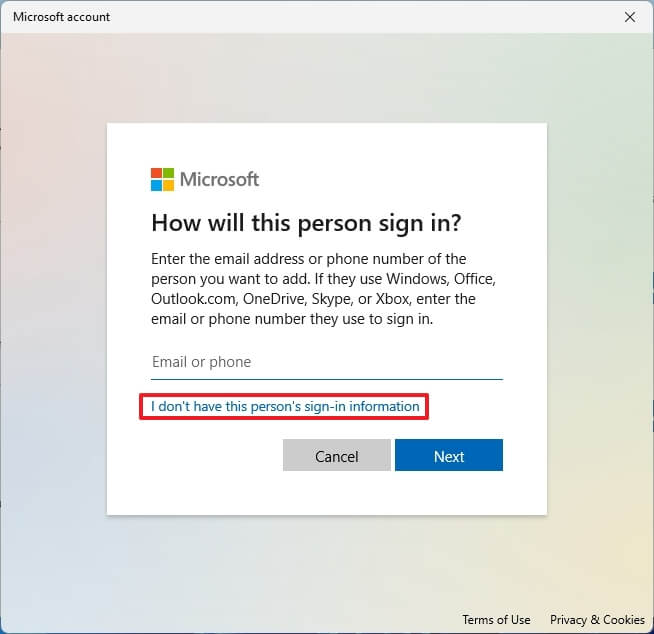
5. Click the “I don’t have this person’s sign-in information” option
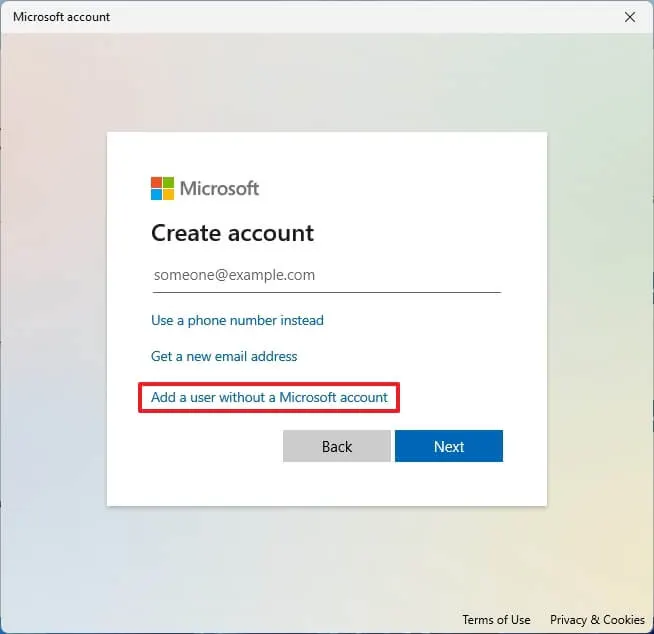
6.Click the “Add a user without a Microsoft account” option
7. Create a Windows 11 local account by confirming a name and password
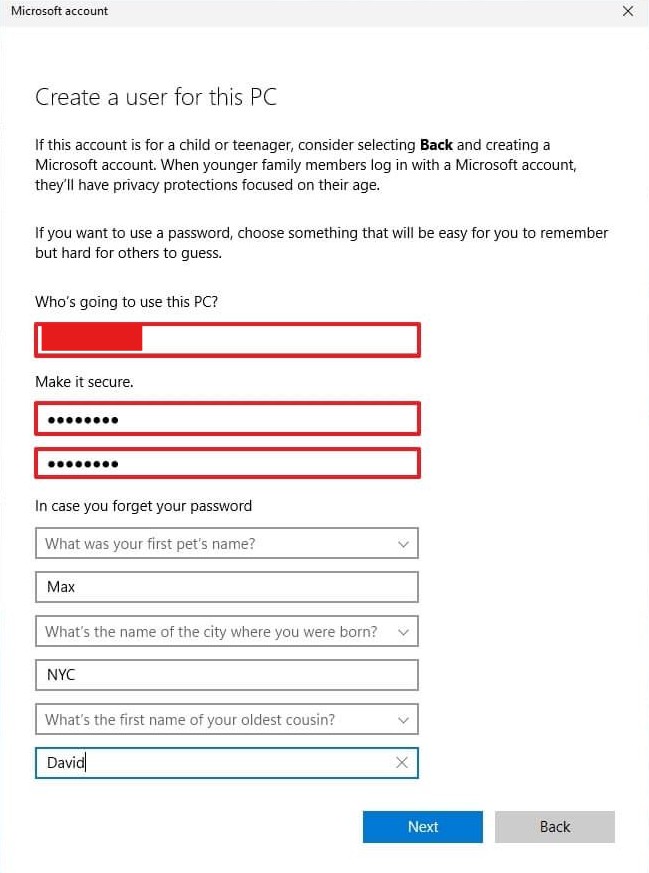
8. Configure the security questions to recover the account if the password is lost
9. Click the Next button
10. (Optional) Select the newly created account and click the “Change account type” button
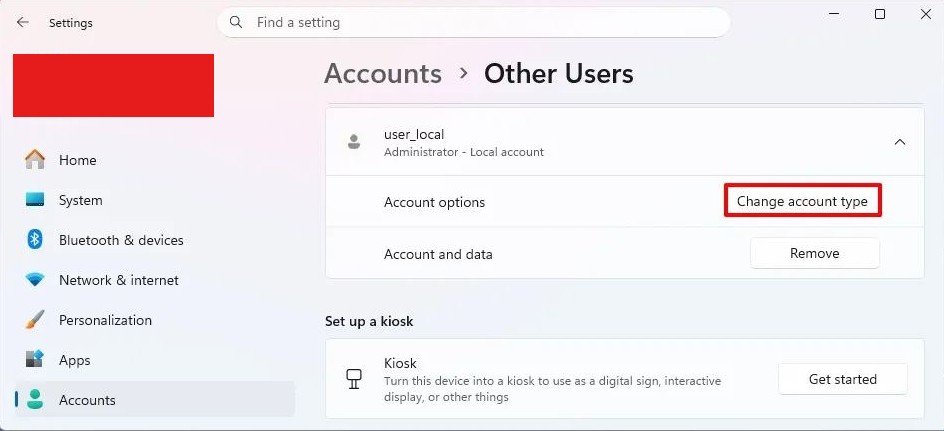
11. Use the “Account type” drop-down menu and select the Administrator option.

12. Click the OK button.
Once you complete the steps, the new account will appear on Windows 11, and the new user should be able to log in as a standard user or administrator, depending on the account type settings.
Leave A Comment?