Situatie

Cemu—the Nintendo Wii U emulator—is now a mature program with good performance on most systems. If you’d like to play Wii U games on your PC with all the benefits of an emulator, Cemu is the way to go.
Solutie
Pasi de urmat
Setting Up Cemu
Cemu isn’t the most user-friendly of emulators. The setup process is a little involved, and you’ll have to download some files that are usually bundled with programs like this. This may change in the future, but for now, most of this will be manual.
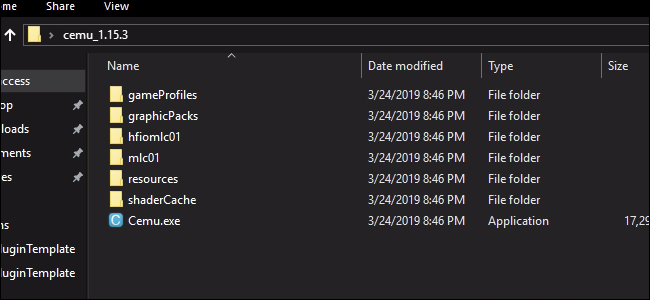
Download the latest release of Cemu from its website and unzip the folder. The folder will be named something like “cemu_1.15.3,” but you can rename this to whatever you’d like, and store it anywhere easy to access (like your Desktop or Documents folders). The contents will look something like this:
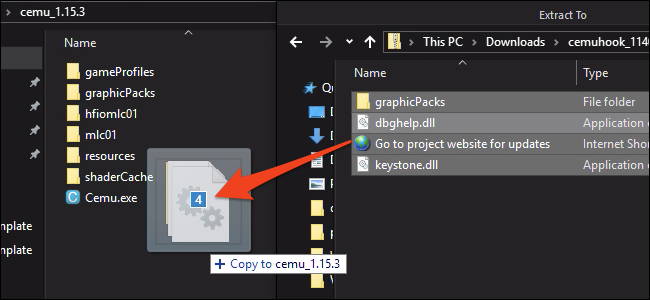
Don’t run Cemu just yet; there’s still some configuring to do. There’s a mod called Cemuhook that you’ll want for specific graphics packs and performance options. Download the release matching your Cemu version, and open the zipped Cemuhook folder. You can drag everything in here into your Cemu install folder.
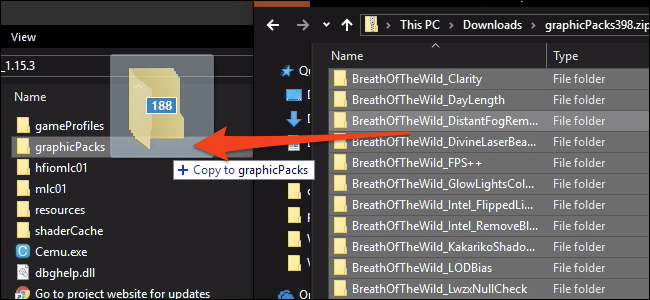
Next comes the graphics packs. Graphics packs in Cemu serve lots of roles, from essential fixes for bugs on specific hardware, to making the game look or run better, to full-on mods for Wii U games. You can download all the most important ones from this tracker on Github.
Open up the zipped folder, press Ctrl+A to select everything, and drag them all into the graphicsPacks folder in your Cemu install. You don’t have to copy all of them if you are only playing one game, but they’re just text files and small enough that it doesn’t matter much.
The last thing you’ll need to install is shader caches. With the way Cemu works, every time it has to calculate a new shader, your game will lag quite a bit while it figures it out. Luckily after you’ve done it once, the answer is stored in a cache and used for all calculations in the future, so if you play long enough, it will be very smooth. Since you probably don’t want to sit through hours of constant stutters, you can download someone else’s cache and use it instead. You can find a list of complete caches for various games on the CemuCaches subreddit.
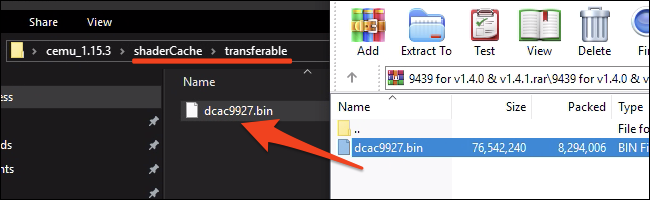
Download the caches for the games you’ll be playing, and open up the .rar folder. The actual cache file is a .bin file which you’ll want to transfer to shaderCache/transferable/ in your Cemu folder.
After all of this, you can finally open Cemu.exe to run the emulator. If you can’t open Cemu, make sure you have the latest C++ libraries installed.
Using Cemu
Cemu has a lot of options to configure, so we’ll stick to the most important ones.
Graphics Packs
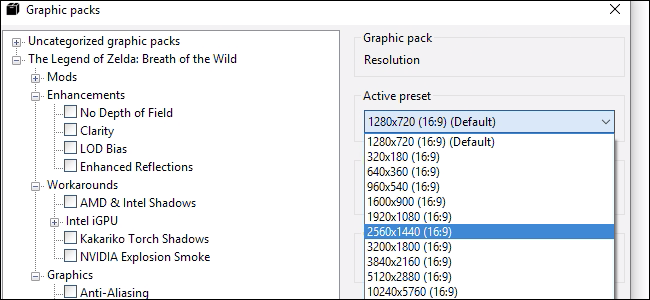
You can enable different graphics packs under Options > Graphics Packs. They’ll be sorted by game, and have different categories within each game.
Resolution is an important option to configure, both for performance and visuals. You’ll find it along with shadow resolution and antialiasing quality under the “Graphics” category for most games. You’ll find mods and fixes for games in the graphics packs as well. Most graphics packs can be applied while the game is running, so mess around with the options and find what works best for you.
Connecting Controllers
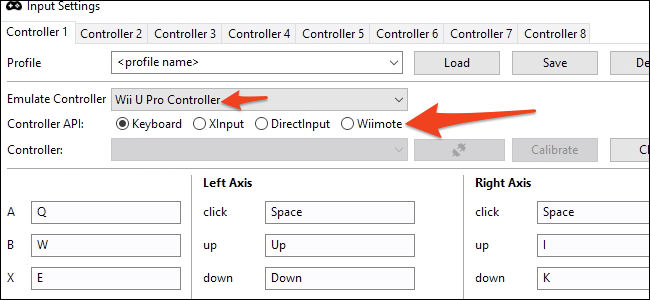
A significant benefit of emulators is that you can play with any controller you prefer. Cemu still supports real Wii Remotes, so long as you connect them over Bluetooth, but you can use Xbox and PlayStation controllers in the same fashion. You’ll have to set all the buttons up manually under Options > Input Settings, but you can save your configuration to a profile so you won’t have to do it twice.

Cemu will emulate a specific controller under the hood, and for compatibility, you should probably stick to emulating a “Wii U Pro Controller.” This is so that the game you’re playing will act as if you have your Wii U Gamepad turned off and won’t show anything on its screen. If you’re playing a game that uses the Gamepad’s screen, you’ll have to enable “Separate Gamepad View” under options.
Performance
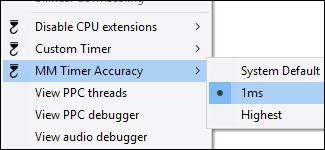
The emulator’s performance will ultimately depend on your system, but there are some settings to enable to maximize yours. Under “Debug,” you’ll find two options for adjusting the game’s timer. Make sure they’re set as shown here, to QPC and 1ms respectively.

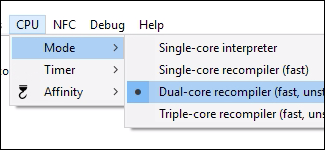
A major option is the CPU settings, found under CPU > Mode. If you have a quad-core or higher system, set this to Dual or Triple-core recompiler. This will make Cemu use more threads, and ease up on your CPU.
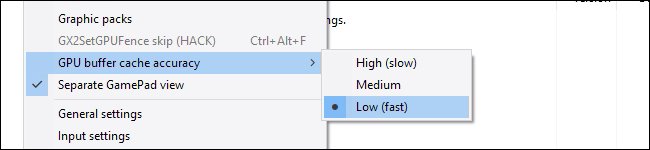
Under Options, set “GPU buffer cache accuracy” to Low.
That should be enough for Cemu run well on your CPU (assuming you’re not playing on a toaster). If you’re still having performance issues, it might be GPU related, so try reducing the game’s resolution and graphics in the graphics packs settings.
Once you’re all set, you’re ready to start playing. If you don’t see your games in the main window, you may have to add the path under Options > General Settings > Game Paths.
Leave A Comment?