Situatie
- Be Heard, Not Heard From: Imagine trying to decipher a muffled conversation. Background noise from traffic, fans, or even your keyboard can quickly turn listeners away. Proper microphone settings filter out unwanted noise, ensuring your voice cuts through cleanly.
- The Power of Perception: Crystal-clear audio creates a professional impression. Listeners subconsciously associate a well-configured microphone with quality content and a polished presenter.
- A Sound Investment: A little time spent tweaking settings can significantly improve your audio quality. This is especially important for those relying on voice to engage audiences, like podcasters and YouTubers.
By taking control of your microphone settings, you’re not just affecting the sound – you’re shaping how listeners perceive you and your content. It’s a simple step that can take your voice from background noise to center stage.
Solutie
Pasi de urmat
1. Connecting your Microphone:
- USB Microphone: This is the simplest setup. Just plug your USB microphone directly into a free USB port on your computer.
- XLR Microphone: For professional XLR microphones, you’ll need an audio interface. This connects to your computer via USB and provides the necessary power and signal conversion for the XLR mic.
2. Setting Up OBS:
- Launch OBS Studio.
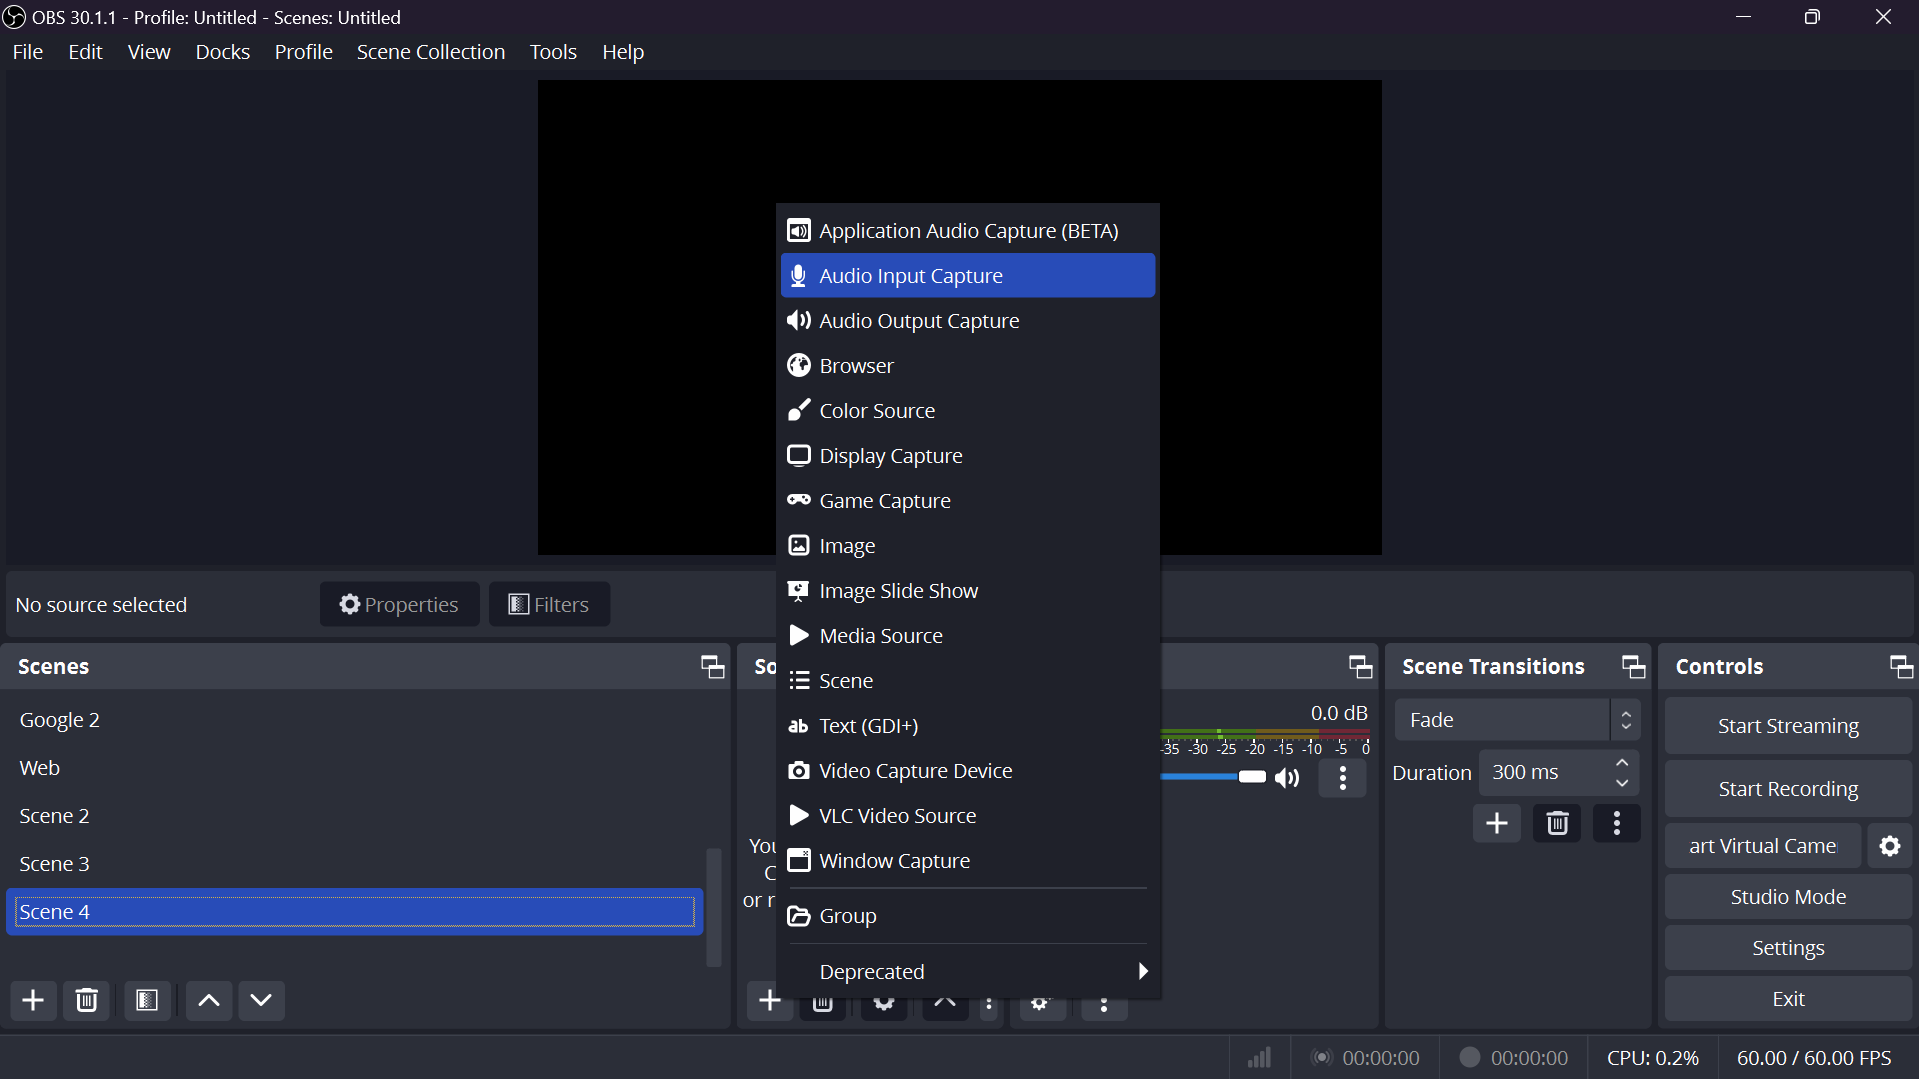
- Add a Mic Source: In the “Sources” window, click the “+” button and select “Audio Input Capture.” Give it a clear name like “Professional Microphone.”
- Choose your Microphone: From the “Device” dropdown menu, select your microphone (USB mic name or audio interface).
- Create a new “Scene” and add a “Audio Imput Capture”;

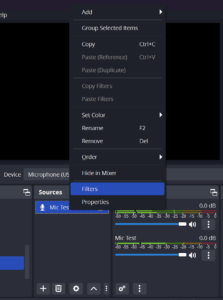
- Use the Filters tab.

3. Basic Audio Settings:
- Monitor Microphone (Optional): If you want to hear your mic through your headphones while recording/streaming, check the “Monitor Output (Main Output)” box. Adjust the “Monitor Mix” slider to balance game/desktop audio with your mic.
- Noise Gate (Highly Recommended): Click the “Filters” button on your mic source. Add a “Noise Gate” filter. This helps eliminate background noise when you’re not speaking. Adjust the “Threshold” to a level just below your quietest speaking volume. Experiment to find the sweet spot.
4. Advanced Audio Settings (Optional):
Here’s where you can refine your mic audio for a professional sound:
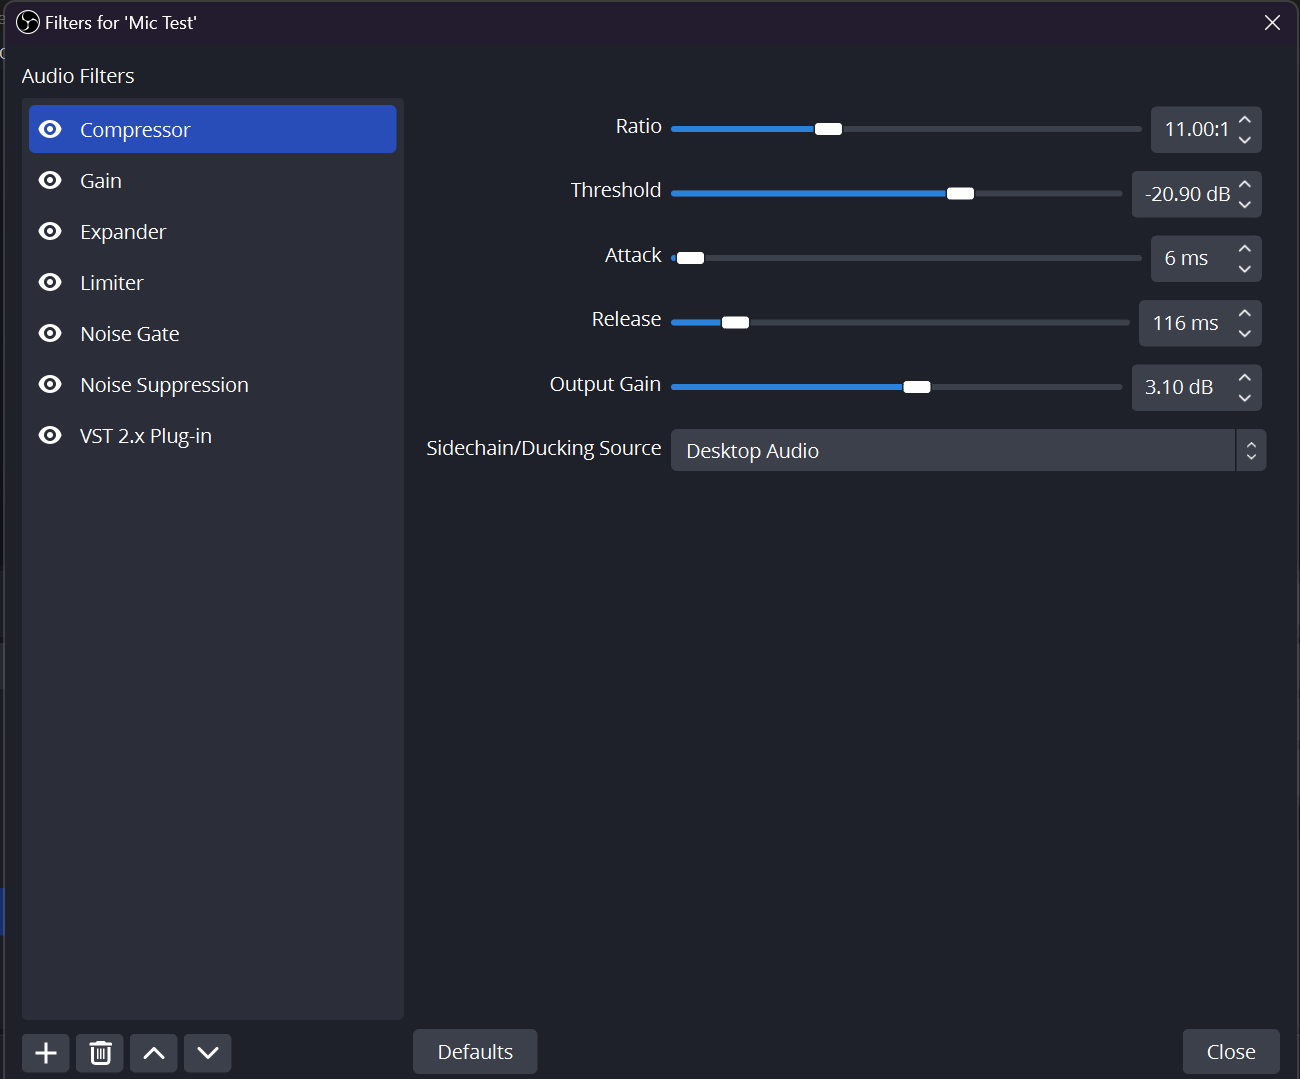
a. Compressor: In the world of microphones, a compressor is a digital effect, not a physical filter. It automatically reduces the volume of loud sounds and boosts quieter ones, creating a more consistent and even sound. This is useful for microphones because it ensures your voice stays at a comfortable level for listeners, even if you speak with varying volume.
- Boost a quiet microphone: If your voice sounds faint, increasing the gain will make it louder.
- Reduce a loud microphone: If your voice is overpowering, lowering the gain will bring it down.
It’s important to find the right balance. Too much gain can amplify background noise and cause distortion (clipping), while too little gain might make you inaudible.

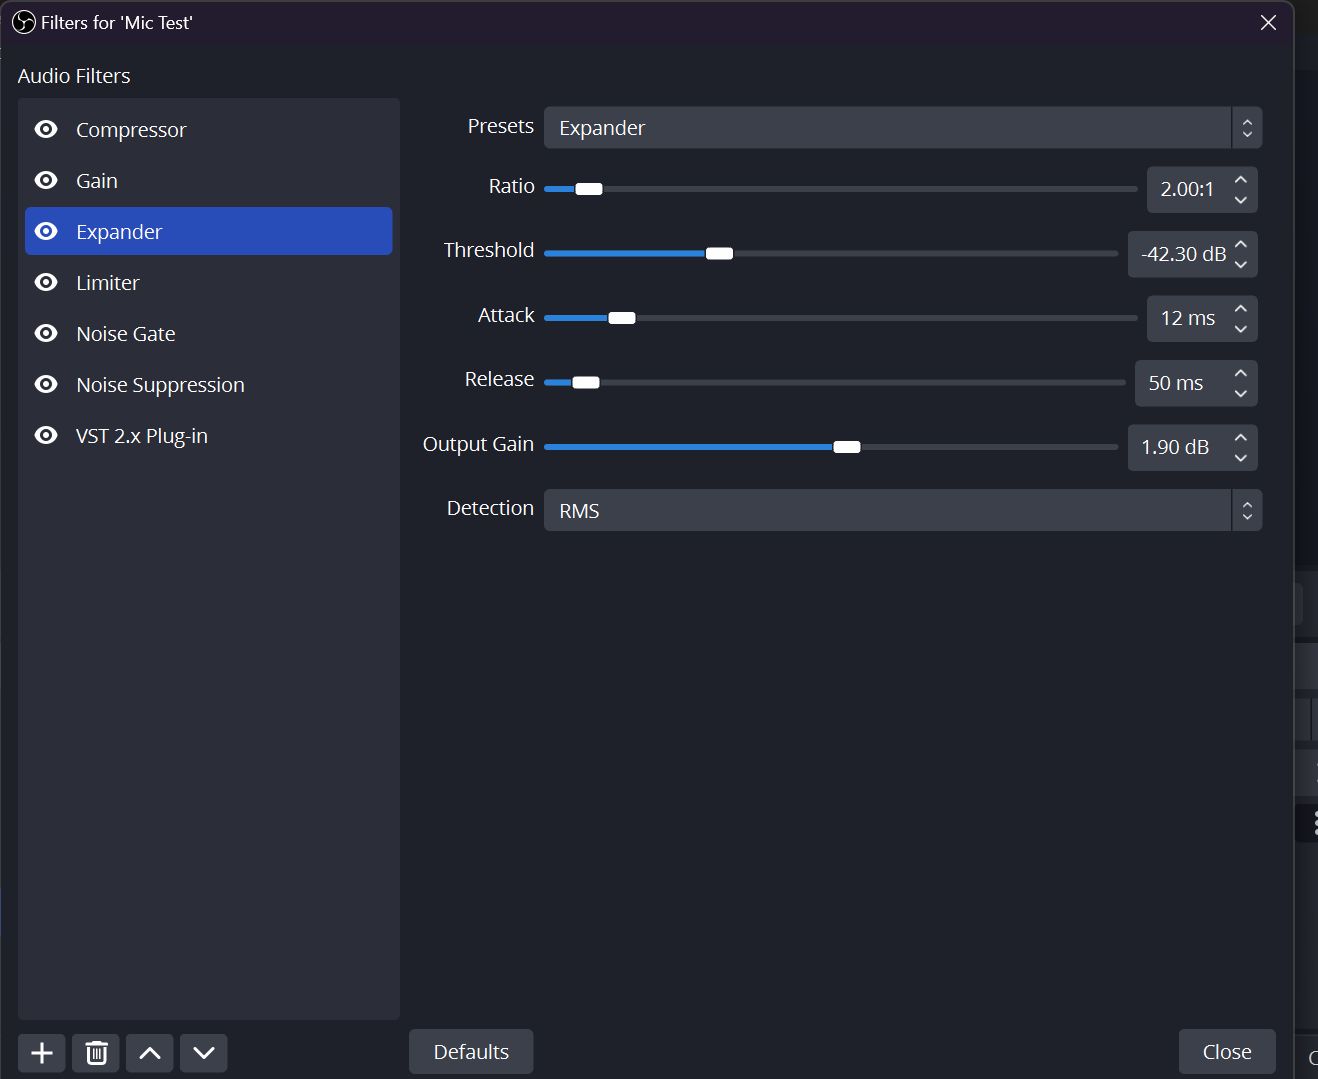
c. Expander Filtrer: An expander filter on a microphone isn’t quite a filter in the traditional sense. It’s a tool for subtly quieting background noise. Here’s the gist:
- Imagine background noise as a constant low hum.
- An expander acts like a volume fader for quiet sounds.
- When there’s no talking (silence), the expander gently reduces the volume of that low hum.
- As you start speaking, the expander automatically increases the gain for your voice, keeping it clear.
This creates a cleaner audio experience for your listeners by reducing the constant presence of background noise without affecting your voice.
d. Limiter Filter: A limiter filter on a microphone isn’t technically a filter, but a safety net for your audio. Imagine a limiter as a volume brick wall:
- Your microphone captures your voice at varying volumes (soft speaking vs excited shouts).
- The limiter lets normal volume levels pass through freely.
- But if a sudden loud sound (cough, yell) tries to go above a set limit, the limiter cuts it off.
This prevents nasty audio clipping (distortion) that sounds unpleasant. It’s like a microphone’s built-in bodyguard, ensuring your voice stays clear and professional, even with unexpected volume spikes.

e.Noise Gate Filter: A noise gate on your microphone acts like a sound bouncer, but for unwanted noise!
- Imagine background noise as a chatty party guest constantly interrupting.
- The noise gate sets a volume threshold like a door.
- When only background noise is present (below the threshold), the gate shuts, blocking it out.
- When your voice comes through (above the threshold), the gate opens and lets your voice be heard clearly.
This keeps your audio clean and professional by silencing those unwanted background noises when you’re not speaking.

f. Noise Suppression Filter: A noise suppression filter on your microphone works like a magic shield against unwanted background noise. Here’s the idea:
- Imagine background noise as a constant rumble or hiss.
- Noise suppression uses clever audio processing to identify and reduce these unwanted sounds.
- It doesn’t completely eliminate them, but significantly weakens them.
Think of it like turning down the volume on just the annoying parts of the room, while keeping your voice clear. This makes your audio much more pleasant to listen to for your audience.
Tips for Professional Sound:
- Microphone Placement: Proper mic placement can significantly impact audio quality. Experiment with distances and angles. Generally, aim the mic slightly off-center to your mouth to reduce plosives (heavy “P” and “B” sounds).
- Pop Filter: Consider using a pop filter to minimize those plosive sounds hitting the microphone directly.
- Room Treatment: If possible, record in a quiet room with soundproofing materials to further reduce background noise.
- Test and Record: Always test your microphone settings before recording or streaming. Speak at different volumes and adjust settings as needed.
Leave A Comment?