Situatie
Do you perform repetitive file manipulation tasks on your Mac every day? With Quick Actions, you can easily streamline these repetitive tasks to simplify your workflow and work more efficiently. By adding them to the right-click context menu, you can complete many of them in a couple of clicks or less.
Solutie
Automator is a built-in macOS app that lets you create workflows to automate repetitive tasks on your Mac. While creating workflows often requires a good understanding of programming languages, Automator employs a simple approach, wherein you drag and drop actions to stitch them together and create workflows.
To create a Quick Action, launch the Automator app under Applicatons > Utilities. Click “New Document,” and when prompted to set the document type, select “Quick Action” and hit “Choose”.

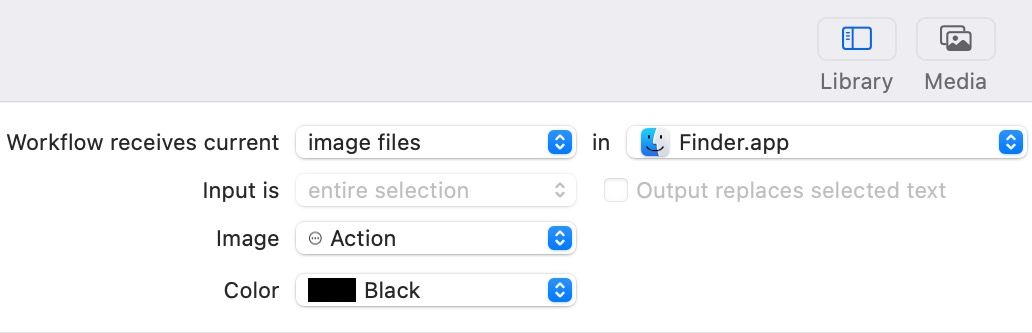
In the workflow area, set the Workflow Receives Current action to “Image Files” in “Finder”
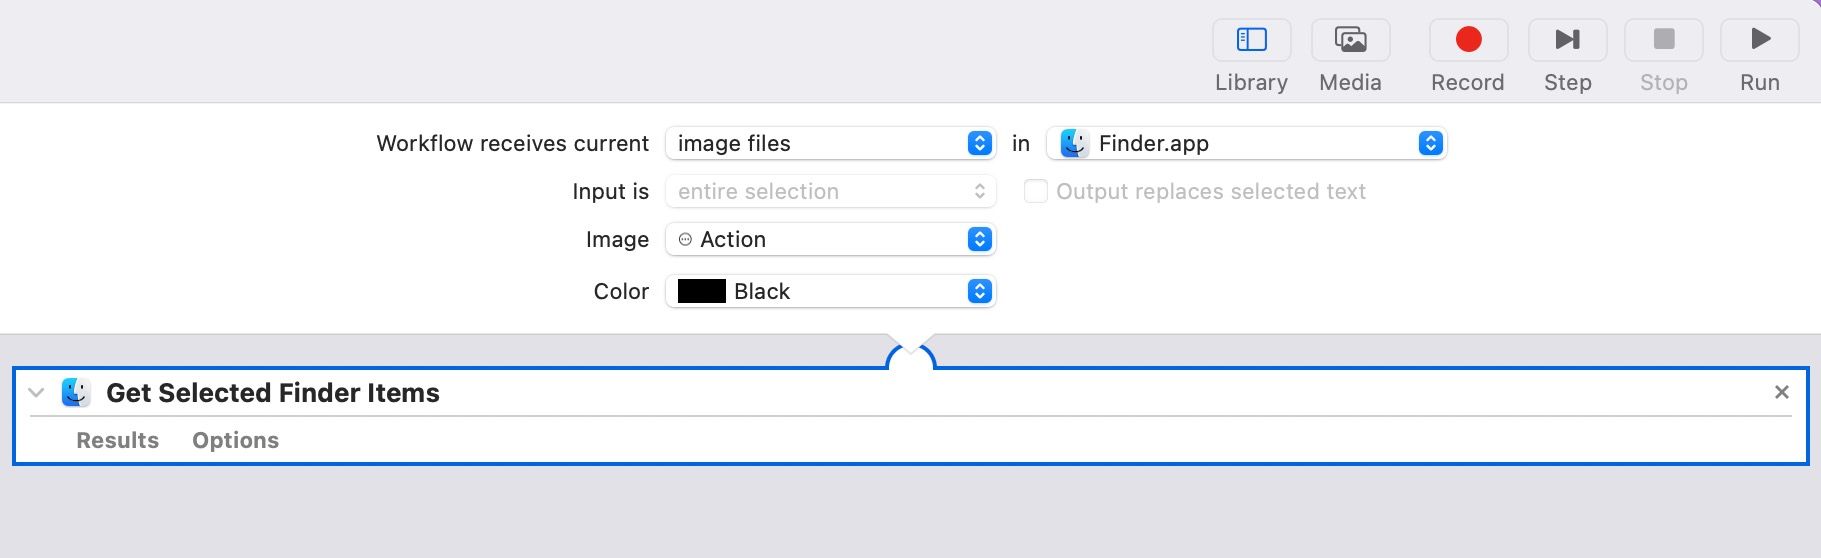
Now, in the Actions sidebar, select “Files and Folders” and drag and drop the “Get Selected Finder Items” action to the workflow area on the right.
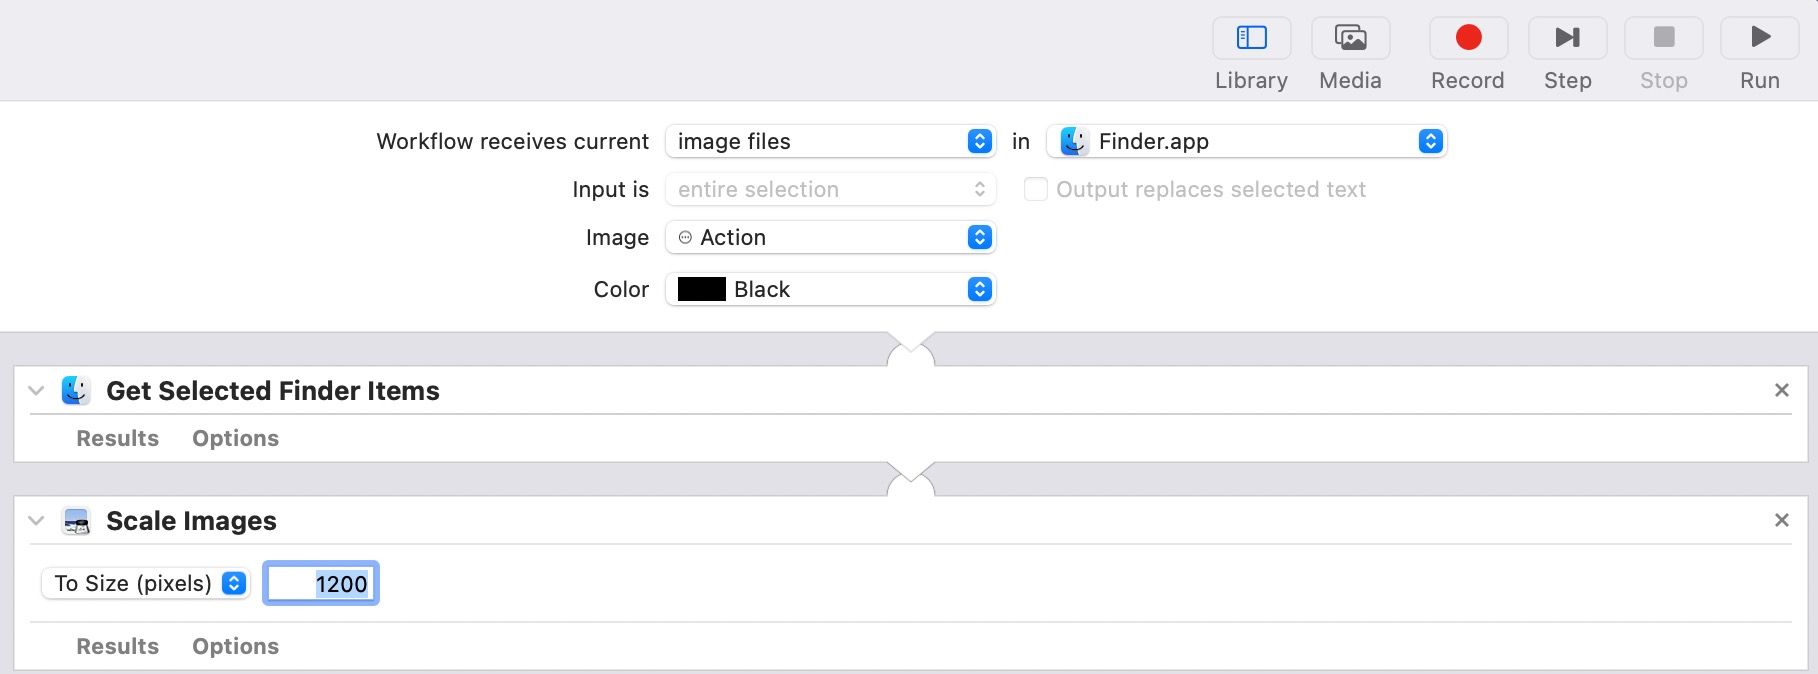
Once done, in the Scale Images action, enter the size (in pixels) you want your images resized to in the text field next to the “To Size” dropdown. Note that this value is essentially the maximum size of the longest side of the image, meaning it could be the width (for a landscape image) and length (for a portrait) image.
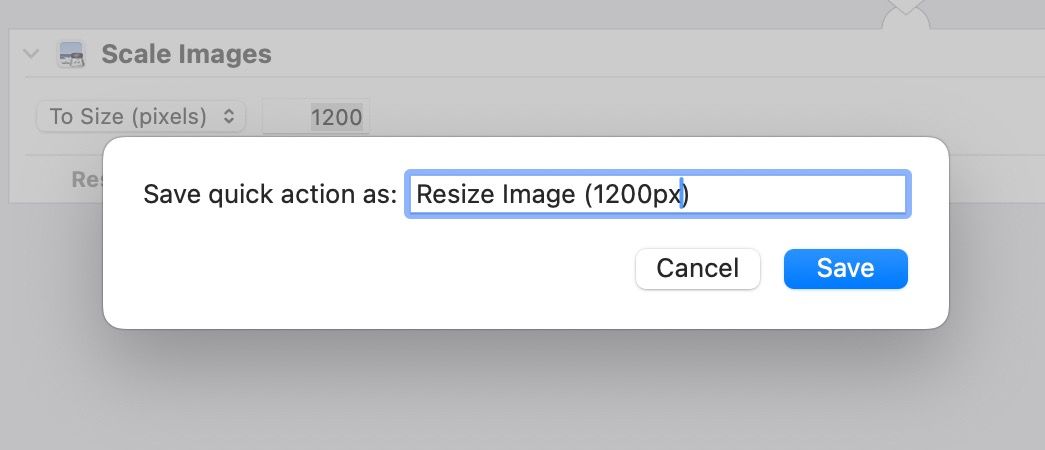
Finally, with all the actions added, save the Quick Action. Go to File > Save, or press the Command+S keyboard shortcut. Give a name to this service and click “Save”.
If you ever want to edit the Quick Action in the future, open the Finder app and press the Command+Shift+G shortcut to access the Go to Folder window. Type in ~/Library/Services, and you’ll see all your Automator Quick Actions.
Creating a Custom Quick Action in the shortcuts App
If you haven’t used Automator before and feel intimidated by its interface, you may use the Shortcuts app to create the Quick Action instead. The Shortcuts app comes pre-installed with macOS. It offers a more user-friendly interface than Automator and is great for automating trivial actions.
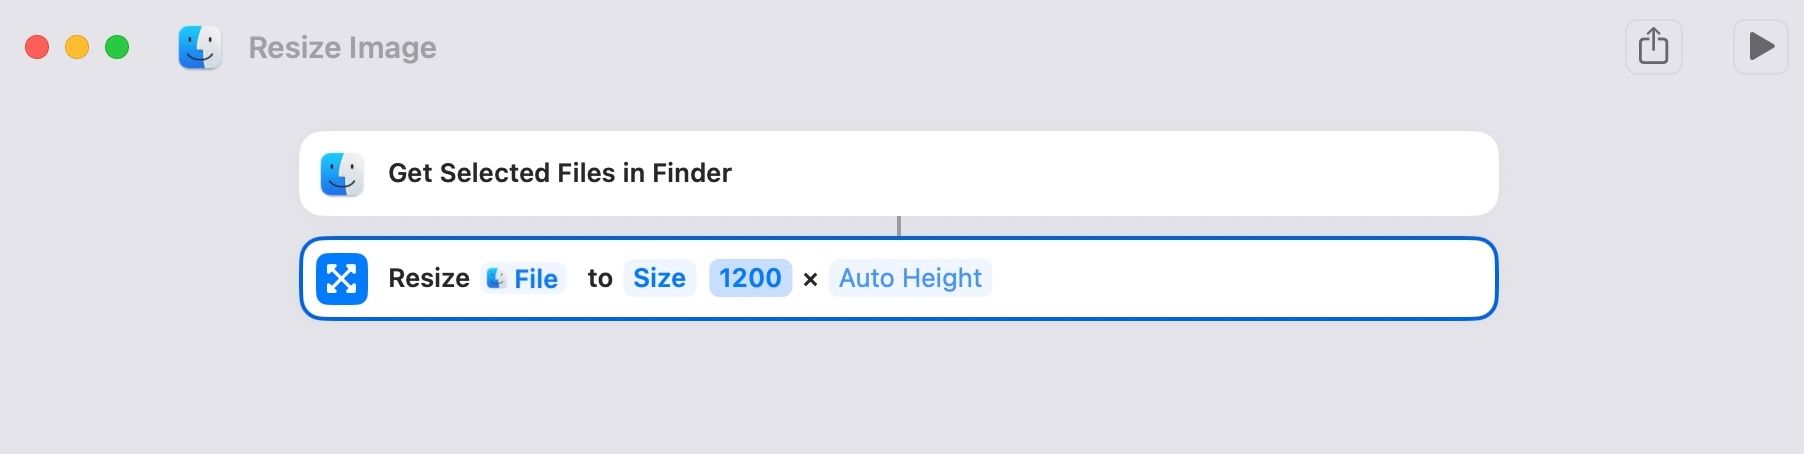
To create a Quick Action, launch the Shortcuts app. Then, click the “+” icon in the upper-right corner to create a new shortcut. Alternatively, go to File > New Shortcut. Now, click the “Search” field in the right sidebar, type “Get Selected Files in Finder,” and double-click it to add it to the shortcut. You may also drag and drop the action.

Similarly, search and add the “Resize Image” action to the shortcut. Once done, on the Resize Image action, click the field next to Size and specify the size (in pixels) you want. By default, the action uses the Auto Height option, but you can specify the width if you have specific requirements.
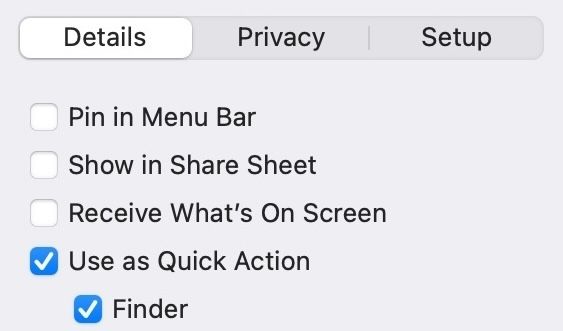
Click the “i” icon in the right sidebar and enable the “Use as Quick Action” option. Tick the checkbox for “Finder.”
After you’ve finished adding the actions, Shortcuts will automatically name the shortcut as Resize Image—based on the Resize Image action that you added. However, you can use a different name, too. Just click the Resize Image text at the top of the shortcut, type a name, and hit the Return key to save it.
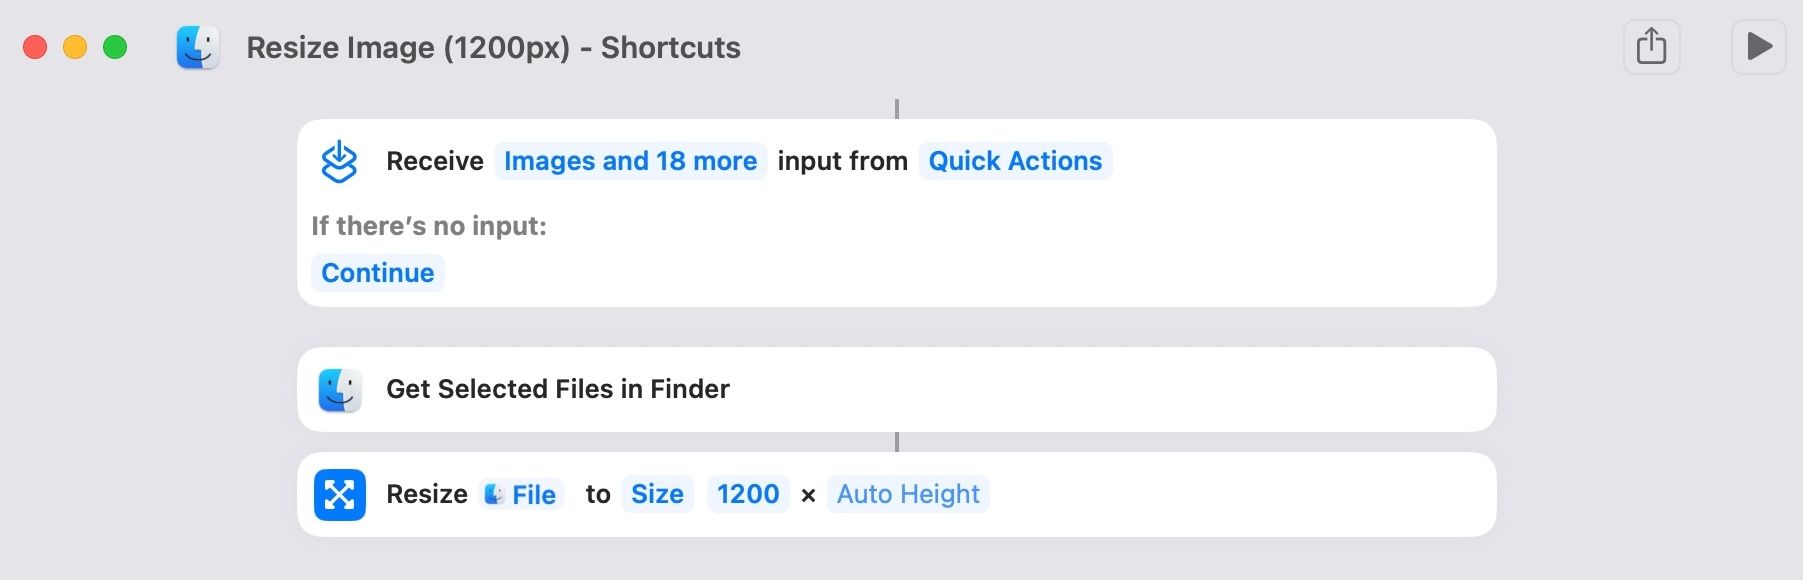
Close the window, and you’ll see the shortcut under All Shortcuts in your Shortcuts library. You can come back to the Shortcuts app anytime you want to make changes to the Quick Action.
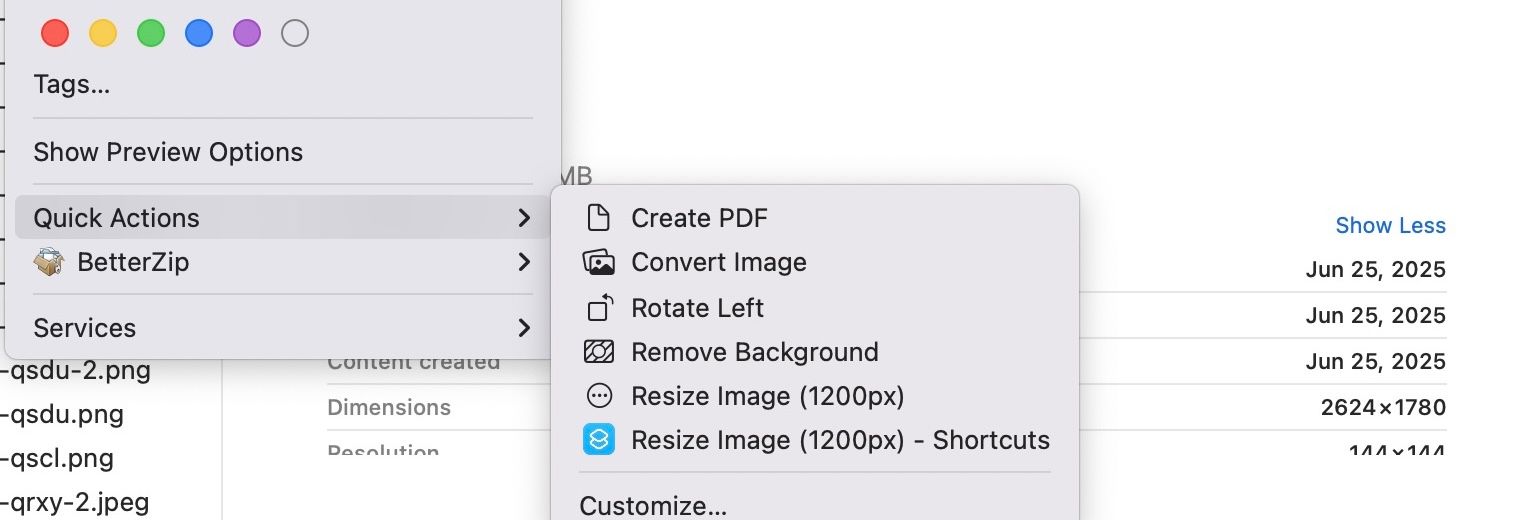
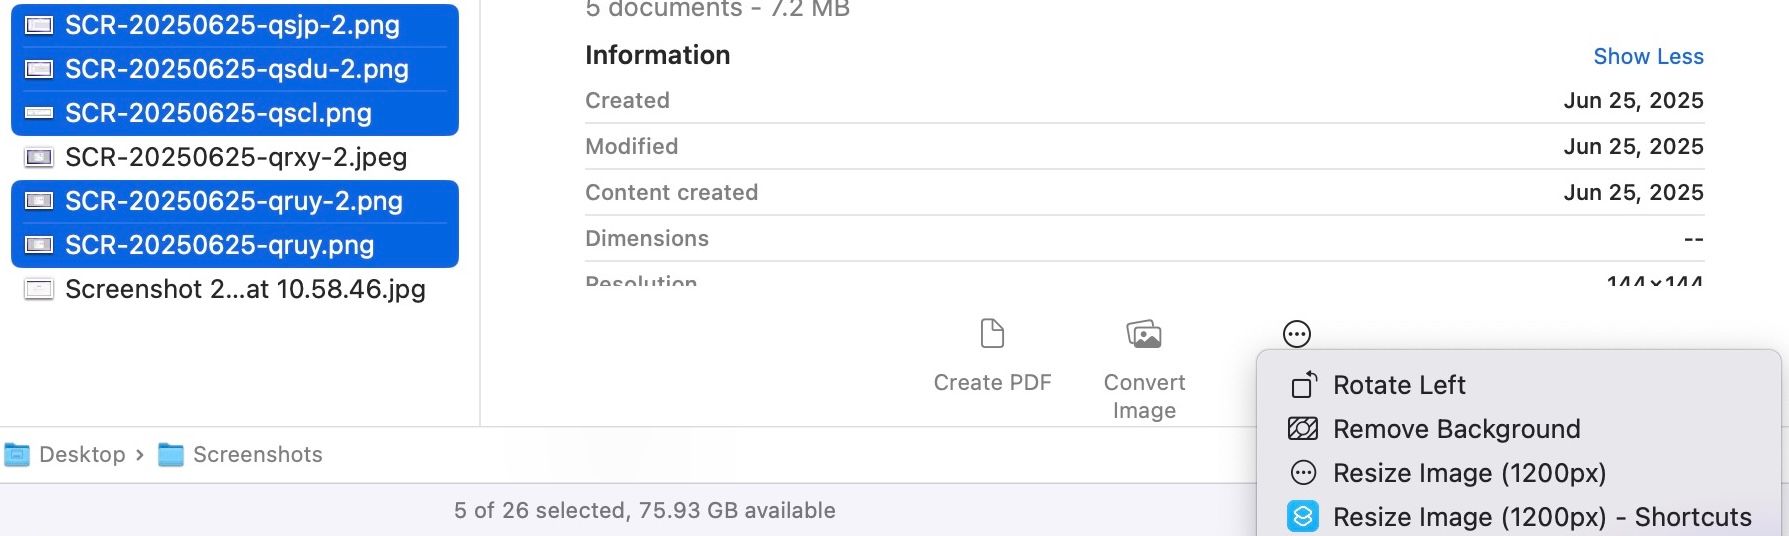
As soon as you create a Quick Action—using either method—it’s automatically added to the Quick Actions menu on your Mac, ready to use.
Alternatively, you can click on the Quick Action you want to use in the Preview pane. You need to enable the Preview pane for this to work. Open Finder and go to View > Show Preview, or press the Command+Shift+P shortcut.
Similarly, if your Mac has a Touch Bar, you can execute Quick Actions from it as well. However, you’ll need to configure it first from the Touch Bar settings.
Depending on what Quick Action you just used, it may work in the background, apply changes to the selected files, and save them automatically. Or it may ask for your input. The Convert Image Quick Action is a great example of this. When you run it, you’ll see prompts on your screen asking you to select the desired output format, among other things. Make the appropriate selections, and the Quick Action will complete the operation and save the file.
Unless you’ve opted to preserve the original file while creating a workflow (in Automator or Shortcuts), the Quick Action will overwrite the original file and save it in the same location.
Leave A Comment?