Situatie
I used to think a 50MB Excel file meant I had a lot of data. I was wrong. It actually meant my workbook was a cluttered mess of hidden caches and ghost data. I managed to reclaim my storage and speed by cutting that file down to 2MB.
Solutie
Making the most of the binary secret
To do this, go to File > Save as, select “Excel Binary Workbook” from the Save As Type drop-down list, and click “Save.”
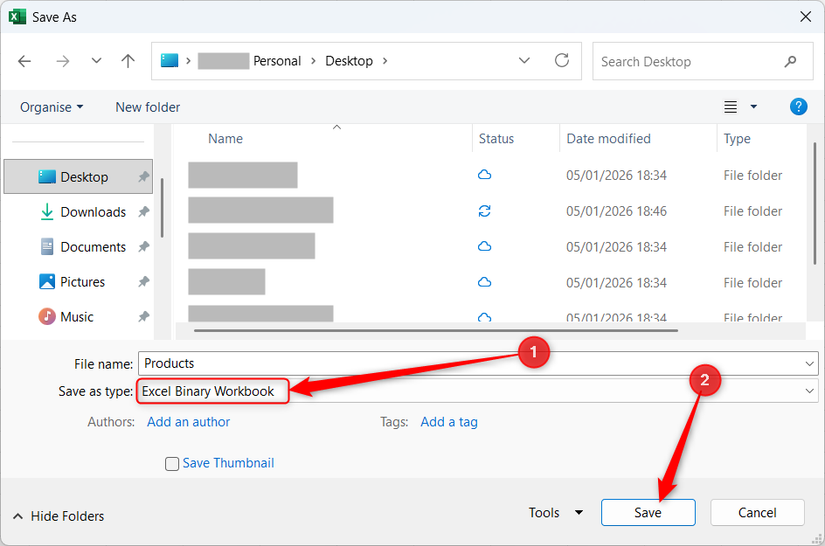
This is my first move for any “heavy lifting” personal workbook—especially those over 50MB—where I’ve seen significant size reductions. However, it can cause issues with some third-party apps or Power Query, so it’s best for internal use where performance is key and advanced external capability isn’t needed.
Reducing the “ghost” used range
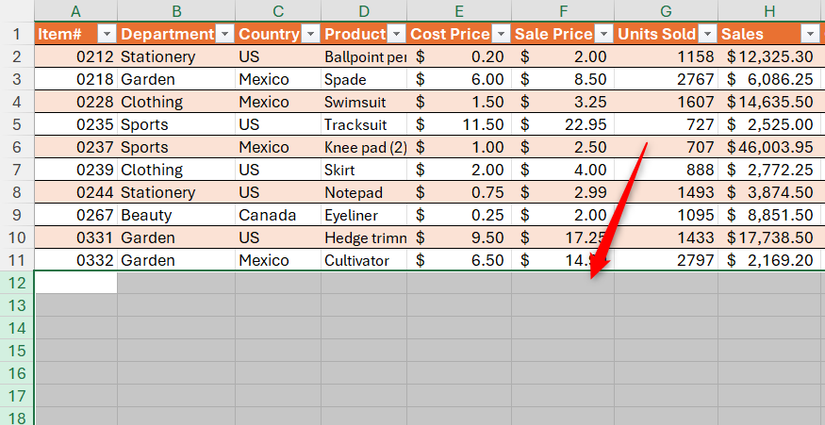
Excel remembers every cell you’ve ever touched. If you once accidentally entered a space or applied a border to row 1,048,576, Excel now treats that as the boundary of your sheet, bloating the file size significantly.
To find your ghost boundary, press Ctrl+End. If you’re taken to a cell thousands of rows below your actual data, your grid is bloated. To fix this, select every empty row below your data by clicking the first empty row header and pressing Ctrl+Shift+Down.
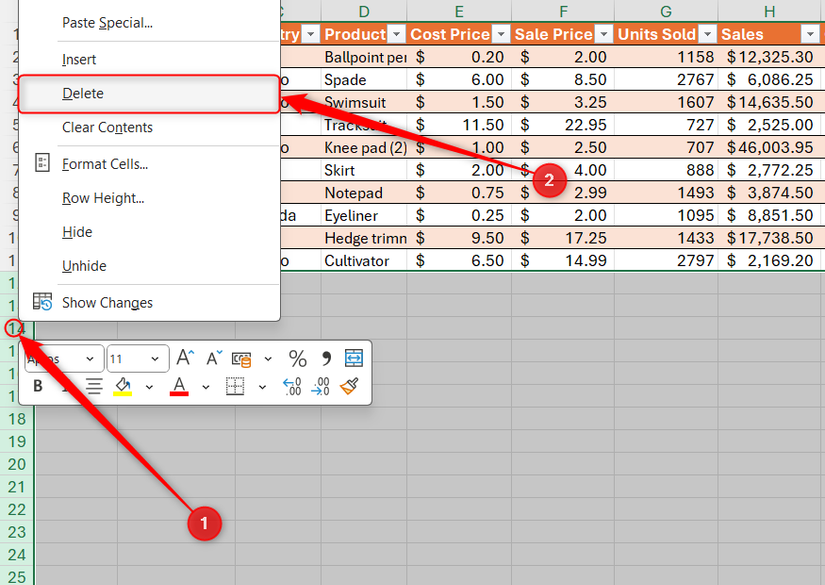
Don’t just press the Delete key on your keyboard, as even though this clears contents and formatting, it doesn’t reset the used range.
Repeat this for any empty columns to the right, then save the file immediately—even if AutoSave is on—to force Excel to reclaim the memory.
Killing the PivotTable double-data
By default, when you create a PivotTable, Excel saves a hidden duplicate of your source data—called the Pivot Cache—inside the file. This ensures the table works even if the source is disconnected, but it effectively doubles the file size.
To stop this, first, right-click anywhere in your PivotTable and select “PivotTable Options”
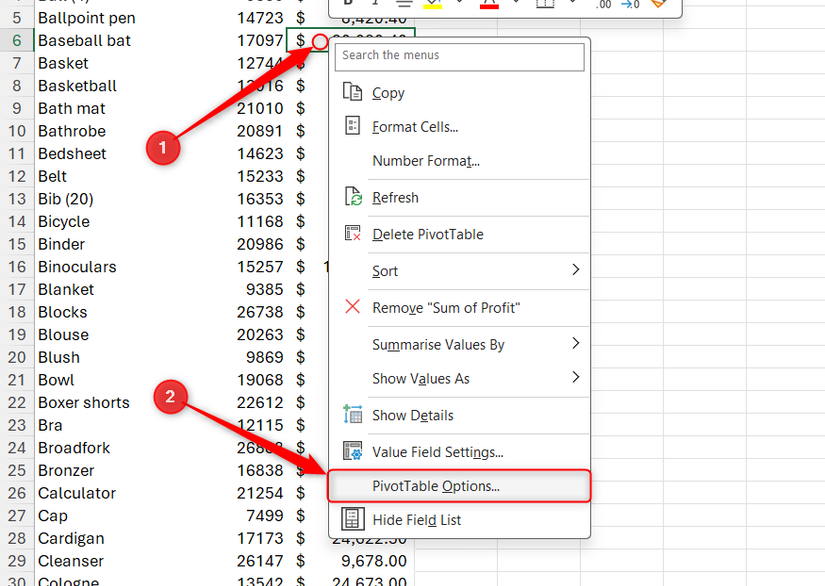
Then, in the Data tab, uncheck “Save source data with file,” check “Refresh data when opening the file,” and click “OK”
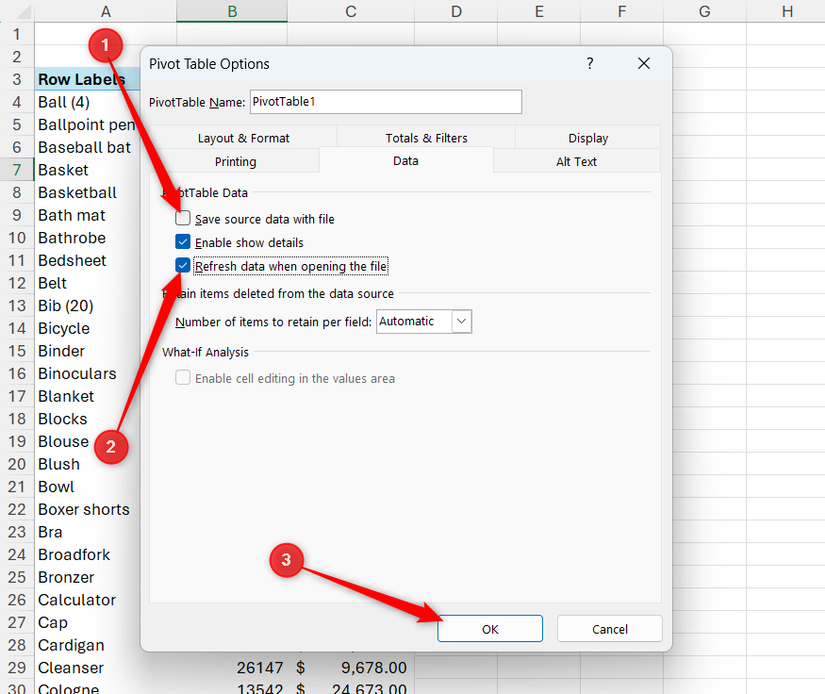
Just be aware that taking this route means you must have access to the original data source to make any changes. If you share the file without the source data, others can see the report but won’t be able to drill down into the details or refresh the results. Also, the refresh-on-opening option requires the source data to be in the same file or accessible via a shared network or cloud path.
Clearing digital scar tissue
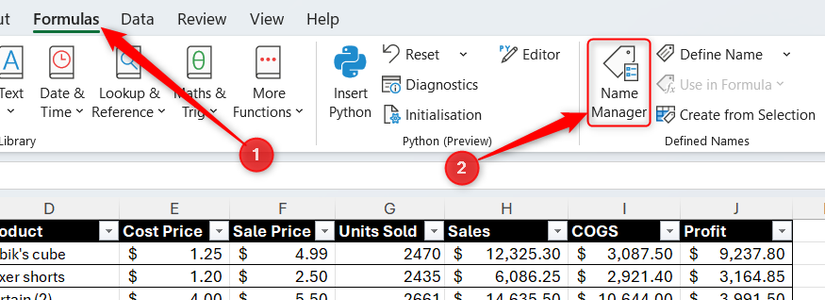
Excel workbooks often carry baggage from years of copy-pasting, such as hidden sheets or hundreds of named ranges with errors. To clean these out, click “Name Manager” in the Formulas tab, or press Ctrl+F3.
Then, take the following actions:
Before deleting external links in the Name Manager, ensure no formulas or macros are currently using them. Deleting a name via this menu cannot be undone—once it’s gone, any dependent formulas will immediately break.
If you’re using Excel for Microsoft 365 or Excel for the web, click “Check Performance” in the Review tab to open the Workbook Performance tab. It’s the most effective way to clean a file, as it scans for thousands of unnecessary formatted cells that offer no visual value.
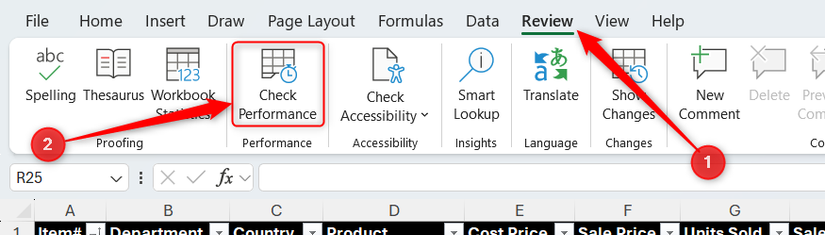
If any performance issues are identified, click “Optimize All” to let Excel strip away the metadata bloat in one click.
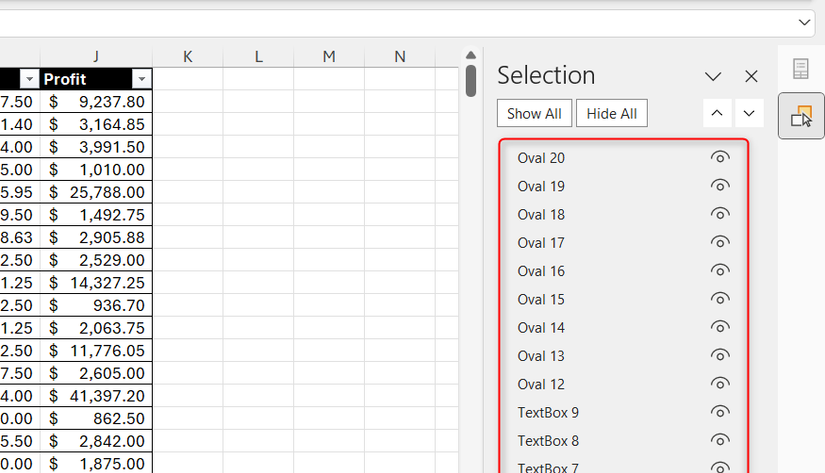
Deleting invisible objects and compressing images
A single high-res photo or hundreds of ghost text boxes—often created when pasting data from the web—can bloat a file instantly. To find them, in the Home tab, click “Find & Select,” then “Selection Pane”
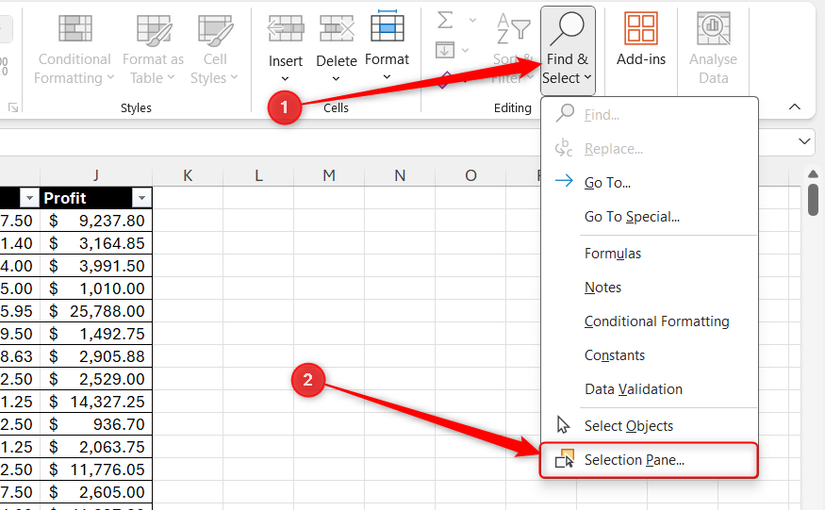
The sidebar that appears lists every object on the sheet. If you see items you didn’t deliberately create, select them and press Delete.
To select more than one item at a time in the Selection Pane, hold Ctrl as you click.
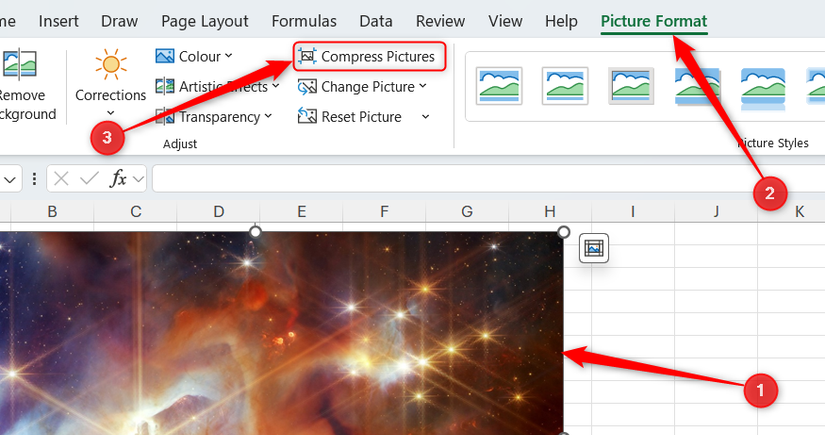
To reduce image resolution, select any picture, and in the Picture Format tab, click “Compress Pictures”
Then, in the dialog box, do the following:
- Uncheck “Apply only to this picture” to compress every picture at once.
- Check “Delete cropped areas of pictures” to make sure the file doesn’t retain bits you’ve cropped away.
- Check “Email (96 ppi)” to achieve the minimum picture resolution. If this adversely affects the images too much, choose a slightly higher resolution.
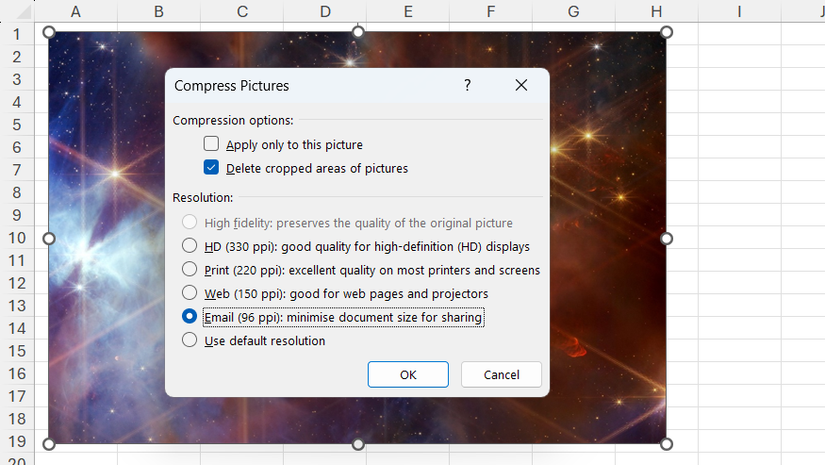
This only works with images placed over the cells (as opposed to those embedded within individual cells). Finally, click “OK” to confirm the new picture settings and significantly reduce your Excel file size.
Leave A Comment?