Batch file pentru minimizarea ferestrelor
Batch file pentru minimizarea ferestrelor
Pasul 1
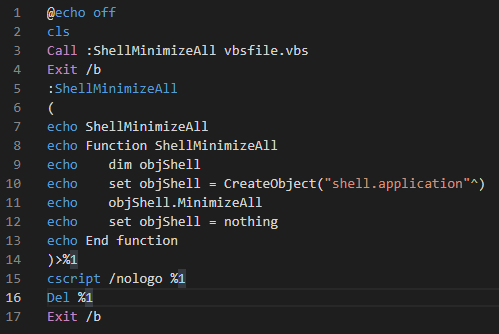
Intr-un editor de text copiem urmatorul cod:
@echo off
cls
Call :ShellMinimizeAll vbsfile.vbs
Exit /b
:ShellMinimizeAll
(
echo ShellMinimizeAll
echo Function ShellMinimizeAll
echo dim objShell
echo set objShell = CreateObject(“shell.application”^)
echo objShell.MinimizeAll
echo set objShell = nothing
echo End function
)>%1
cscript /nologo %1
Del %1
Exit /b
Pasul 2
Salvam fisierul cu numele dorit si extensia .bat