Cum afli cand a fost ultima schimbare a parolei unui utilizator din AD (Active Directory)
Dorim sa aflam cand si-a schimbat ultima oara parola un utilizator din AD (de domeniu).
[mai mult...]Soluții pentru problemele tale IT
Dorim sa aflam cand si-a schimbat ultima oara parola un utilizator din AD (de domeniu).
[mai mult...]Dorim sa schimbam caracterele automat in excel.
Ex: in tabel modificam ; cu –
[mai mult...]Dorim ca intr-un document word sa inlocuim un caracter cu altul.
[mai mult...]Sitemul de operare MAC OS este insotit de solutia cea mai optima pentru backup, numita time machine.
Ce face asta?
Cum foloseste?
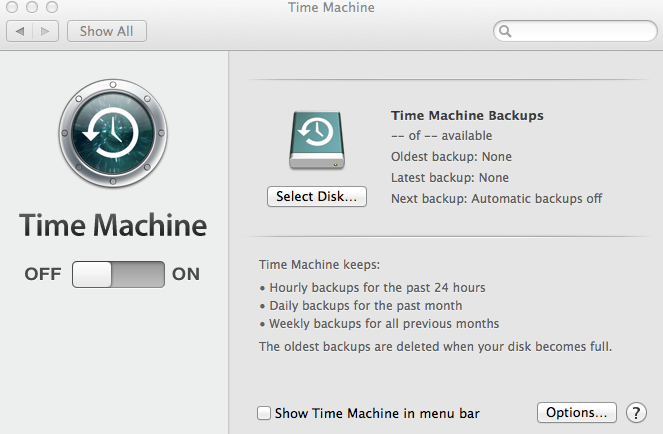
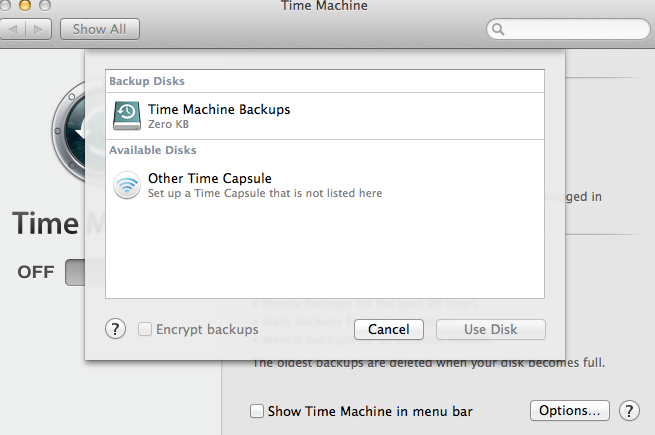
In momentul deschiderii avem butonul de on/off. In momentul in care am selectat on vom putea alege destiantia backup-ului. De preferat un hard disk extern, sau cea de-a doua solutie a lor, Time Capsule.
Dupa ce a fost aleasa locatia, backup-ul incepe automat.
Acesta poate fi configurat in asa fel incat sa se faca automat, la un interval de timp specificat de utilizator (zilnic / saptamanal / lunar).
[mai mult...]In urmatorii pasi am sa va arat functiile de baza ale terminalului TMUX in sistemul de operare Linux.
[mai mult...]If your background image is drawing unnecessary attention, or you need to blur part of an image that contains sensitive information, you can do so directly in PowerPoint. We’ll show you how.

First, open PowerPoint and navigate to the slide containing the image you want to blur. Select the image, and that automatically opens the “Picture Format” tab.

Next, select “Artistic Effects” from the “Adjust” group.

In the drop-down menu that appears, click the Blur option.

Your image in its entirety is now blurred. If it’s not as blurry as you’d like, you can adjust it manually. Back in the “Artistic Effects” drop-down menu, select “Artistic Effects Options.”

The “Format Picture” pane appears on the right side of the window. Under “Artistic Effects,” find the bar next to “Radius” and drag the setting to the right to increase the blurriness of the image until you’re happy with it.

What if you only want to blur a specific part of an image instead of the entire picture? While it’s not a straightforward process, there is a way you can do it.
As Office states, there’s not a blur tool explicitly designed to blur part of an image. This trick requires a little manipulation of the other tools.
The first thing you need to do is insert a shape that covers the area of the photo you want to blur. You can use one of the default shapes from the “Illustrations” group on the “Insert” tab, or you can draw a freeform shape.
Once you have your shape, adjust it to cover the part of the image you want to blur.
RELATED: How to Change a Shape Using Edit Points in Microsoft PowerPoint

After you insert the shape, you’re moved to the “Shape Format” tab. In the “Shape Styles” group, select “Shape Fill,” and then select “Eyedropper” from the drop-down menu.

This allows you to choose a part of the image that is close to the color you want to make the shape.

Next, head back over to the “Shape Styles” group of the “Shape Format” tab. Click “Shape Effects,” and then select “Soft Edges” from the drop-down menu that appears.

A sub-menu appears showcasing several different soft edge variations. Choose one that works best for you. For this example, we selected the 25-point variation.

That specific part of the image should now appear blurred without drawing unnecessary attention.

Now, we need to group the image and shape so they stay together if you need to adjust something else later. To do this, hold the ctrl key and click both objects.
RELATED: How to Anchor Pictures to Text in PowerPoint

Now, in the “Picture Format” tab, select “Group” from the “Arrange” section. In the drop-down menu, click “Group.”

The two objects are now joined together. This allows you to adjust the background while the blurry shape stays in the correct location.
[mai mult...]