Situatie
When treated like the desktop equivalent, the Microsoft Word mobile app can quickly become frustrating. However, once you embrace the small screen and understand the app’s strengths, the experience becomes instantly more enjoyable. Here are my top tips for using the Word mobile app.
Solutie
The first step to making the most of your compact phone screen when using the Word mobile app—available on iOS and Android—is to learn the touch gestures:
| Action | Touch gesture |
|---|---|
| Select a word (and activate the floating contextual menu) | Double-tap the word. |
| Select a paragraph | Triple-tap any word within the paragraph. |
| Select a precise section of text | Double-tap a word to select it, then drag the blue selection handles. |
| Move the cursor to a precise location | Long-press anywhere in the document until the magnified cursor view appears, then drag the cursor to the relevant place. Alternatively, long-press the Space key on the on-screen keyboard, then slide your finger to move the cursor. |
| Accept autocomplete | Swipe to the right when the suggested word appears in the document. |
| Expand the ribbon | After selecting a tab on the ribbon (such as “Home,” “Insert,” or “Review”), swipe upwards from the top of the menu to see all the options together. |
Some touch gestures may differ slightly between iOS and Android.
Maximize the view for editing and review
The biggest mistake you can make when using the Word mobile app is treating the small phone screen as a single, fixed view. In fact, the app gives you different views, each optimized for specific tasks.
Mobile View: Content creation
Similar to the Draft View on desktop, the Mobile View removes things that get in the way when you just want to get on with your work, like natural page breaks, footnotes, and page numbers. It also changes the size of the font so that the text runs from one side of the screen to the other, meaning the margins don’t squeeze the document into a smaller column, and you get an enlarged scroll bar to make navigation even easier.

Always use portrait orientation while in Mobile View. The vertical screen height leaves more room for the on-screen keyboard, making typing much easier.
To activate this view, tap the “Mobile View” icon. If it’s not immediately visible, head to the “View” tab.
Print Layout View: Layout integrity
The Word mobile app’s Print Layout View closely mimics the same view in the desktop alternative. It shows you exactly how your document will look when printed, including the margins and page breaks. This view is essential for checking your work’s final design and structure.
To switch to the Print Layout View, tap the icon that looks like a sheet of paper, which you’ll find either on the ribbon or in the View tab.
Make the most of the features optimized for the mobile Word app
The Word mobile app isn’t meant to mimic the desktop app. In fact, it really shines when you use tools designed explicitly to make life easier when creating a document on a small screen.
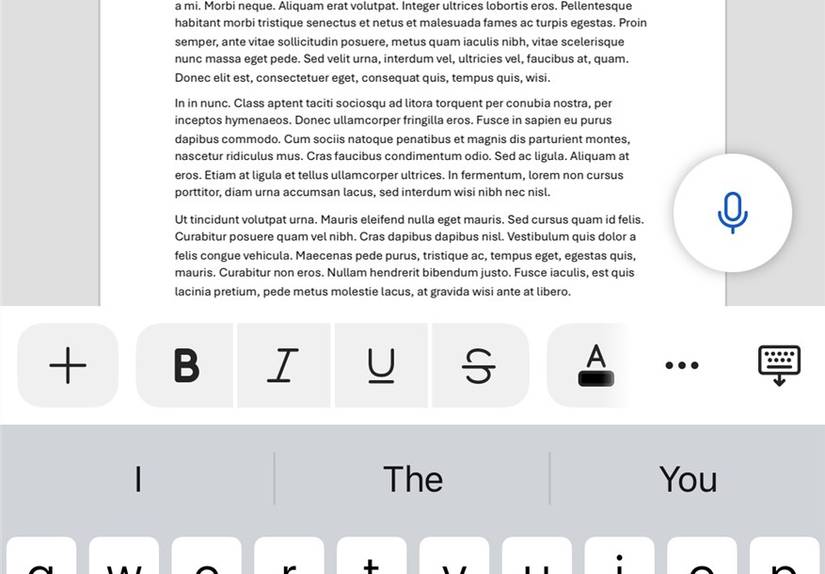
Voice dictation: Type without typing
The Word mobile app’s coice dictation tool is probably the biggest productivity game-changer. It’s perfect for capturing thoughts, taking meeting notes, or even crafting entire documents when your hands are busy or if you simply think faster than you can type. Also, dictating your document rather than typing it means you can choose somewhere more comfortable to work than your desk.
To get started, find and tap the microphone icon. On many devices, it’s permanently visible in the bottom-right corner of your screen, but if it’s not there, tap the microphone button on your device’s on-screen keyboard.
As well as understanding and typing the words you speak, the Word mobile app’s dictate feature also recognizes spoken commands for formatting. Say things like “full stop,” “comma,” “new paragraph,” or “start list”.
In a similar vein, you can use the mobile app’s Read Aloud feature. This turns your Word document into an audiobook, letting you proofread your work as you commute, exercise, or do your household chores. Having your document read back to you allows you to catch errors in flow and grammar that your eyes might miss.
Place your cursor where you want the reading to begin, and tap “Read Aloud” in the Review tab.

Annotations: Add handwritten marks
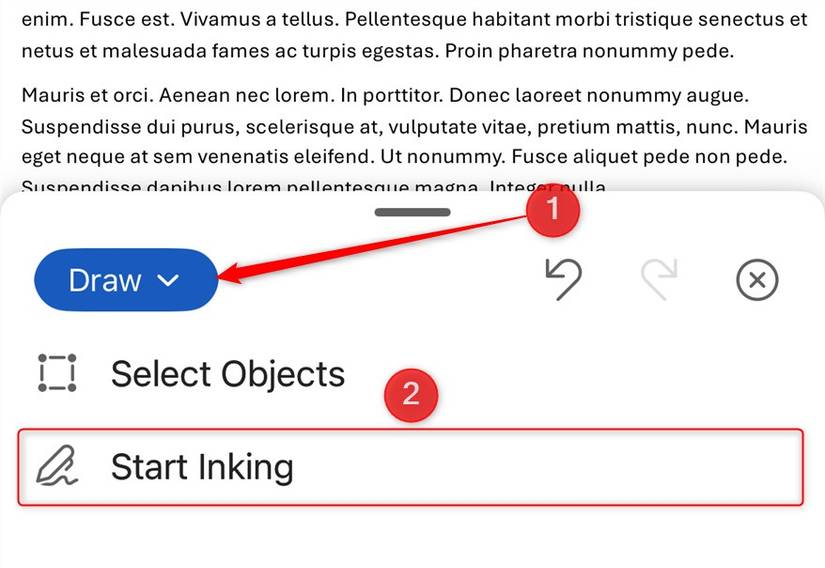
Yes, you can access Drawing Tools via the Draw tab in the Microsoft Word desktop app, but this can be difficult to use, especially if you’re using a desktop mouse. The mobile app’s Start Inking option is much easier to use, especially if you have a stylus to hand. You can add quick annotations, highlight existing text, scribble your signature, or simply jot handwritten notes.
To access this feature, first, make sure you’re in Print Layout View. Then, open the “Draw” menu, and tap “Start Inking”.
From there, you can choose your pen type, and begin your freehand annotations.
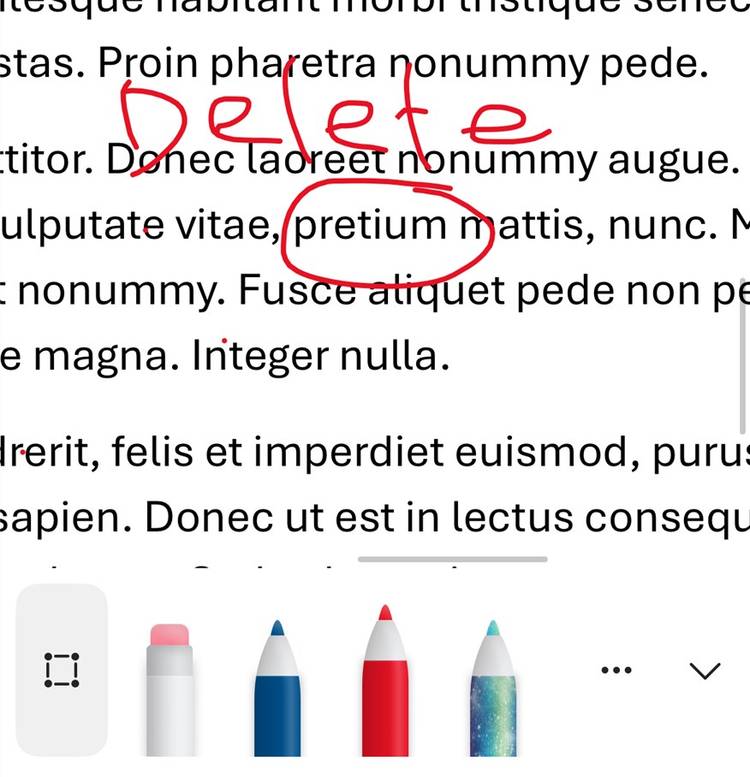
Even with the inking tool activated, you can use the pinch gesture to zoom in and out. This means you can be more precise with your annotations.
Insert from camera: No need to save and upload
Whether you want to add a photo of a whiteboard of meeting notes, a diagram sketched on a napkin, or a specific page from a printed report to your Word document, the mobile app’s camera feature makes this really simple. With this feature, you don’t need to save and upload the image in separate steps, so the process is much quicker than in the desktop app.
Using the camera tool is straightforward. After placing the cursor where you want the picture to go, navigate to the “Insert” tab, and tap “Camera”.
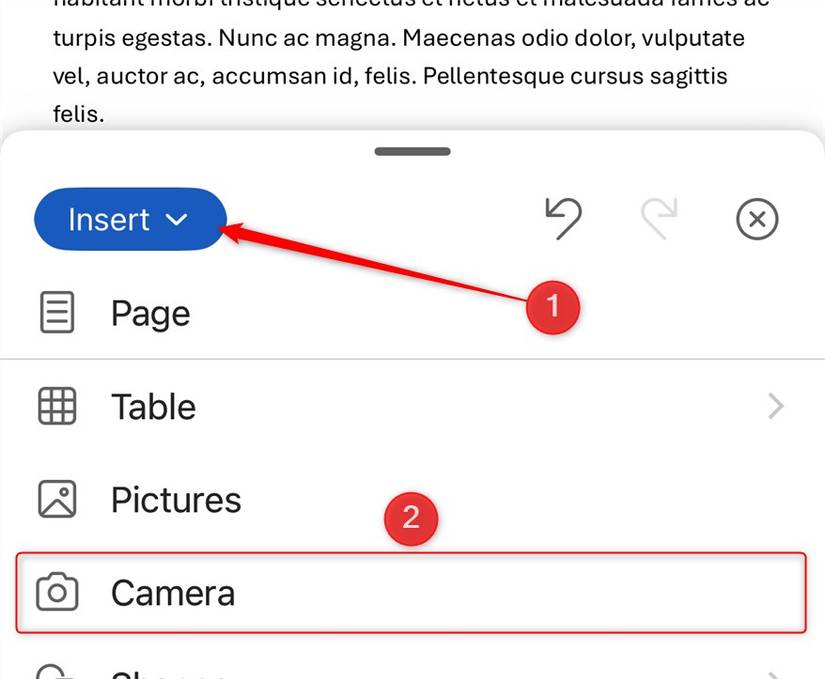
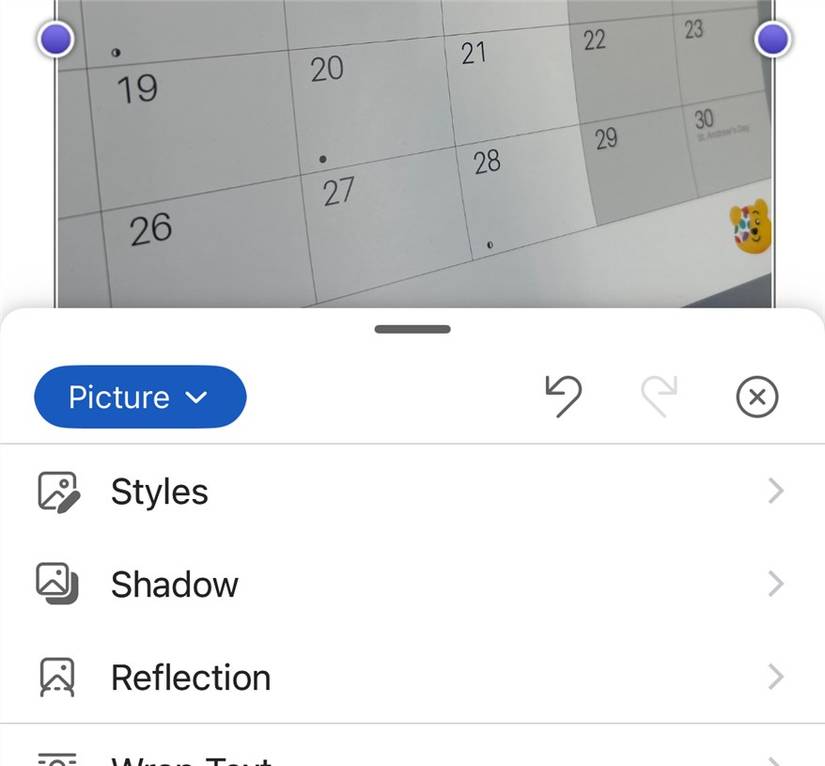
Then, take your photo, add it to your document, and with the inserted image still selected, open the “Picture” tab to make any necessary adjustments.
Know what to expect before you begin
While the Word mobile app is great for creating and editing documents on the go, setting realistic expectations before you get started is crucial for a frustration-free experience. Here are some shortcomings to keep in mind:
Leave A Comment?