Situatie
Whether you share your computer with someone or not, maintaining separate professional files can help save the day. Creating a user account is simple, and you can change it into an administrator account as a backup in case something goes wrong while trying new features, especially if you need to use a Microsoft account to have access to certain features for work.
Solutie
Pasi de urmat
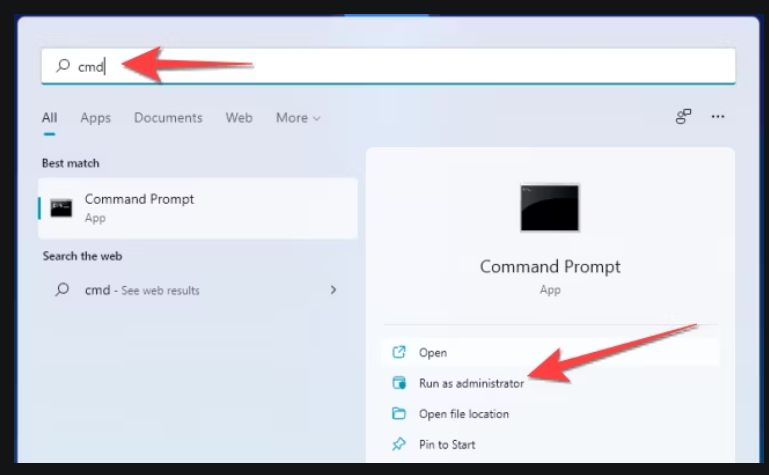
To open the command prompt, click the Start button, type “cmd” in the Windows Search, and select “Run as Administrator”
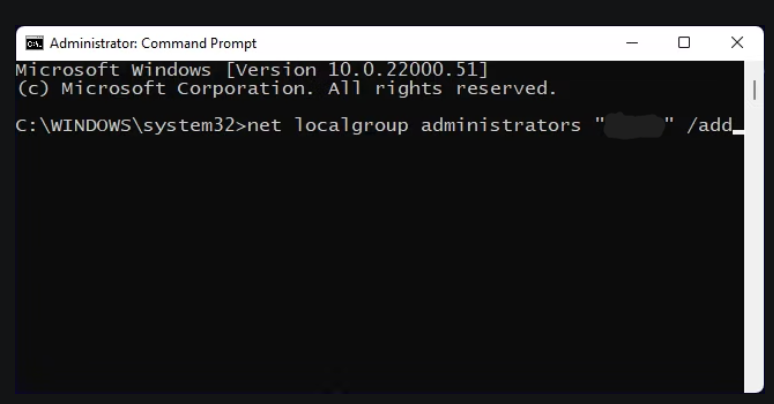
In the Command Prompt, type the following command, and then press Enter:
net localgroup administrators "UserAccountName" /add

Replace the text in quotes with the account username on your computer.
 When you run this command, it looks like this:
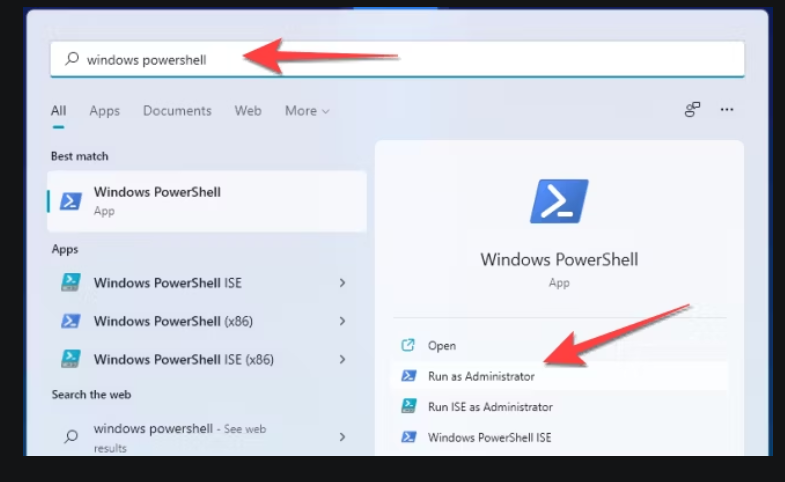
Change a User Account to Administrator Using the PowerShell
After clicking the Start button, type “windows powershell” into the Windows Search, and select “Run as Administrator”
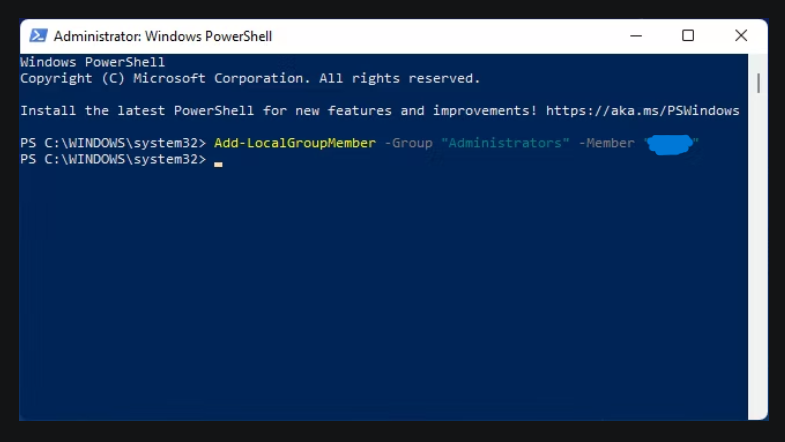
Choose “Yes” when the User Account Control prompt shows up. Then, type the following command into Windows PowerShell, and then hit Enter:
Add-LocalGroupMember -Group "Administrators" -Member "username".

This is how it will look:
Leave A Comment?