Situatie
Solutie
Pasi de urmat
To change the RDP port number, we’ll need to make a small edit in the Windows Registry. Don’t worry; it’s not that hard. First, sign in to Windows 11 using an administrator account on your PC.
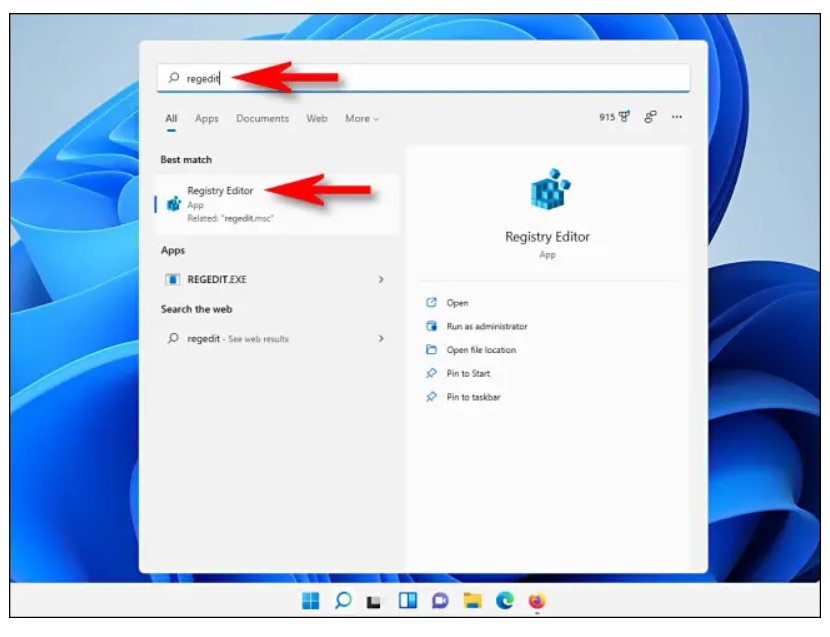
If you’re comfortable editing your registry, open the Start menu and type “regedit.” In the results that appear below, click the “Registry Editor” icon.
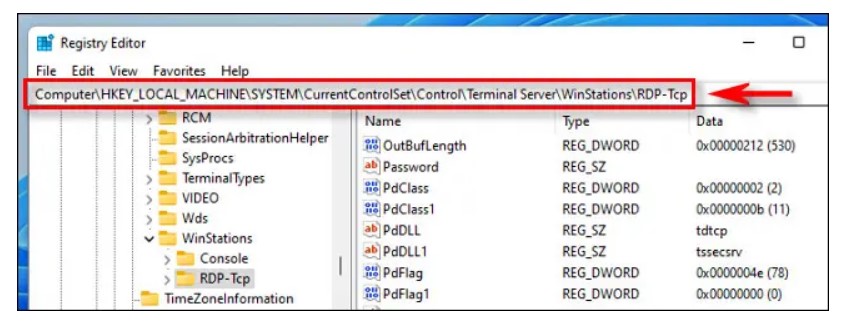
When Registry Editor opens, use the sidebar to browse to the following key, or you can paste it in the Registry Editor address bar near the top of the window:
KEY_LOCAL_MACHINE\System\CurrentControlSet\Control\Terminal Server\WinStations\RDP-Tcp
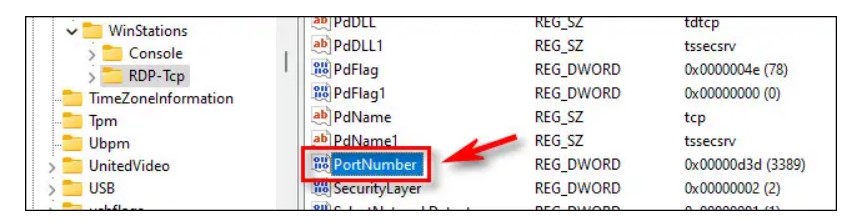
When you’ve located the proper “RCP-Tcp” key, browse the list of values in the right half of the window and select “PortNumber” by double-clicking its name.
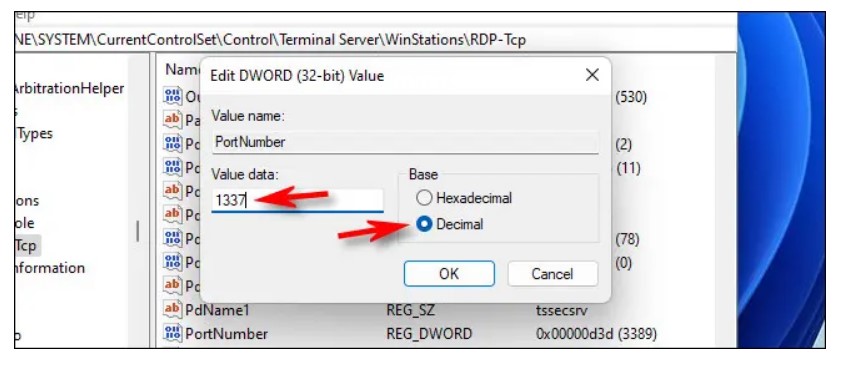
In the “Edit DWORD Value” box that opens, select the “Decimal” option under “Base” so you can enter a standard port number. Then, using the “Value Data” text entry box, type in the new port number you want to use for RDP. For example, to use port “1337” for RDP, type in 1337 in the box. Finally, click “OK” to save the changes.
Close the Registry Editor, then restart your computer.
Leave A Comment?