Situatie
Android has matured a lot since its early days, but there are some features that I keep wishing would be included already. One of those features is the ability to set a different volume for each app. I have found an excellent workaround to get this feature.
Solutie
Before we install Volume Manager and Shizuku, we need to enable a feature called “wireless debugging.” Technically, it’s meant for developers to wirelessly connect Android devices to their PCs for testing purposes. This pairing gives them elevated privileges. Shizuku uses the same wireless debugging to get the same elevated access without a PC connection.
To activate Shizuku, you have to be connected to Wi-Fi. It won’t work on data. However, you only need Wi-Fi to set up and enable Shizuku. Once you’ve used Shizuku to grant the necessary permissions to Volume Manager, the Volume Manager will work just fine on data and offline too.
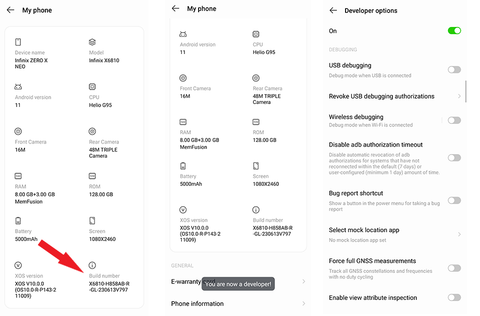
Open the device settings and scroll down to “About Phone.” Tap it and look for the “Build Number.” Tap “Build Number” 7 times until you see the “You are now a developer!” toast message.
Go to Settings > System > Developer Options and scroll down to “Wireless Debugging.” Enable it and select “Always allow on this network,” when prompted.
We’re now ready to install and set up Shizuku. You can install it from the Google Play Store or grab the APK file from GitHub. Open the app and tap “Pairing.” A notification labeled “Searching for a pairing service” should appear right away.
You might be prompted to grant Shizuku notification access. Tap the prompt and then enable “Allow Notifications.”
Go back to Settings > System > Developer Options. Tap “Wireless Debugging” to open the menu (be sure to tap the text, not the toggle). Then tap “Pair device with pairing code.”
Shizuku should now appear in the list of paired devices.
Let’s activate Shizuku:
- Open the app and tap the “Start” button.
- A pop-up window should appear briefly and then close. If everything goes well, you’ll see a “Shizuku is running” message at the top.
Volume Manager is a free and open-source app, but it’s not available on the Google Play Store. You can either download it from its GitHub repo or use F-Droid to install it (you’ll need to add the IzzyonAndroid repo to F-Droid to fetch the app, though). The easiest method is to use the GitHub page.
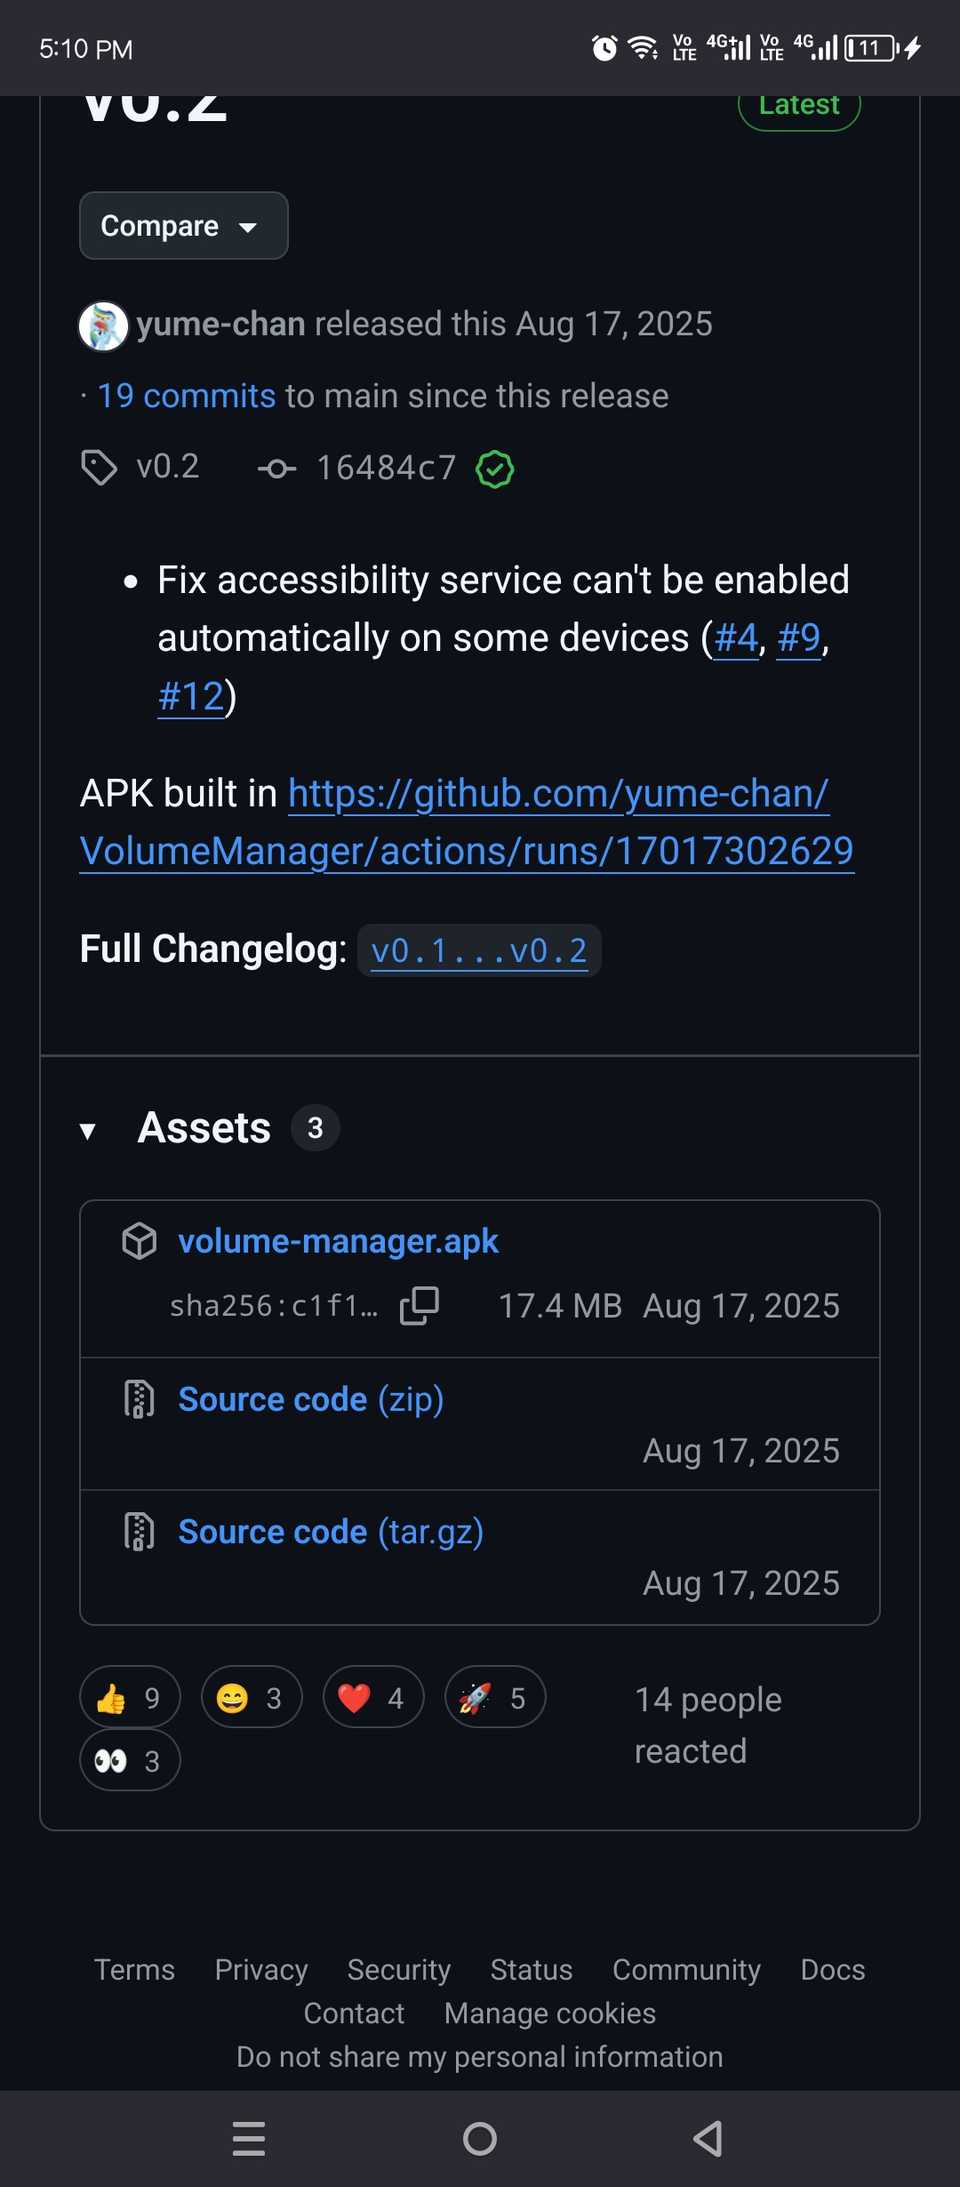
Open the GitHub repo in your browser and scroll down to the “Releases” section. Tap it, and you should see an APK package under the “Assets” tab. Download it. Here you’ll also see the source code for the app, which anyone can download to audit the app and compile it on their computer.
Install Volume Manager on your device using the APK file and open the app. You’ll see an “Add Permission” button on the app’s home page. Tap it and select “Allow all the time.”
Volume Manager will now take over the native Android volume interface. You can pull it up by clicking the volume buttons or opening the Volume Manager app.
You can use it to change the volume of Android system sounds (for example, the screenshot sound effect) or notifications. As you open more apps that support audio or video playback, they’ll show up in the volume manager. You can use the sliders next to the app’s name and icon to change its volume.
Leave A Comment?