Situatie
Scanner not working is a common issue in Windows 10, especially in new Windows 10. If your scanner doesn’t work in Windows 10, don’t worry. You’re not a lone. Many Windows 10 users have reported this issue. You can fix the problem with one of the solutions below.
There are three solutions you can try to fix the problem. You may not have to try them all. Just try them one by one until you find the one that works for you.
Solutie
Repair Corrupted System Files
The problem can be caused by corrupted system files. To check and repair the corrupted files, follow these steps:
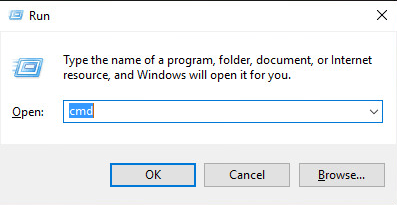
1) Hold Down Windows logo and press R key at the same time to invoke the run box.
2) Type cmd and click the OK button.
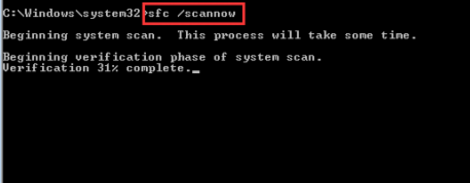
3) When Command Prompt opens, type sfc / scannow and press Enter.
The process will take several minutes until the verification 100% complete.
Configure Related Services
If some related services are not started, the scanner cannot work properly.
Here are the related services. Be sure these services are started:
Remote Procedure Call RPC
DCOM Server Process Launcher
RPC Endpoint Mapper
Shell Hardware Detection
Windows Image Acquisition (WIA)
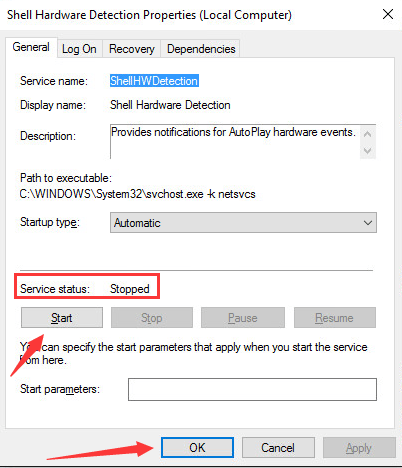
Steps below are for your reference how to check for the service status. Here, let’s take Shell Hardware Detection for example.
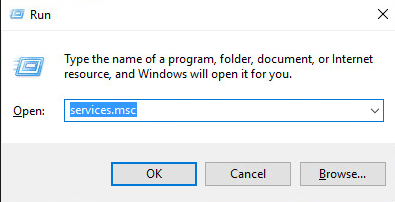
1) Hold Down Windows logo and press R key. A Run dialog box will pop up.
2) Type services.msc in the run box and click OK button.
3) Find Shell Hardware Detection from Name list. Right-click on it and select Properties from the context menu.
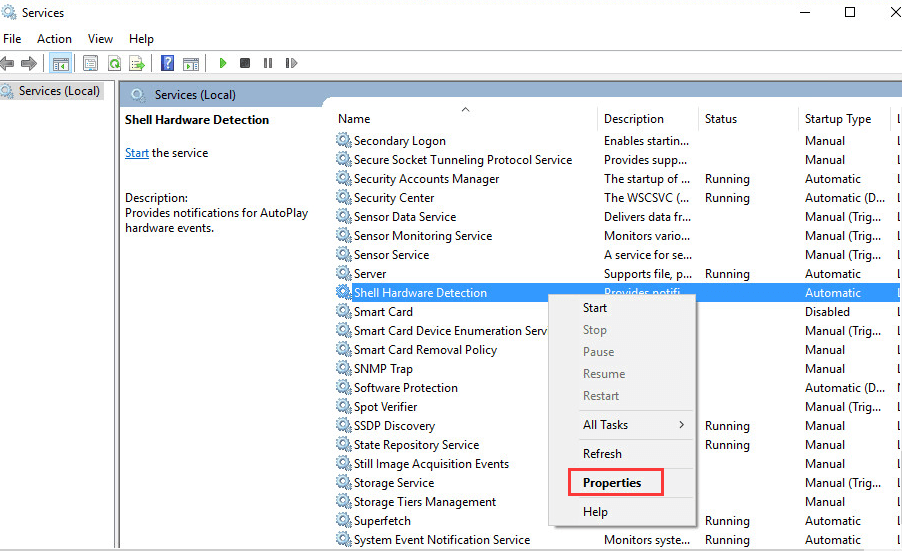
4) If you see “Service status” is Stopped, click Start button and OK button. Then the service will start again.
Leave A Comment?