Situatie
If you’ve ever displayed multiple calendars in one view in Outlook Online, you’ll know how useful it is but also how confusing it can get. Use colors and charms to know at a glance which appointment belongs to which calendar.
Outlook can show a variety of different calendars apart from your default calendar. Additional calendars you’ve created yourself shared calendars from other people, calendars from groups you belong to, and calendars from Planner can all be viewed either individually or together.
Solutie
When you’re viewing multiple calendars together, it’s easy to get a bit lost. Microsoft has made it easy to distinguish between different calendars by using colors, and you can also add charms—icons on each appointment—as a default for each calendar, and individually on specific events.
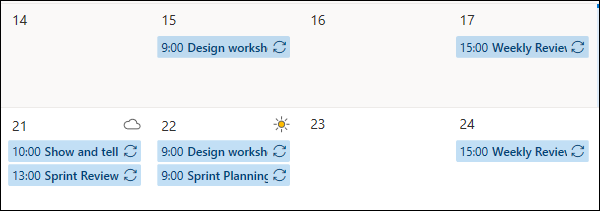
Your default calendar will show appointments in blue, with no charms.
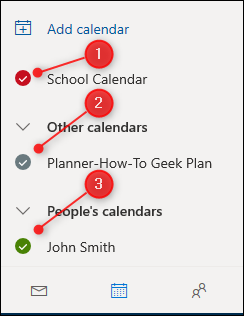
To view additional calendars, click them in the sidebar on the left-hand side so that a checkmark is displayed.
The appointments from those calendars will appear in the calendar view. Outlook gives them a different color by default.
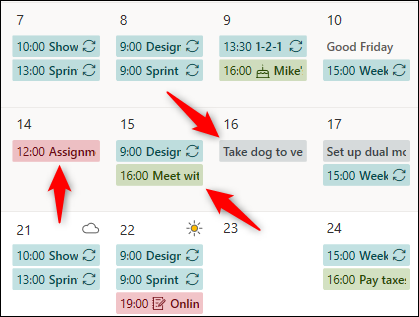
In our example, two of the events have an icon—called a charm—already assigned to them.
This is done automatically by Outlook when it finds a word that matches a charm. The green appointment has a birthday cake charm because the appointment title is “Mike’s birthday.” The red appointment has a pen and paper charm because the appointment includes the word “tutorial.” Other terms that will cause a charm to be automatically added include “dentist,” “doctor,” “holiday,” and “car.”
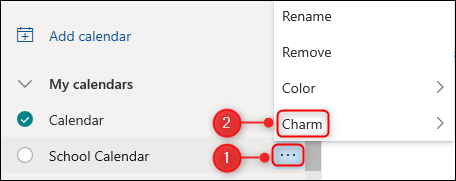
You can manually change the default color for a calendar by clicking the three dots next to the calendar in the sidebar and then selecting the “Color” option.

Choose the color you want, and the appointments on the calendar will immediately change to match.

You can also add a default charm to a calendar, which will be applied to every appointment in that calendar. Click the three dots next to the calendar in the sidebar and then select the “Charm” button.
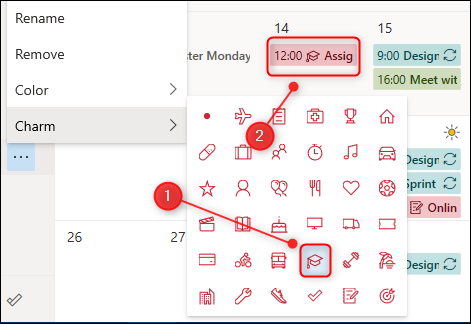
Choose the charm you want, and the appointments will immediately change to match.
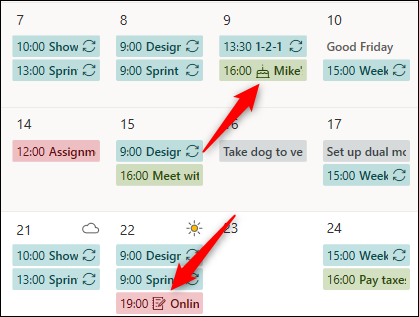
One of the appointments we pointed out earlier still has the pen and paper charm that Outlook automatically applied.
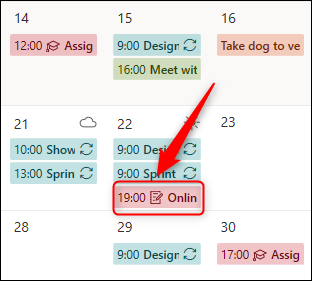
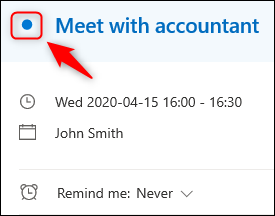
The previous automatic charm overrides the calendar default, but you can change it. Double-click the appointment to open it and then select the charm.

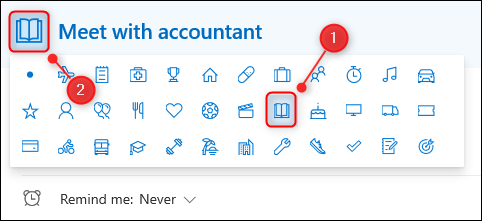
This opens the charm box. You can choose any charm you want, but to match the default charm for the calendar, you need to remove the automatically applied charm. To do this, click the circle in the top left.
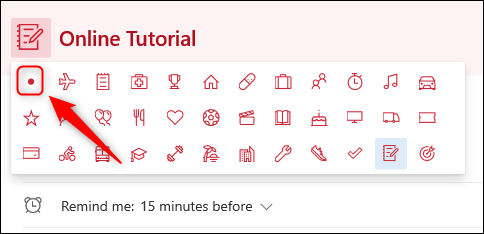
This will remove the bespoke charm, and the appointment will pick up the default charm you selected for the calendar.

If you don’t want a default charm applied to a calendar, but instead you want to apply bespoke charms to specific appointments, the process is similar. Double-click an appointment to open it and click the circle next to the appointment title.
This opens the charm box. Choose the charm you want and click it to apply it to the appointment.
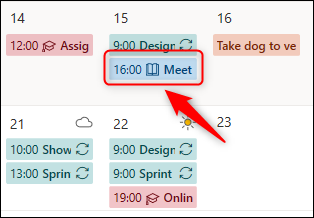
Close the appointment, and the charm will be visible on the appointment in the calendar.
Currently, there is no way to add your own colors or charms to Outlook, so you have to use the options the company gives you. However, there are enough colors and charms that, in most situations, you’ll be able to create unique markers for quite a few calendars, which is certainly better than having multiple identical calendars staring back at you.
Leave A Comment?