
Situatie
Solutie
WSL enables running virtual Linux environment on a Windows 11. After a quick research on WSL version 1 vs 2, I decided on WSL2 because of its full system call compatibility with Linux (source). To install WSL2, I ran the following in command line as an administrator wsl --install which installs Ubuntu. I was prompted for a username and password.
To ensure installation is correct, I used wsl -l -v and the following is shown.
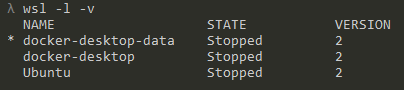
Going forward, to switch to Ubuntu environment, I would run wsl -d Ubuntu -u <username> . You could also visit this link to find out how to install WSL.
Installing Miniconda3 on WSL2
I enjoy using Miniconda because it is the lightweight form of Anaconda that installs only the most essential core packages.
Now that I’m signed into my WSL, it will show the mounted directory that I’m on within local C drive (/mnt/c). You can imagine the C drive to be a USB drive that is plugged in. I can also switch to my Linux environment home directory using cd ~.
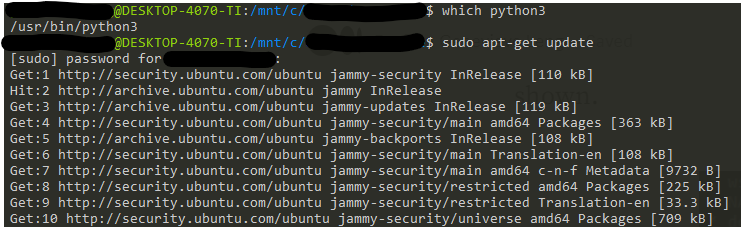
Next, I updated apt-get and installed wget via cmd below.
sudo apt-get update
sudo apt-get install wget
Press enter or click to view image in full size
I visited Miniconda3 website and copied the latest link to the .sh file under Linux, and installed Miniconda3.
wget <latest link to Miniconda3 .sh file>
sh <latest link to Miniconda3 .sh file>
Press enter or click to view image in full size

I exited my Linux environment via exit, re-login via wsl -d Ubuntu -u <username> , and typed which conda and which python into cmd to check if it is installed properly. It should be installed in the Linux environment’s directory (i.e. /home/<username>/miniconda3/…).

You could also visit this link to find out how to install Miniconda3 on WSL2.
Installing Tensorflow on WSL2
Different versions of Tensorflow is compatible with different version of Nvidia tools (i.e. cuDNN and CUDA). Using that information, you can install the correct version of Tensorflow, Cuda Toolkit and cuDNN.
Actually, for this portion, I just followed instructions from this link, which you can see from the bash command below.
# install Nvidia's cuda toolkit
conda install -c conda-forge cudatoolkit=11.8.0

# install Nvidia's cudnn and tensorflow
python3 -m pip install nvidia-cudnn-cu11==8.6.0.163 tensorflow==2.12.*

# create directory to auto-load env_vars.sh whenever conda is loaded
mkdir -p $CONDA_PREFIX/etc/conda/activate.d
echo 'CUDNN_PATH=$(dirname $(python -c "import nvidia.cudnn;print(nvidia.cudnn.__file__)"))' >> $CONDA_PREFIX/etc/conda/activate.d/env_vars.sh
echo 'export LD_LIBRARY_PATH=$LD_LIBRARY_PATH:$CONDA_PREFIX/lib/:$CUDNN_PATH/lib' >> $CONDA_PREFIX/etc/conda/activate.d/env_vars.sh

# load env_vars.sh file
source $CONDA_PREFIX/etc/conda/activate.d/env_vars.sh
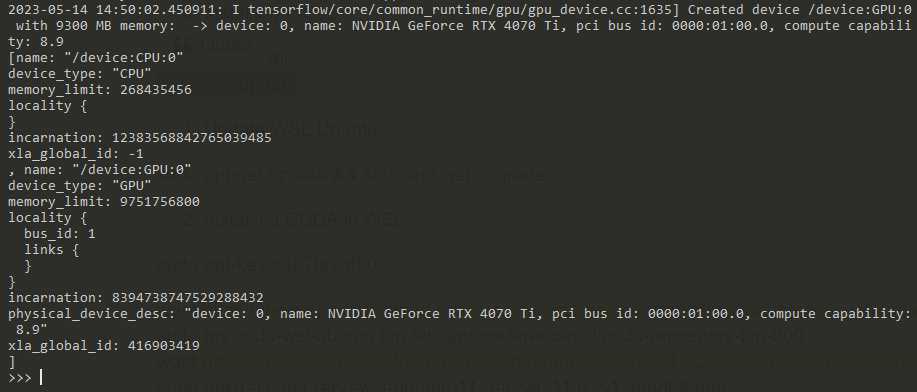
To test whether I have successfully set up, I ran the code below in bash.
# verify installation
python3 -c "import tensorflow as tf; print('Num GPUs Available: ', len(tf.config.list_physical_devices('GPU')));print(tf.config.list_physical_devices('GPU'))"
Alternatively, you can also run it in python.
import tensorflow as tf
from tensorflow.python.client import device_lib

print("Num GPUs Available: ", len(tf.config.list_physical_devices('GPU')))
device_lib.list_local_devices()
Press enter or click to view image in full size
Leave A Comment?