Situatie
Solutie
Check Which Version of Jellyfin You Have Installed
Before attempting to update Jellyfin it’s a good idea to check whether you need to. You can do this by starting the server and launching the web UI on your platform of choice. By default, this is located at localhost:8096/web/index.html.
Access the sidebar on the left side of the screen and click on “Dashboard” under the “Administration” heading.
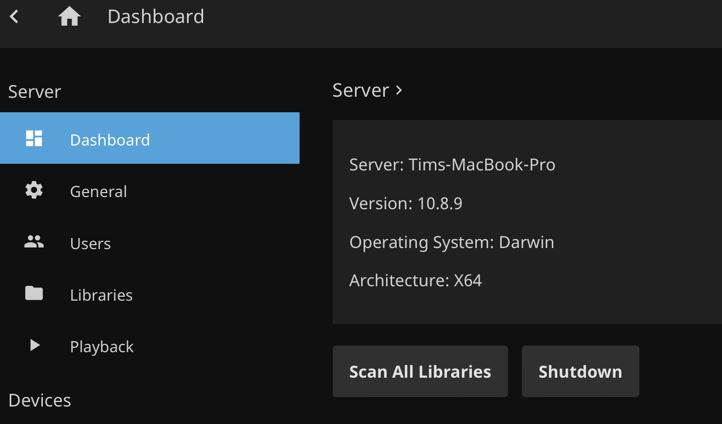
At the top of the screen, you should now see the name of your server, followed by the currently installed version. Make a note of this number since you’ll need to check it in the next step.
How to Update Jellyfin on Windows
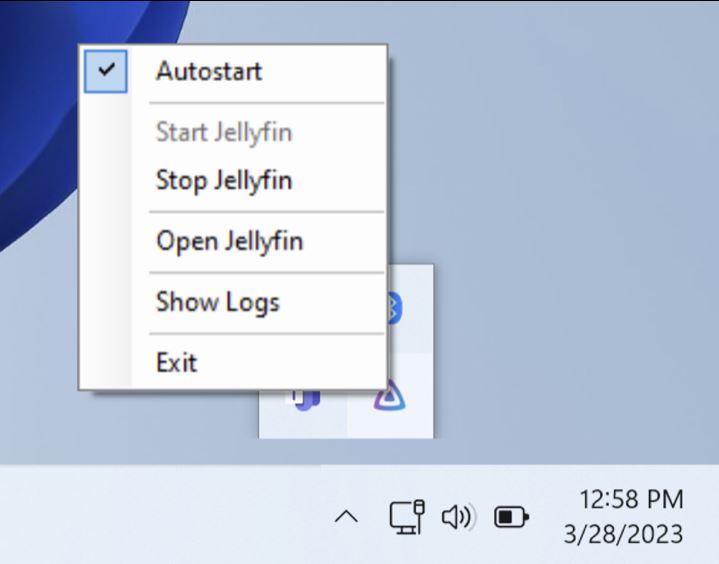
Before you begin, stop your Jellyfin server if it’s running. You can do this by finding the Jellyfin icon in the system tray in the bottom-right corner of your Windows desktop, right-clicking on it, then choosing “Exit” to quit the server.
Now head to the Windows release page and take a look at the latest stable server download at the top of the list. The version number is in the file name. If the two versions match, you already have the latest version installed. If you see a newer version, download the executable.
With your server stopped and the new version ready to install, all you need to do is install the new version of Jellyfin on top of the old one. When you run the installer you will be notified that an existing Jellyfin installation has been detected and that your server settings will be preserved.
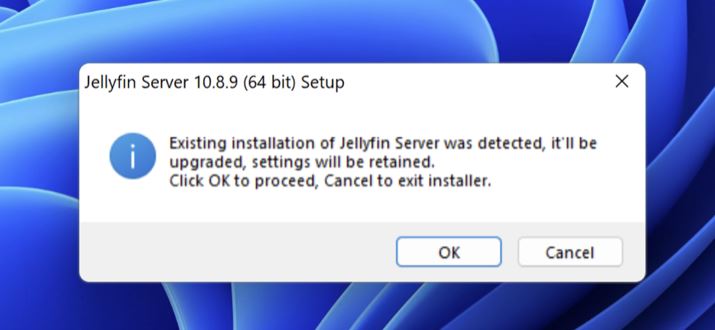
Click “OK” to proceed then follow the update process by clicking “Next” as if you were installing the server for the first time. When all is complete, the media server will be up to date.