Situatie
In Windows 11, the ZIP file format compresses data and makes files smaller, which speeds up file transfers and saves disk space. You can also use ZIP compression to combine multiple files into one compact package.
Solutie
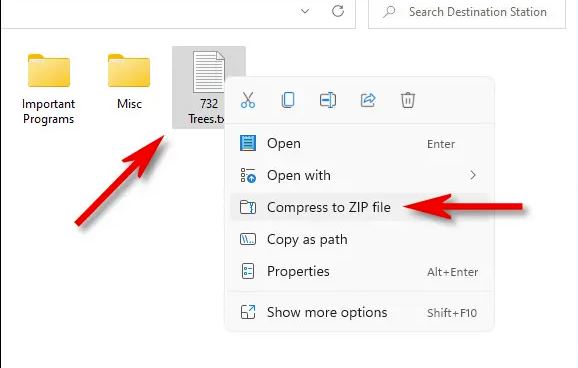
First, using File Explorer, locate the file (or files) that you’d like to compress or combine into a ZIP file. This technique also works with files on your desktop. Before compressing, know that if you zip folders, their internal folder structure will be preserved when they get unzipped later.
If you want to zip a group of files or folders, select them by dragging your mouse cursor over them using the selection rectangle, and then right-click the group. If it’s a single file, right-click it. In the menu that appears, select “Compress to ZIP file.”
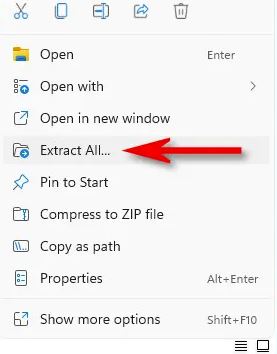
Extracting (unzipping) ZIP files in Windows 11 is just as easy as zipping them. First, locate the ZIP file that you’d like to extract in File Explorer. Next, right-click the file and select “Extract All” in the menu.
In the “Extract Compressed (Zipped) Folders” window that appears, you’ll see the current file path as the default location for the unzipped files. If you’d like to change the location where the files will be extracted, click “Browse,” and then navigate to the desired drive or folder.
If you’d like to see the extracted files in File Explorer when the process finishes, check the box beside “Show extracted files when complete.” When you’re done with those options, click “Extract.” After a moment, your ZIP file will appear in the same folder as the source files that you just compressed. The ZIP file name will highlight, allowing you to type in whatever name you’d like. Type a new file name or leave the default name in place. When you’re ready, press Enter.