Situatie
As with clearing the cache in your browser, clearing the cache in Windows is a good start for troubleshooting system issues, improving system performance, and freeing up disk space.
Solutie
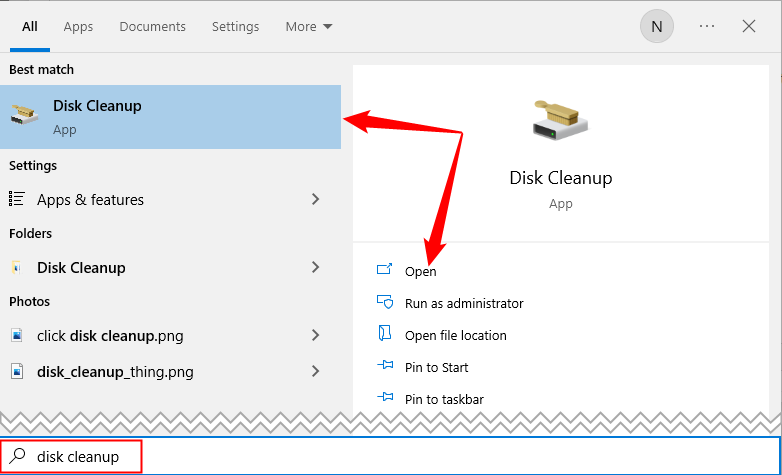
To clear the temporary files cache, search Disk Cleanup in the Start Menu search bar. Select the “Disk Cleanup” app, which will appear in the search results.
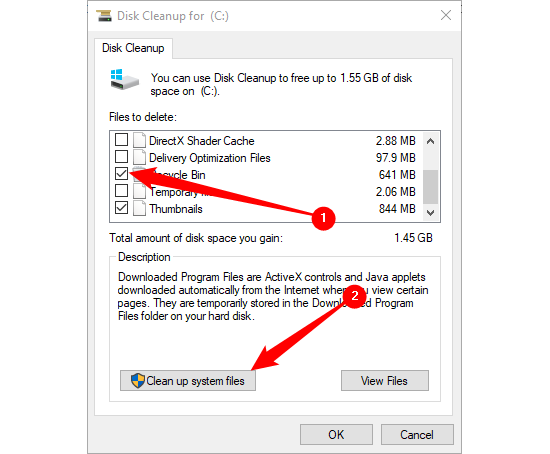
Once selected, Disk Cleanup will start calculating how much space you can free up on the operating system drive (C:), or whichever drive you select. On a modern SSD, the window will probably be fast enough that you barely see it. The Disk Cleanup for OS (C:) will now appear. Scroll down and check the box next to “Temporary Files”. You can also choose to delete files from other locations, such as Recycle Bin or Downloads.
Once you’ve selected what you’d like to clear, click “Clean Up System Files”
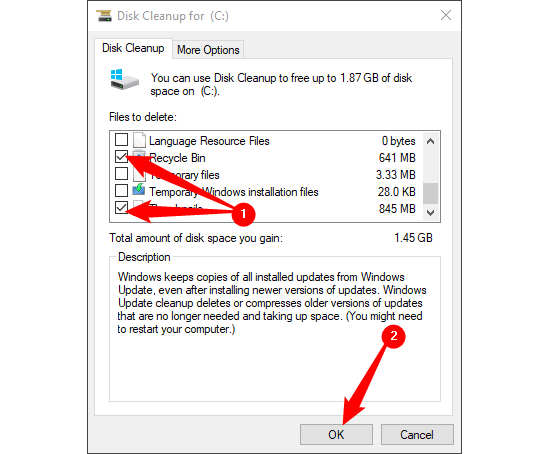
A warning will appear, prompting you to confirm you are sure you want to permanently delete the files. Select “Delete Files”.

Disk Cleanup will now clean up unnecessary files on your machine. This process could take several minutes.
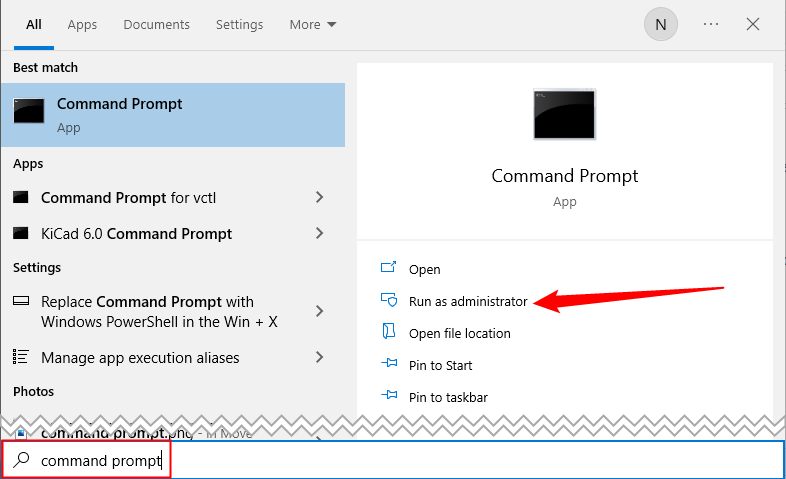
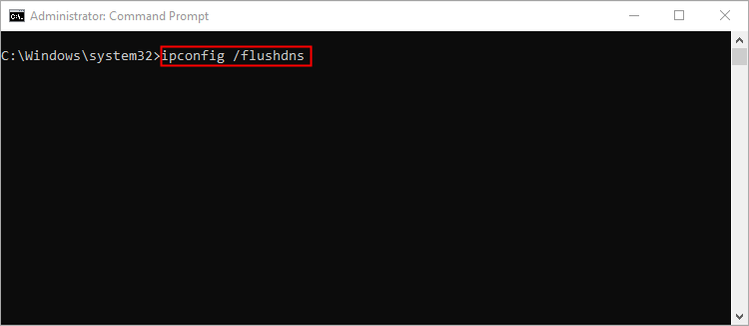
If you want to clear your Windows 10 PC’s DNScache, open Command Promt as an admin. To do this, click the Start button, then type “Command Prompt” in the search bar. The “Command Prompt” app will appear in the search results. Right-click it and select “Run As Administrator” from the menu, or click “Run as Administrator” on the side.
You can also use PowerShell if you prefer that.
Next, run the following command:
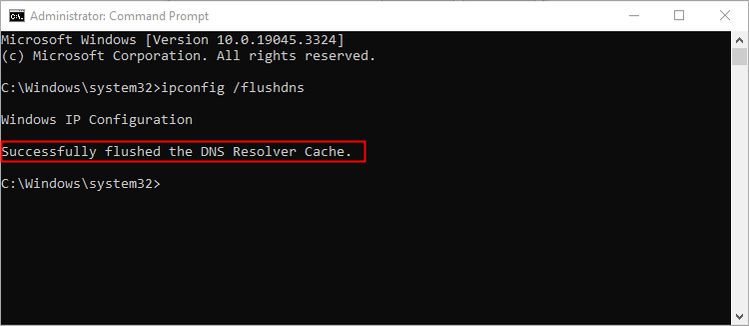
ipconfig /flushDNS
You’ll receive a message letting you know you’ve successfully flushed the DNS Resolver Cache.
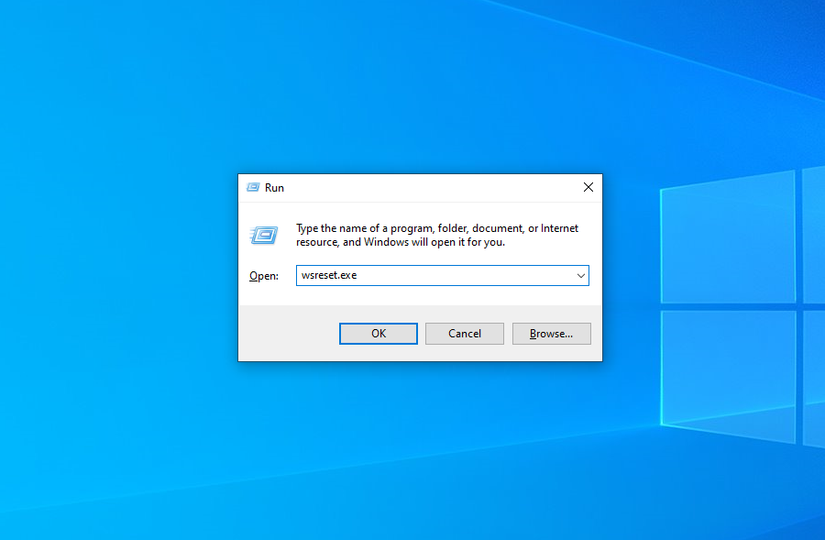
To clear the Windows store cache, open Run by pressing Windows+R on your keyboard. The Run window will appear. In the text box next to Open, type wsreset.exe and then click “OK”.
Once selected, a black window will very briefly appear. There’s nothing you can do here, so just wait a few moments while it clears the cache. You will then see the Windows Store with a blank screen and a loading sign. Once the window closes, the cache is cleared, and Windows Store will launch. You can close the Windows Store app if you like.
Clear Location Cache
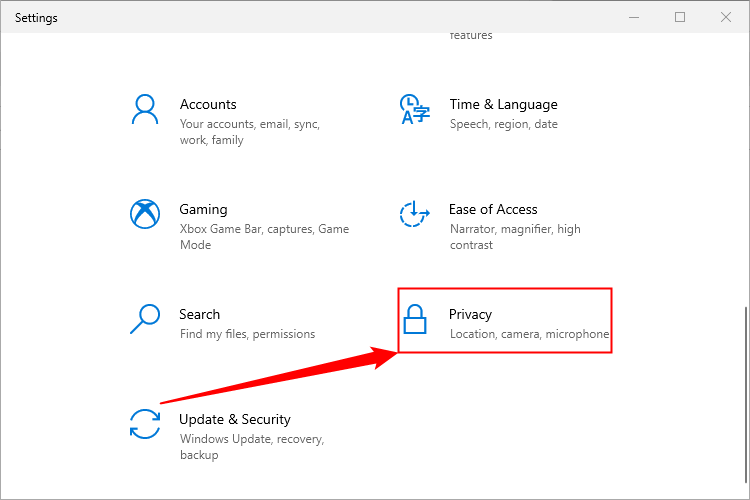
To clear the location cache, click the “Windows” icon in the bottom-left corner of your desktop to open the Start Menu. From there, select the Gear icon to open Windows settings. Alternatively, press Windows+i to open the Settings app.
The Settings window will appear. Scroll down and select the “Privacy” option.
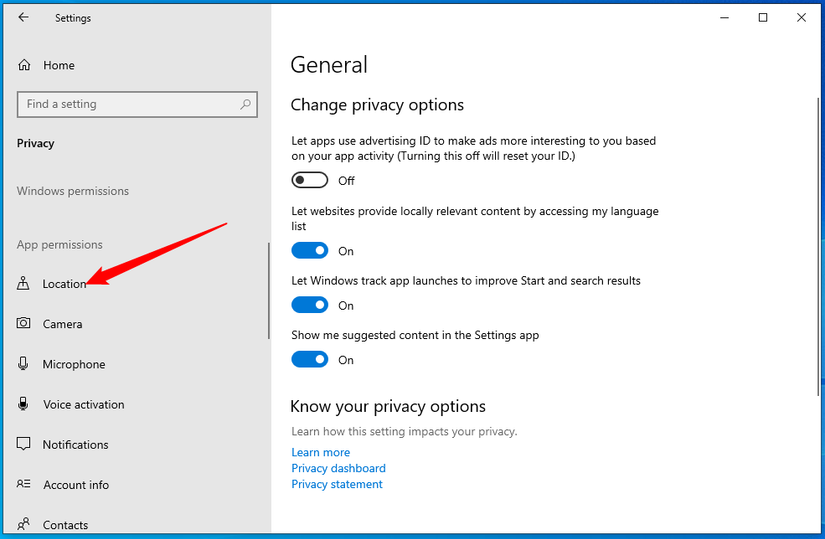
You’ll now be in the Privacy group of the settings. In the left-hand pane, select “Location” found in the App Permissions section.
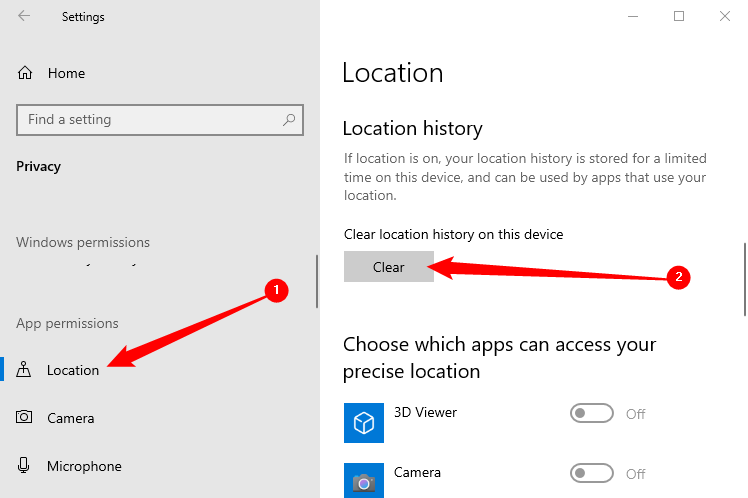
In the next window, scroll down until you find the “Location” group. Here, select “Clear” under the Location History On This Device heading.
Leave A Comment?