
Situatie
A firmware update is recommended as part of the troubleshooting process when the Scan to Email feature is not working correctly. Firmware updates can provide bug fixes, security improvements, compatibility updates, and fixes related to network services.
Important: A firmware update does not guarantee that a Scan to Email problem will be resolved. Scan to Email also depends on the SMTP server configuration, authentication method, network connectivity, and supported security protocols.
Solutie
Before starting, make sure that:
- The printer is powered on and in a Ready state.
- The printer is connected to the network.
- The computer can communicate with the printer.
- You know the printers IP address.
- You have administrator rights on the computer.
- The printer will not be powered off during the firmware update.
Step 1 – Verify Network Connectivity
On the Windows computer, open Command Prompt.
ping 192.168.x.x
- Replace 192.168.x.x with the actual IP address of the printer.
- If replies are received, the computer can communicate with the printer over the network.
- Next, open a web browser and enter: http://192.168.x.x
The HP Embedded Web Server (EWS) should open.
If the Embedded Web Server is accessible, network communication with the printer is working.
Step 2 – Download the Firmware from HP
Go to the official HP Support website:
Search for: HP LaserJet Pro 400 MFP M425dn
Open the Software and Drivers section and locate the firmware available for the printer.
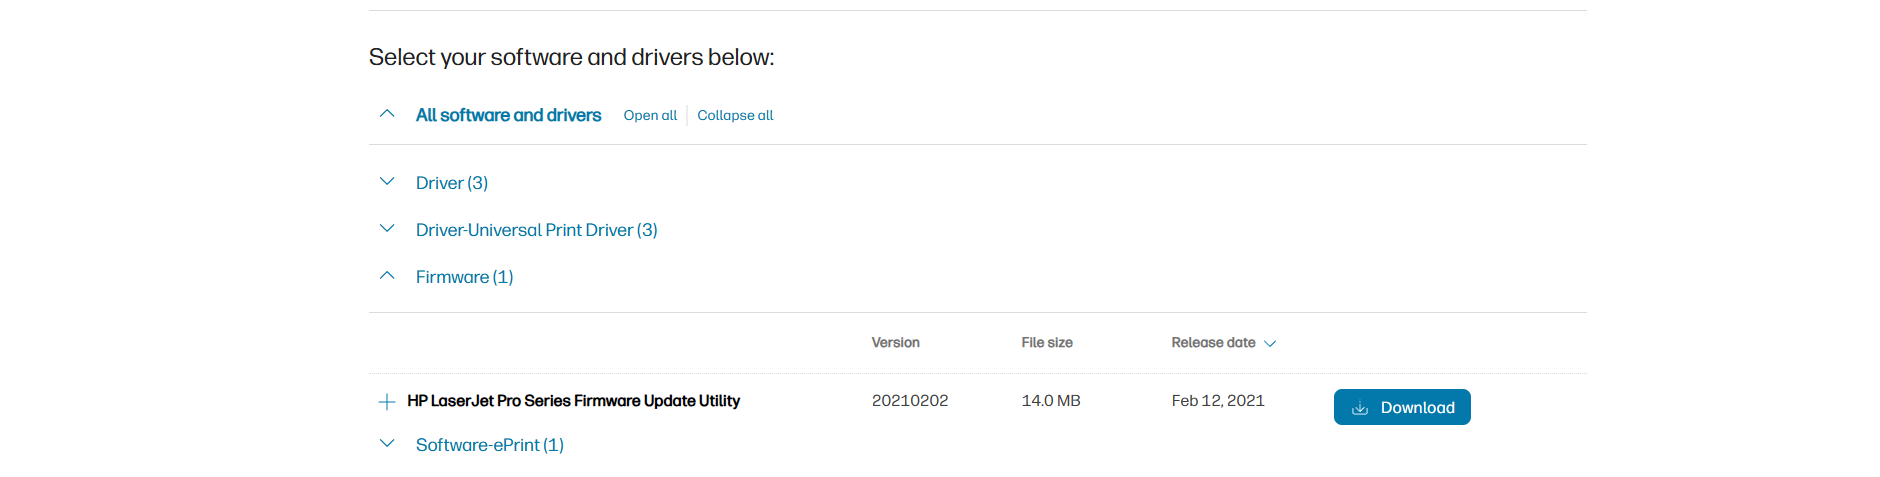
Download the latest firmware package available for the HP LaserJet Pro 400 MFP M425 series.
Step 3 – Run the HP Firmware Update Utility
- Run the downloaded HP Firmware Update Utility as Administrator.
- Allow the utility to search for compatible HP printers.
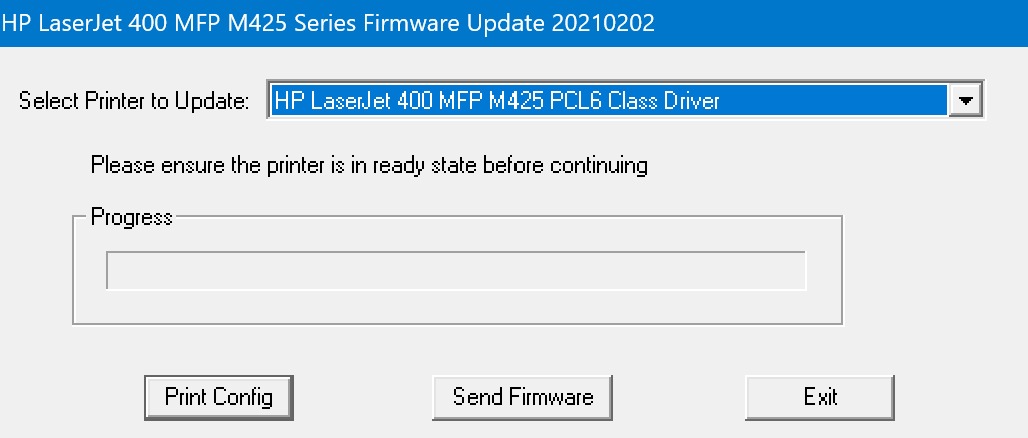
If the printer is detected
- Select the HP LaserJet Pro 400 MFP M425dn.
- Verify that you have selected the correct printer.
- Start the firmware update.
- Continue to Step 4.
If the printer is not detected
If the printer does not appear in the Firmware Update Utility, add it temporarily to Windows using its IP address.
Step 4 – Wait for the Firmware Update to Complete
The firmware package will be transferred to the printer.
During the update:
- Do not turn off the printer.
- Do not disconnect the Ethernet cable.
- Do not restart the computer.
- Do not interrupt firmware update process.
- Do not attempt to print or scan.
The printer may automatically restart during the process. Wait until the printer has completely restarted and returned to its normal Ready state.
Step 5 – Test Scan to Email
After confirming that the firmware update was successful:
- Place a test document in the scanner.
- Select Scan on the printer.
- Select Scan to Email.
- Select or enter a destination email address.
- Send the test scan.
- Verify that the email is successfully delivered.
If Scan to Email Still Does Not Work
If updating the firmware does not resolve the problem, access the HP Embedded Web Server and review the Scan to Email configuration.
Verify:
- SMTP server address
- SMTP port
- SMTP authentication
- Username and password
- Sender email address
- DNS configuration
- Default gateway
- Date and time settings
- TLS/encryption requirements
- Firewall rules.
Leave A Comment?