Configurare program

Cum se activeaza functionalitatea tastei backspace in Firefox

Browserul Firefox are functia de a folosi tasta Backspace ca scurtatura de la tastatura pentru navigarea la pagina anterioara. Nefunctionalitatea acestei taste pentru a va putea intoarce la pagina precedenta se datoreaza, de obicei, dezactivarii acestei setari in mod implicit pe versiunile noi de Firefox si nu neaparat problemelor cu browserul.
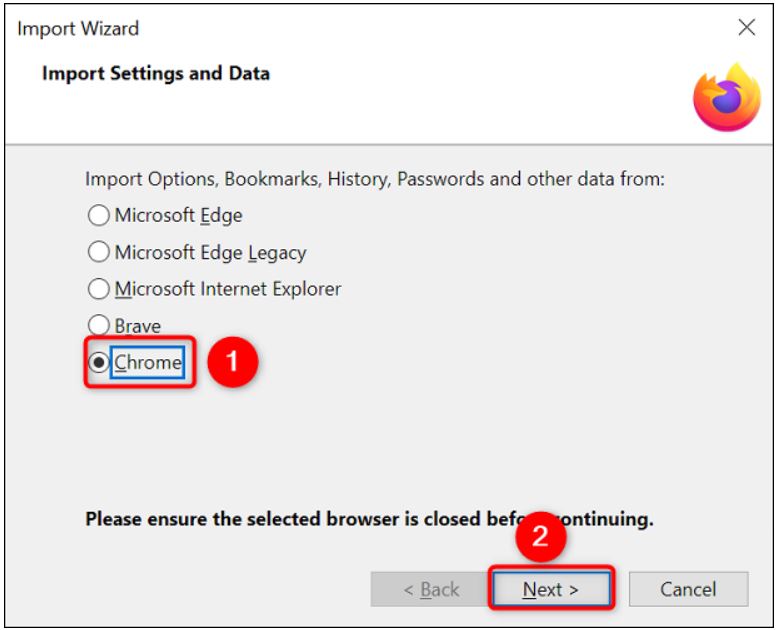
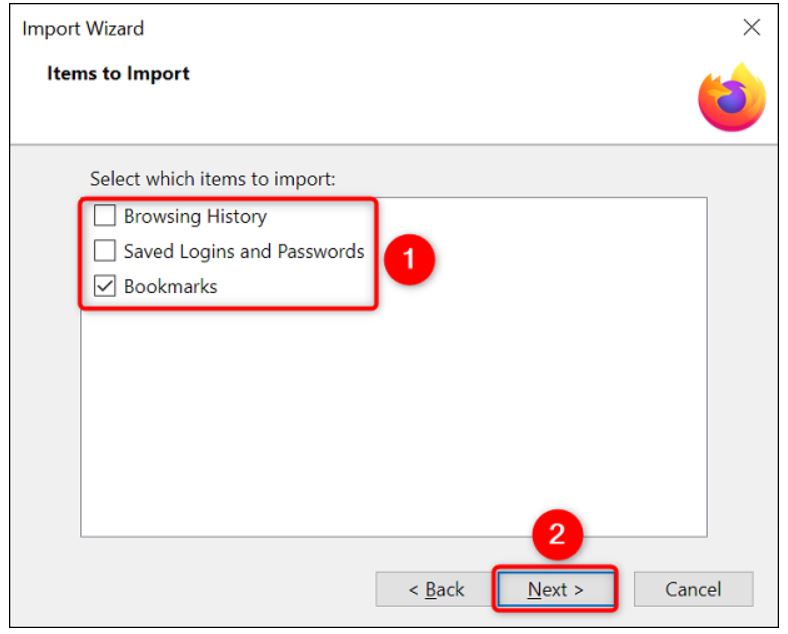
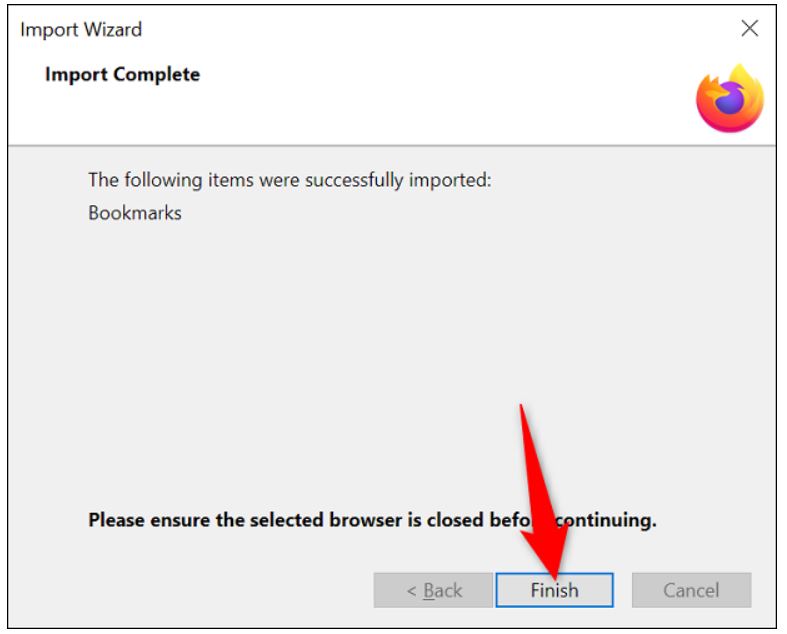
Pentru reactivarea acestei setari se vor urma pasii:

[mai mult...]

How to Transfer iPhone Text Messages to Android

Switching from an iPhone to an Android phone is not as difficult as you might think. The most tedious part is transferring all your personal stuff. We’ll show you how to move your iPhone SMS messages to Android, including iMessages.

Along with photos and videos, text messages are probably one of the things you care about the most when switching phones. Nobody wants to lose all of their conversations—some of which may be very important. The good news is you don’t have to. The first thing we need to do is prepare your iPhone to transfer text messages. To do that, we simply need to make sure you’re syncing your messages with iCloud.

  • First, open the “Settings” app.

Open the "Settings" app.

Tap your profile at the top of the screen.

Tap your profile.

Select “iCloud.”

Select "iCloud."

Scroll down and make sure “Messages” is toggled on.

Toggle on "Messages."

Transfer Text Messages from iPhone to Samsung Galaxy

Samsung offers an app called “Smart Switch” that you can use to move text messages (and other stuff) from your iPhone to a Galaxy phone. You’ll need the little USB-C to USB-A adapter that came with your Samsung phone. If you don’t have one, you can buy a cheap USB-C to USB-A adapter online.

First, open the “Smart Switch” app on your Galaxy phone—download here—and select “Recieve Data.”

Select "Receive Data."

Select “iPhone/iPad” as the source.

Tap "iPhone/iPad."

Plug the adapter into your Samsung phone and then connect it to your iPhone with the USB Lightning cable.

Connect the two phones.

Smart Switch will begin “Searching for Data to Transfer.” When it’s done, you’ll see a list of things you can transfer from your iPhone. Select “Messages” and anything else you might want and tap “Transfer.”

Choose "Messages" to transfer.

This process can take a while depending on what you’re transferring. You can select “Keep Screen On” to ensure it’s not interrupted.

"Keep Screen On."

After it’s done, you can tap “Next.”

Tap "Next."

The next screen will remind you to turn off iMessage on your iPhone to make sure you get all messages.

Turn off iMessage.

That’s all there is to it! You can skip through the next few screens and you’ll see all your conversations —including iMessage—from your iPhone in your default texting app.

Transfer Text Messages from iPhone to Google Pixel

Samsung Smart Switch is a great tool because you can use it at any time. Google Pixel phones don’t have that option. You can only transfer data from a secondary phone during the initial setup process. So if your Pixel is already set up, you’re stuck with putting your data in the hands of a third-party app or resetting your phone.

Regardless, we’ll show you how it’s done. Go through the Pixel setup process and connect to your mobile network or Wi-Fi. Tap “Next” when it asks if you want to copy apps and data.

Tap "Next."

The next screen will instruct you to turn on your iPhone and unlock the screen. Tap “Next.”

Tap "Next."

Now we’ll need the USB-C to USB-A adapter that came with your Pixel phone. If you don’t have one, you can find them for cheap online. Plug it into your Pixel and then connect it to your iPhone with the USB Lightning cable. Tap “Next.”

Tap "Next."

Sign in with your Google account to continue with the setup.

Sign in with Google account and tap "Next."

The next screen will ask what you want to copy from your iPhone. Select “Messages” and anything else you’d like, then tap “Copy.”

Select "Messages."

You’ll be given the option to “Continue” with setup or leave and finish it later. Tap “Continue.”

Tap "Continue."

Continue with setup until you get to the “Your Phone’s Almost Ready” screen. Tap “Done” to finish up.

Tap "Done."

The next screen will instruct you to turn off iMessage on your iPhone to ensure you don’t miss any messages.

Turn off iMessage.

[mai mult...]

How to Use Google Password Manager on Android

A password manager is a great thing to use if you want to keep your passwords secure and easy to remember. Google’s Password Manager built-in to Chrome is a popular option and it works on Android too. While we don’t necessarily recommend everyone use their browser’s password manager, it’s better than nothing. Plus, Google’s password manager has gotten a lot better over the years. If you use it in Google Chrome on your computer, you should use it on Android, too.

Before we get started, we’ll need to make sure you have Google’s password manager set as your “Autofill” service on your Android device. This will ensure that the passwords you save will automatically generate when you need to log in to an app or website.

Swipe down once or twice (depending on your phone) from the top of the screen and tap the gear icon to open the Settings.

Tap the "Passwords & Accounts" section.

Now select whichever service is listed under “Autofill Service.” It may already be “Google.”

Select the service under "Autofill service."

Choose “Google” from the list if it’s not already selected.

Choose "Google."

Next, go back to the previous “Passwords & Accounts” screen. You’ll see “Google” listed under “Passwords.” Tap it.

Select "Google."

This is the Google Password Manager. You can search through your saved passwords to edit the details or delete outdated ones. You’ll need to enter your security method to access any of the passwords.

Find and edit passwords.

At the top of the screen, you’ll see the “Password Checkup” tool. You can run this to see if any of your passwords should be improved for security.

Password Checkup tool.

Lastly, we’ll take a peek at the settings. Tap the gear icon in the top right corner.

Here’s where you can decide if you want Google to offer to save passwords when you enter them in apps and websites in Chrome. You can choose to automatically sign in to websites and get alerts when your passwords have been compromised.

Password Manager settings.

And if you want to use the Password Manager a lot, you can add a shortcut to the home screen.

Add it to the home screen.

That’s all there is to the Google Password Manager. It’s not the best or most secure password manager out there, but it’s probably the easiest to use if you’re a Chrome and Android user.

[mai mult...]

Cum să importați bookmarks din Chrome în Firefox

Pentru a începe, lansați Firefox pe computerul dumneavoastră. Apoi, în colțul din dreapta sus al Firefox, faceți click pe meniul din dreapta sus (trei linii orizontale) și alegeți Bookmarks > Manage Bookmarks.

În fereastra “Library”, în partea de sus, selectați Import and Backup > Import Data From Another Browser.

În fereastra “Import Wizard”, alegeți “Chrome” și selectați “Next”.

Firefox vă va întreba ce elemente doriți să importați din Chrome. Activați opțiunea “Bookmarks” și faceți click pe “Next”.

Dacă doriți ca și alte elemente să fie migrate, atunci nu ezitați să activați opțiunile acestora.

Veți vedea un mesaj de succes care va spune că toate marcajele din Chrome au fost importate cu succes. Închideți fereastra “Import Wizard” făcând click pe “Finish”. In bara de marcaje din Firefox, veți vedea acum toate marcajele dvs. din Chrome.

[mai mult...]

Utilizare cmdleturi PowerShell pentru Powerapps

Cmdleturi sunt funcții scrise în limbajul de script PowerShell care execută comenzi în mediul Windows PowerShell. Rularea acestor cmdleturi Power Apps vă va permite să interacționați cu platforma dvs. de aplicații de afaceri, fără a fi necesar să parcurgeți portalul de administrare într-un browser web.

Puteți combina aceste cmdleturi cu alte funcții PowerShell pentru a scrie scripturi complexe care vă pot optimiza fluxul de lucru. Rețineți că puteți folosi în continuare cmdlet-urile dacă nu sunteți administrator pe entitatea găzduită, dar veți fi limitat la resursele pe care le dețineți. Cmdlet-urile care încep cu cuvântul „Administrator” sunt concepute pentru a fi utilizate de un cont de utilizator administrativ.

Cmdlet-urile sunt disponibile în galeria PowerShell ca două module separate:

Pentru informații despre modulul de administrare Power Apps, consultați Începeți utilizând modulul de administrare Power Apps și Microsoft.PowerApps .Administration.PowerShell.

Notă! În ceea ce privește asistență Dynamics 365 Government Community Cloud (GCC), nivelul 2:

Punctul final implicit este „prod”. Dacă un utilizator dorește să ruleze un script PowerShell care vizează un mediu GCC, parametrul -Endpoint trebuie schimbat în „usgov” pentru GCC Moderate sau „usgovhigh” pentru GCC High sau „dod” pentru GCC DOD.

PowerShell
Add-PowerAppsAccount -Endpoint "usgov" 

PowerShell în acest subiect necesită versiunea PowerShell 5.x. Pentru a verifica versiunea de PowerShell care rulează pe aparatul dvs., executați următoarea comandă:

PowerShell
$PSVersionTable.PSVersion

Dacă aveți o versiune depășită, consultați Actualizați Windows PowerShell existent.

Important! Modulele descrise în acest document utilizează .NET Framework. Acest lucru îl face incompatibil cu PowerShell 6.0 și versiunile ulterioare, care utilizează .NET Core.

Pentru a rula cmdleturile PowerShell pentru creatorii de aplicații, efectuați următoarele:

  1. Executați PowerShell ca administrator.

    Executați PowerShell ca administrator.

  2. Importați modulele necesare folosind următoarele comenzi:
    PowerShell
Install-Module -Name Microsoft.PowerApps.Administration.PowerShell
Install-Module -Name Microsoft.PowerApps.PowerShell -AllowClobber

Alternativ, dacă nu aveți drepturi de administrator pe computer, puteți utiliza următoarele pentru a utiliza aceste module:

PowerShell
  • Save-Module -Name Microsoft.PowerApps.Administration.PowerShell -Path
    Import-Module -Name Microsoft.PowerApps.Administration.PowerShell
    Save-Module -Name Microsoft.PowerApps.PowerShell -Path
    Import-Module -Name Microsoft.PowerApps.PowerShell
    
  • Dacă vi se solicită să acceptați modificarea la valoarea InstallationPolicy depozitului, acceptați [A] Da la toate modulele tastând „A” și apăsând Enter pentru fiecare modul.Acceptați valoarea InstallationPolicy.
  • Înainte de a accesa oricare dintre comenzi, aveți opțiunea de a vă furniza datele de acreditare folosind următoarea comandă. Aceste date de acreditare sunt reîmprospătate pentru până la ~ 8 ore înainte de a vi se cere să vă conectați din nou pentru a continua utilizarea cmdlet-urilor.
    PowerShell
# This call opens prompt to collect credentials (Azure Active Directory account and password) used by the commands 
Add-PowerAppsAccount
PowerShell
  1. # Here is how you can pass in credentials (avoiding opening a prompt)
    $pass = ConvertTo-SecureString "password" -AsPlainText -Force
    Add-PowerAppsAccount -Username user@contoso.com -Password $pass.
Scop Cmdleturi
Adăugați o aplicație pânză la o soluție Microsoft Dataverse Set-PowerAppAsSolutionAware
Citiți medii Get-PowerAppEnvironment (anterior Get-PowerAppsEnvironment)
Get-FlowEnvironment
Citiți, actualizați și ștergeți o aplicație pânză Get-PowerApp (anterior Get-App)
Remove-PowerApp (anterior Remove-App)
Publish-PowerApp (anterior Publish-App)
Set-PowerAppDisplayName (anterior Set-AppDisplayName)
Get-PowerAppVersion (anterior Get-AppVersion)
Restore-PowerAppEnvironment (anterior Restore-AppVersion)
Citiți, actualizați și ștergeți aplicația pânză Get-AdminPowerAppRoleAssignment (anterior Get-AppRoleAssignment)
Remove-AdminPowerAppRoleAssignment (anterior Remove-AppRoleAssignment)
Citiți, actualizați și ștergeți un flux Get-AdminFlow
Activați-AdminFlow
Dezactivați-AdminFlow
Remove-AdminFlow
Citiți, actualizați și ștergeți permisiuni flux Get-AdminFlowOwnerRole
Set-AdminFlowOwnerRole
Remove-AdminFlowOwnerRole
Citiți și răspundeți la aprobările de flux Get-AdminFlowApprovalRequest
Remove-AdminFlowApprovals
Citiți și ștergeți conexiunile Get-AdminPowerAppConnection (anterior Get-Connection)
Remove-AdminPowerAppConnection (anterior Remove-Connection)
Citiți, actualizați și ștergeți permisiunile de conexiune Get-AdminPowerAppConnectionRoleAssignment (anterior Get-ConnectionRoleAssignment)
Set-AdminPowerAppConnectionRoleAssignment (anterior Set-ConnectionRoleAssignment)
Remove-AdminPowerAppConnectionRoleAssignment (anterior Remove-ConnectionRoleAssignment)
Citiți și ștergeți conectorii Get-AdminPowerAppConnector (anterior Get-Connector)
Remove-AdminPowerAppConnector (anterior Remove-Connector)
Adăugați, citiți, actualizați și ștergeți permisiunile personalizate ale conectorilor Get-AdminPowerAppConnectorRoleAssignment (anterior Get-ConnectorRoleAssignment)
Get-PowerAppConnectorRoleAssignment (anterior Set-ConnectorRoleAssignment)
Remove-PowerAppConnectorRoleAssignment (anterior Remove-ConnectorRoleAssignment)
Citiți, adăugați și eliminați modelele URL-urilor de politici Obțineți-PowerAppPolicyUrlPatterns
Nou-PowerAppPolicyUrlPatterns
Eliminare-PowerAppPolicyUrlPatterns
Citiți, înregistrați și eliminați aplicațiile de gestionare Get-PowerAppManagementApp
Get-PowerAppManagementApps
New-PowerAppManagementApp
Remove-PowerAppManagementApp
Citiți, creați, actualizați și importați cheile de protecție Get-PowerAppRetrieveAvailableTenantProtectionKeys
Get-PowerAppGenerateProtectionKey
Get-PowerAppRetrieveTenantProtectionKey
New-PowerAppImportProtectionKey
Set-PowerAppTenantProtectionKey

Power Apps cmdleturi pentru administratori

Pentru mai multe informații despre cmdleturi Power Apps pentru administratori consultați Începeți cu PowerShell pentru administratori Power Platform

Sfaturi

  • Folosiți Get-Help „CmdletName” pentru a obține o listă de exemple.comanda Get-Help.
  • Pentru a parcurge opțiunile posibile pentru etichetele de intrare, faceți clic pe tasta tab după ce introduceți caracterul liniu (-), după numele cmdlet.

Exemple de comenzi:

PowerShell
Get-Help Get-AdminPowerAppEnvironment
Get-Help Get-AdminPowerAppEnvironment -Examples
Get-Help Get-AdminPowerAppEnvironment -Detailed
Exemple de operare

Mai jos sunt câteva scenarii comune care arată cum să utilizați cmdleturi Power Apps noi și existente.

Afișați o listă a tuturor mediilor.

PowerShell
Get-AdminPowerAppEnvironment

Returnează o listă a fiecărui mediu din entitatea dvs. găzduită, cu detalii despre fiecare (de exemplu, numele mediului (guid), numele afișat, locația, creatorul, etc).

PowerShell
Get-AdminPowerAppEnvironment –Default

Returnează detaliile numai pentru mediul implicit al entității dvs. găzduite.

Afișați detaliile unui mediu specific
PowerShell
Get-AdminPowerAppEnvironment –EnvironmentName 'EnvironmentName'

Notă: câmpul EnvironmentName este un identificator unic, care este diferit de DisplayName (a se vedea primul și al doilea câmp din ieșire din imaginea următoare).

Comanda Get-AdminEnvironment.

[mai mult...]