How to disable Rewrite with Copilot on Edge
To disable the “Rewrite with Copilot” feature on Microsoft Edge on Windows 11 (and 10), use these steps.
[mai mult...]Soluții pentru problemele tale IT
To disable the “Rewrite with Copilot” feature on Microsoft Edge on Windows 11 (and 10), use these steps.
[mai mult...]You might be asking yourself, why not use an extension that does the same job? Two reasons: an extension will constantly run in the background but a userscript will only be active while you’re on YouTube, so it’s a lot lighter on the resources. Second, the scripts we’re using are pretty simple and small, so it’s easy to audit them for privacy reasons. Extensions (unless they’re open source, and you’ve compiled them yourself) aren’t transparent like that.
Installing a Userscript Extension
Userscripts run inside a script extension. TamperMonkey and ViolentMonkey are two solid options. I’m going to use TamperMonkey since it’s available on every popular browser.
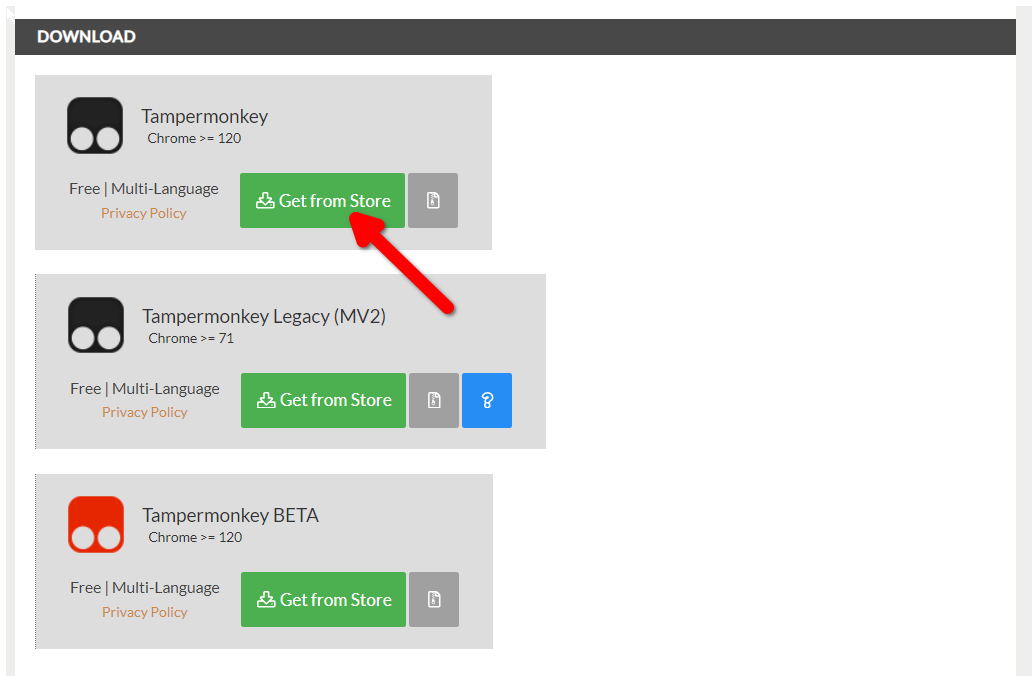
Go to the TamperMonkey website and select your browser, then scroll down and click “Get from the Store.”
You’re now ready to load the userscript that will revert YouTube’s layout.
Revert YouTube to the Old Layout
You can download scripts for free from GreasyFork. Unsurprisingly, a lot of people want to get the old YouTube layout. You have options, however not all of them work perfectly.
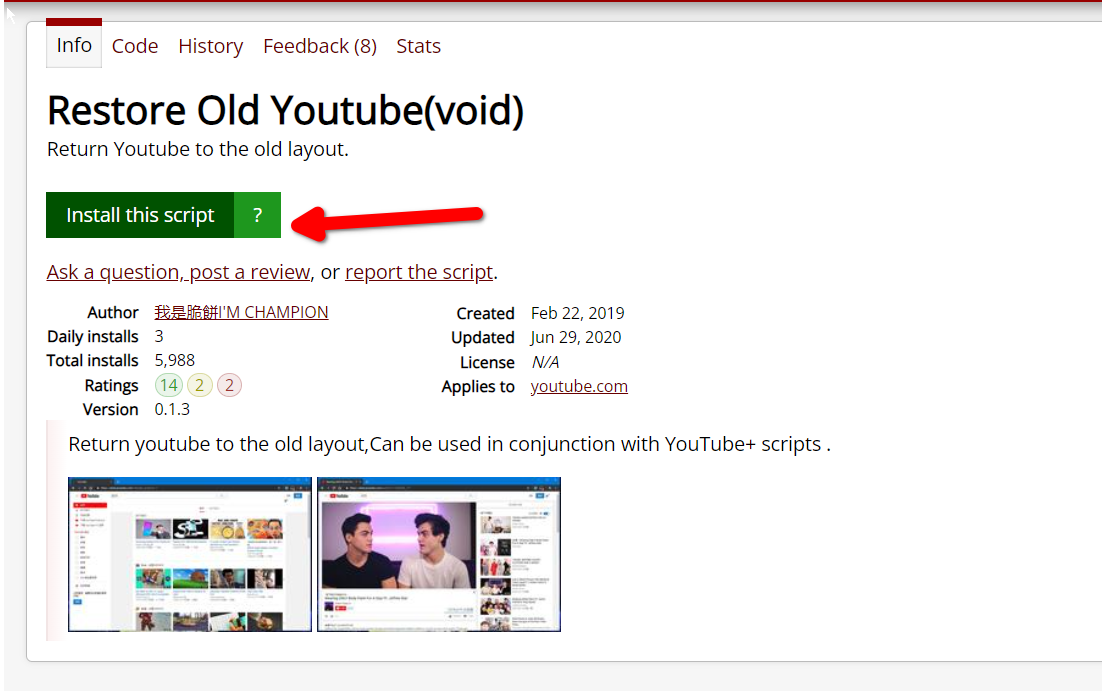
I tried three different userscripts: Pre-2024 YouTube UI, Classic YouTube Layout, and Restore Old Youtube (Void). Restore Old YouTube works best on my browser.
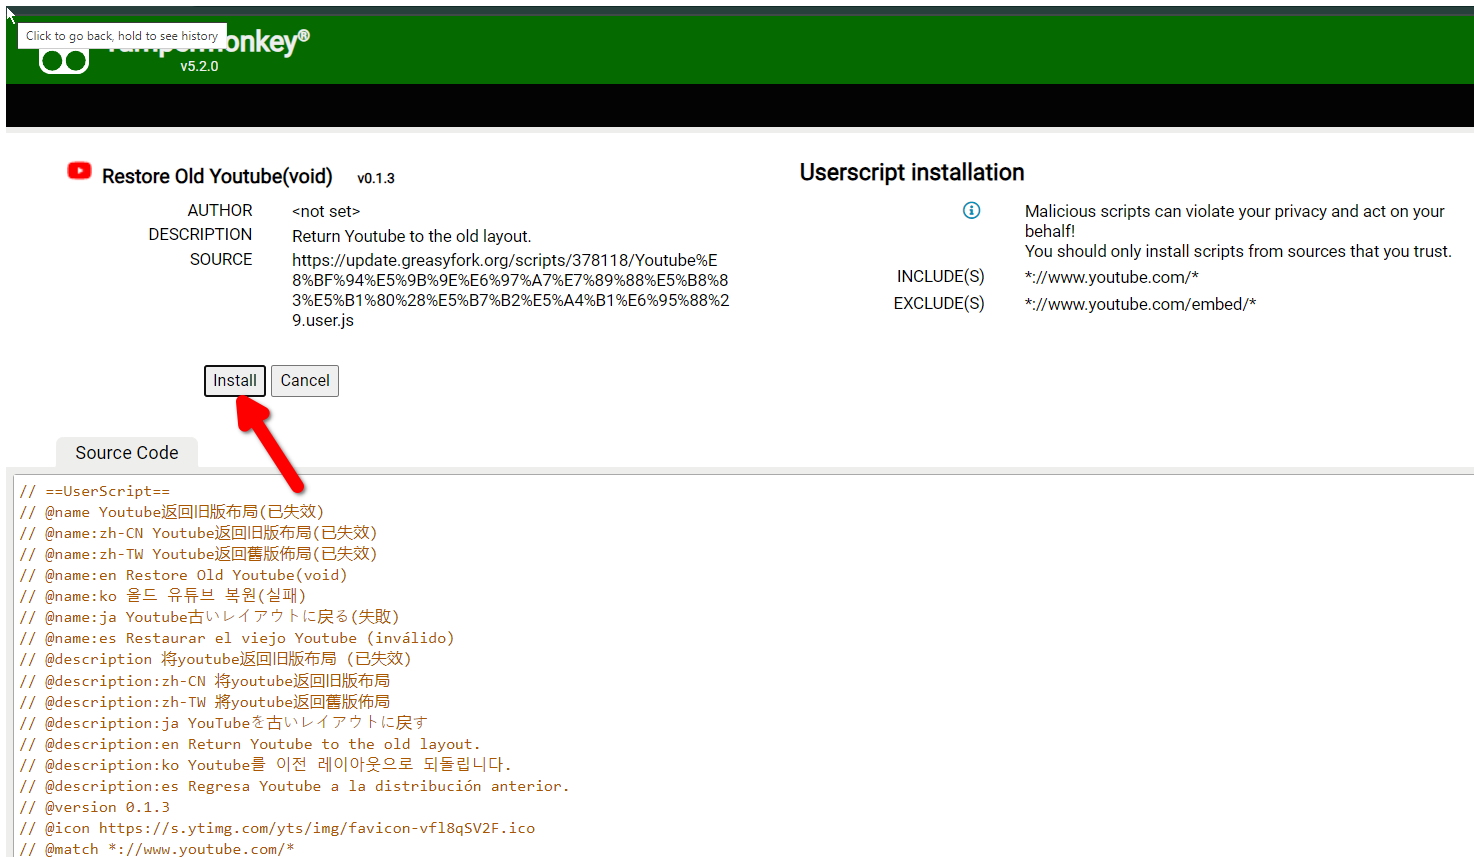
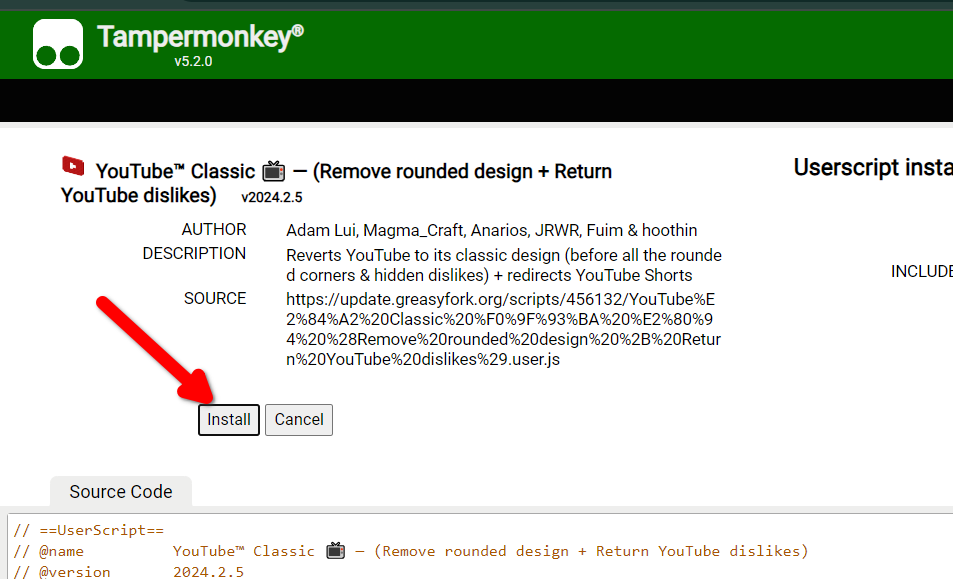
To follow along, open the Restore Old Youtube userscript in GreasyFork. Click “Install this Script.” You’ll be redirected to TamperMonkey to confirm the installation.
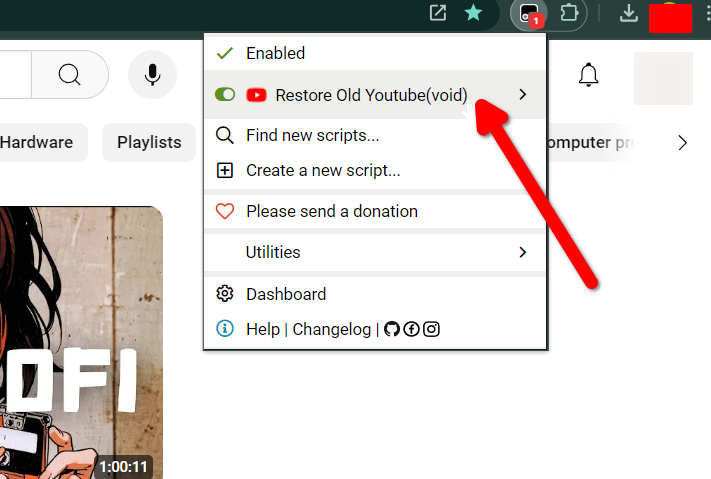
Once that’s done, click the TamperMonkey extension (click the extensions button if you can’t locate it.) Then click “Dashboard.”Make sure that the right script is enabled on the Dashboard. We’re ready to test it now
.Open YouTube in your browser and the layout should be changed. If it hasn’t, click the TamperMonkey extension icon and make sure the script is active.
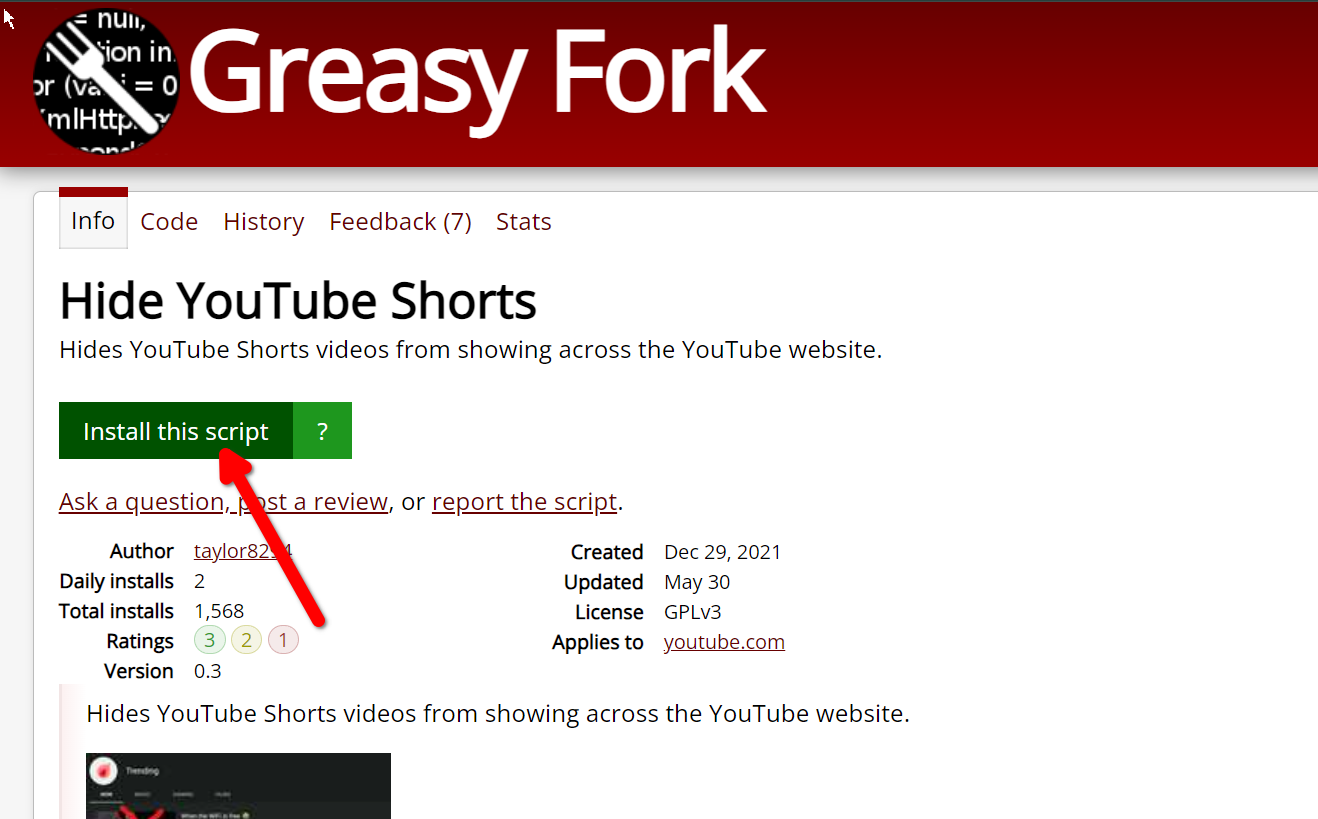
Hide YouTube Shorts
You can also get rid of Youtube Shorts from the feed and search with a simple script. There are more than a dozen scripts available that do the trick. I tested a few of them, and they all worked perfectly.
Hide Youtube Shorts is a good script that I’m using. To load it, click the “Install this Script” button on GreasyFork and hit “Install” again when you’re redirected to the TamperMonkey page.
Go to YouTube and scroll down to see if the Shorts panel is gone.
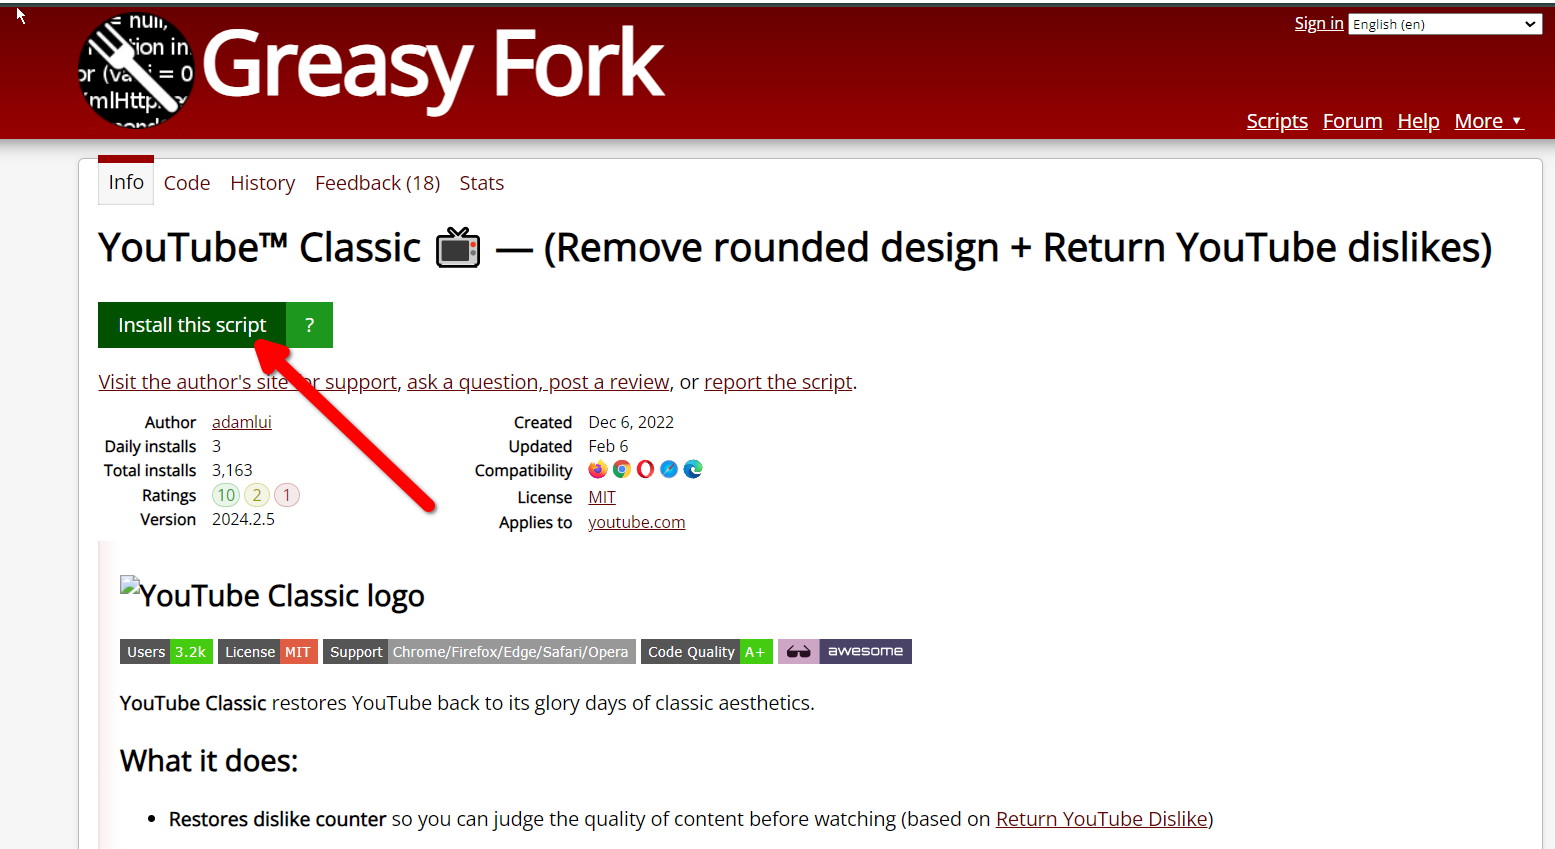
Disable the Rounded Design
I’m not a fan of the rounded design that YouTube has now. If you prefer the old boxy look, here’s how to get it back (you can skip this step if you don’t mind it).
Just install the Youtube Classic userszcript. Open the dashboard and make sure it’s active. Now open YouTube and the UI should be boxy. This script comes with the added bonus of restoring the dislike count under videos.
Pentru a remedia eroarea 0x000000F4 (Blue Screen of Death – BSOD) în Windows, poți urma o serie de pași pentru a diagnostica și rezolva problemele care ar putea cauza această eroare. Iată o listă detaliată de acțiuni pe care le poți încerca:
1. Verificarea conexiunilor Hardware
2. Verificarea și repararea Sistemului de Fișiere
Win + X și selectează “Command Prompt (Admin)” sau “Windows PowerShell (Admin)”).chkdsk /f /r și apasă Enter.3. Verificarea și repararea Fișierelor de Sistem
sfc /scannow și apasă Enter. Așteaptă să se finalizeze scanarea și reparația.mathematica
DISM /Online /Cleanup-Image /CheckHealth

DISM /Online /Cleanup-Image /ScanHealth

DISM /Online /Cleanup-Image /RestoreHealth
4. Actualizarea Driverelor
Win + X și selectează “Device Manager”).5. Verificarea erorilor Hardware
Win + R, tastează mdsched.exe și apasă Enter).6. Verificarea și eliminarea conflitului Software
F8 (sau ține apăsat Shift și selectează “Restart” din meniul Start pentru Windows 10/11) pentru a intra în Safe Mode.7. Reinstalarea Windows-ului
8. Verificarea Jurnalelor Evenimentelor Windows
Win + X și selectează “Event Viewer”).9. Verificarea Setărilor BIOS/UEFI
Del sau F2 la pornirea calculatorului).