Situatie
To prevent a single person from filling up the drive, you can limit the space people can use on a shared PC. Here’s how:
Solutie
1. Open the File explorer by pressing Windows key + E on your keyboard;
2. Click on “This PC”;
3. Under “Devices and drivers” area, right-click the drive you want to limit and select “Properties”;

4. Select the tab named “Quota”, then click the “Show Quota Settings” button;

5. Check both “Enable quota management” and “Deny disk space to users exceeding quota limit”;

6. Click the “Quota Entries” button;

7. If the account you want to restrict isn’t listed, click “Quota” and select “New Quota Entry”;

8. In the “Select Users” tab, click the “Advanced” button;
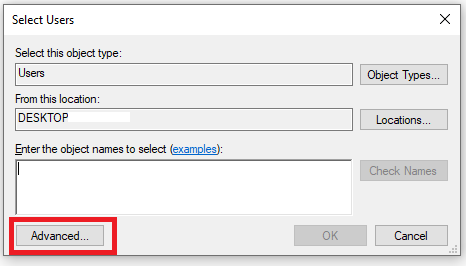
9. Click the Find Now button;

10. Select the account you want;

11. Click on both OK’s;


12. Select the “Limit disk space to” option;

13. Set the amount of space you want and specify the size unit (for example, megabyte or gigabyte). You can also set the amount of space before a warning is triggered to the user and specify the size unit;

14. Now you can click “OK” and quota is saved for the user in question.
After completing the steps, the users you configured storage limits for won’t be able to fill up the entire drive.