Situatie
Your computer with integrated and dedicated graphics won’t necessarily promise the best graphical performance. You may sometimes find some apps struggling to function smoothly or games lagging. That’s because these apps and games are often confused and conflicted about one thing – which graphics chip (GPU) to use?

Solutie
Pasi de urmat
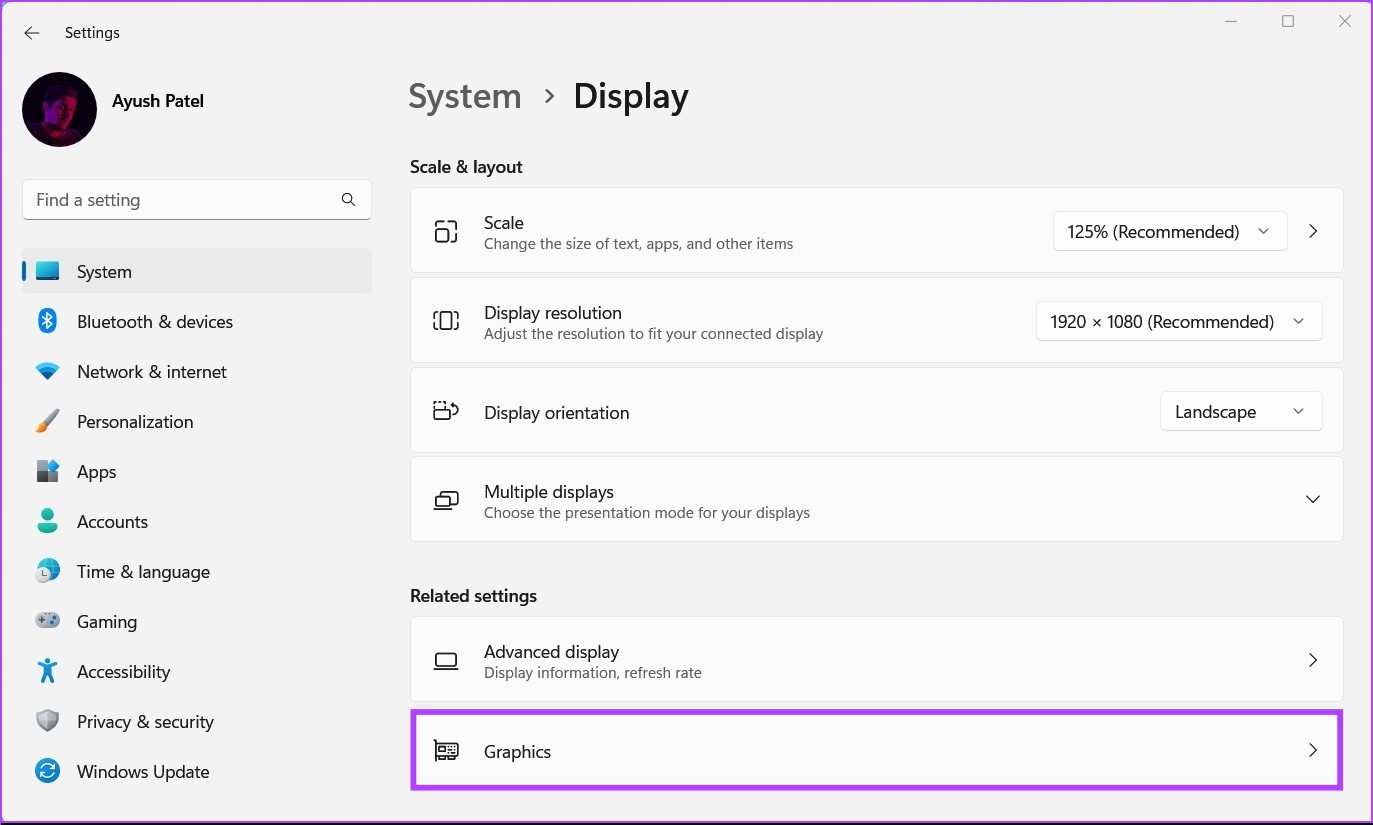
Press the Windows + I shortcut to open the Settings app and click on Display.

Under display settings, scroll down and click Graphics.
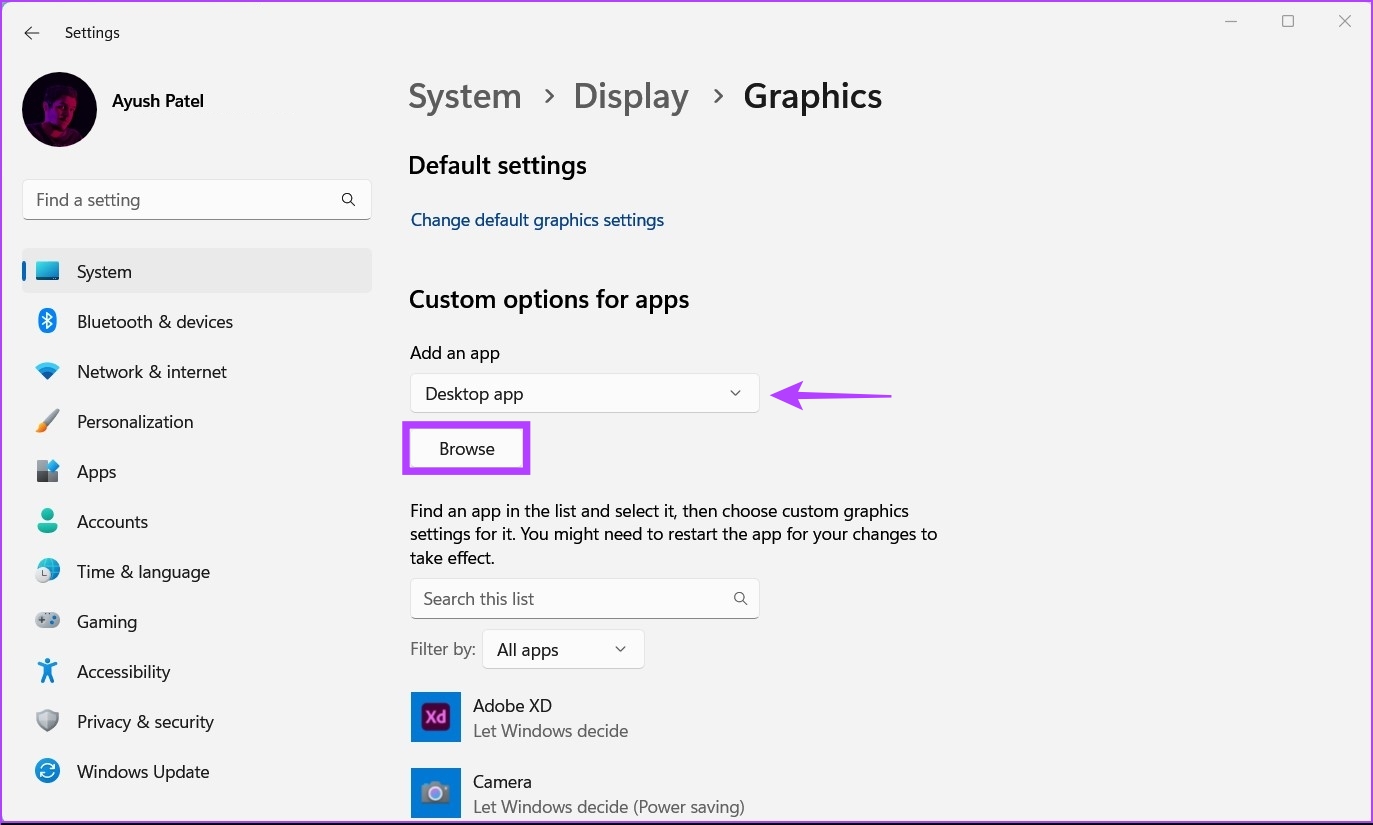
Use the drop-down pointed in the image below to select the Desktop app or Windows Store app option depending on the type of app you want to configure. Then, click on Browse.
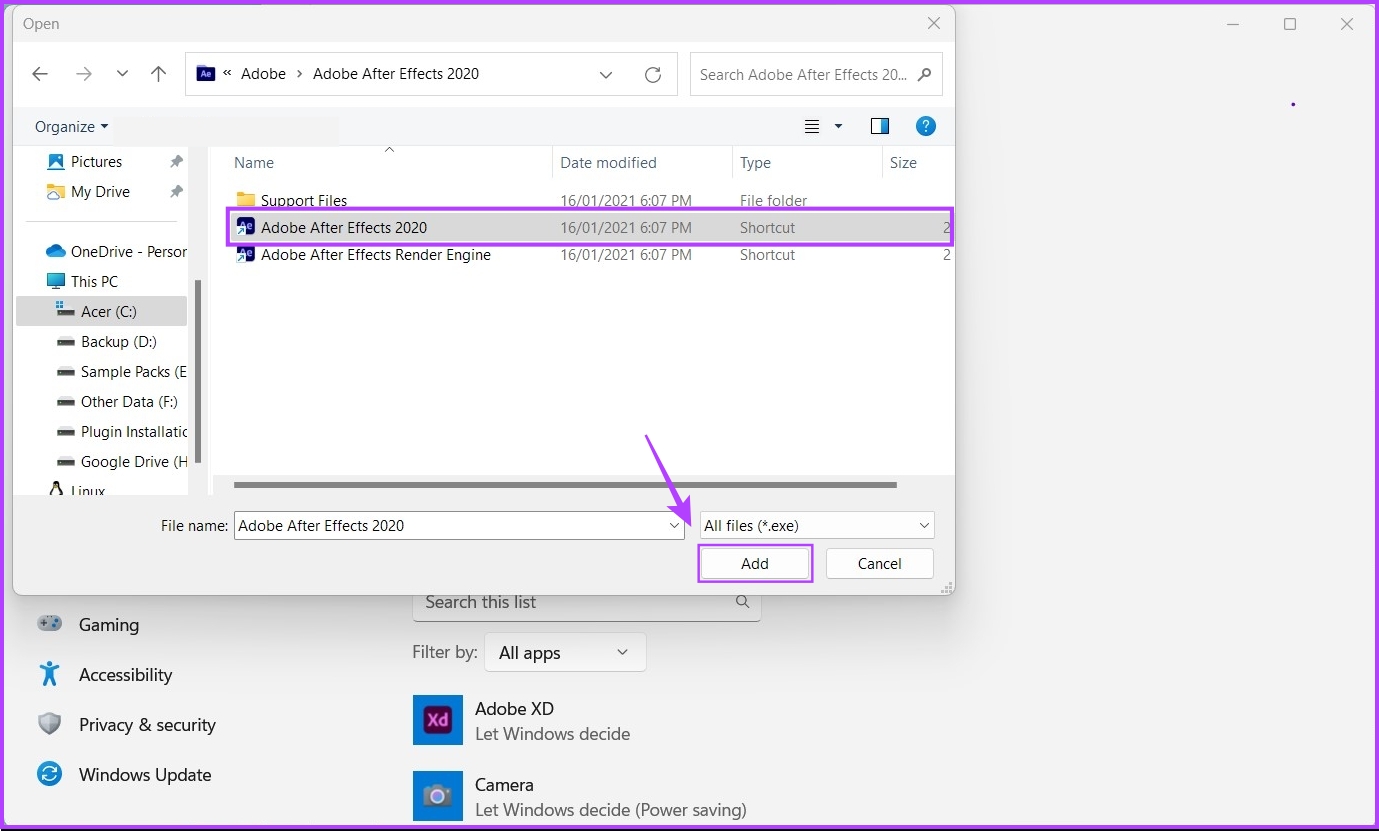
- In the File Explorer window that appears, navigate to your preferred game or app’s install location and select its *.EXE file or shortcut. Then, click Add.
- If you can’t find the app you’re looking for, try navigating to the default ‘Program files’ and ‘Program file (x86)’ installation folders located on your system’s Windows drive.
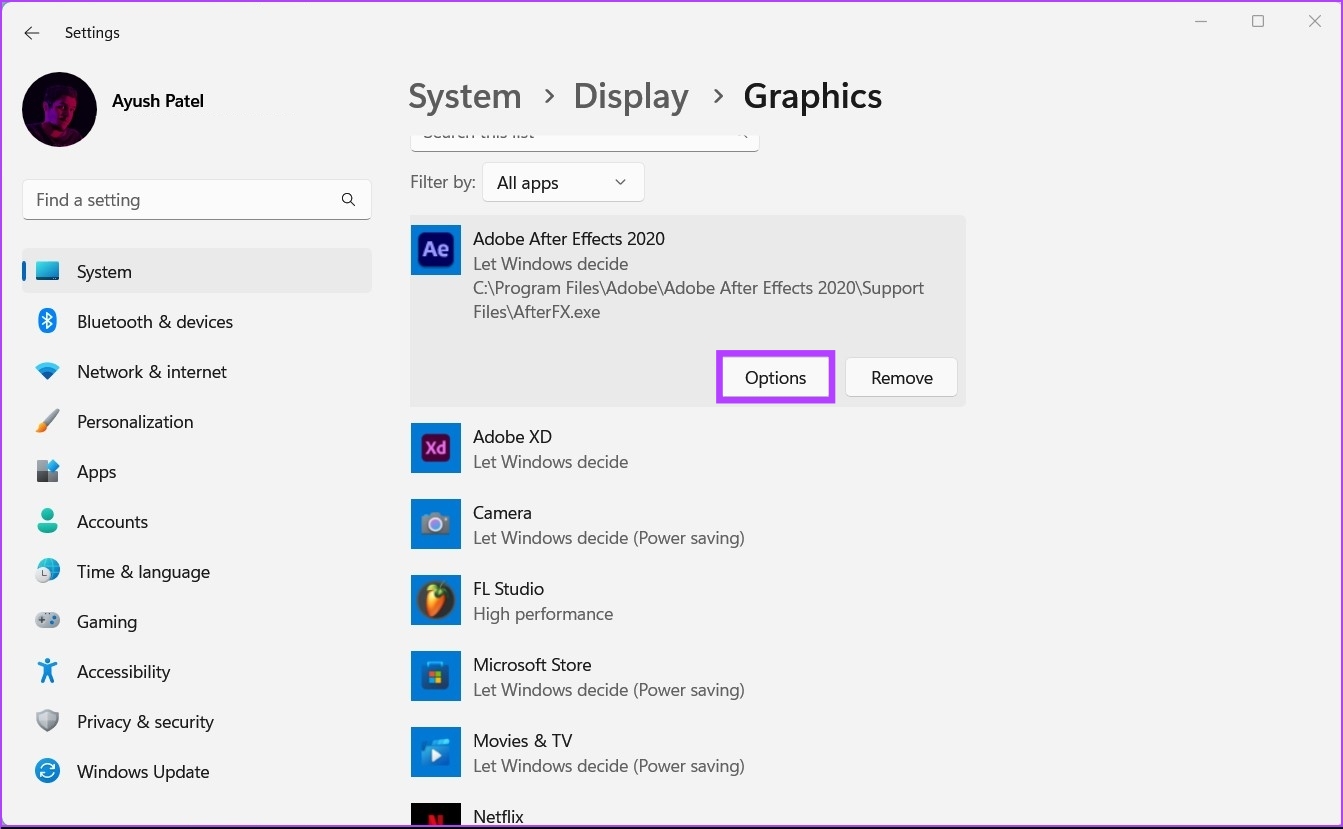
After adding the app, click on Options.
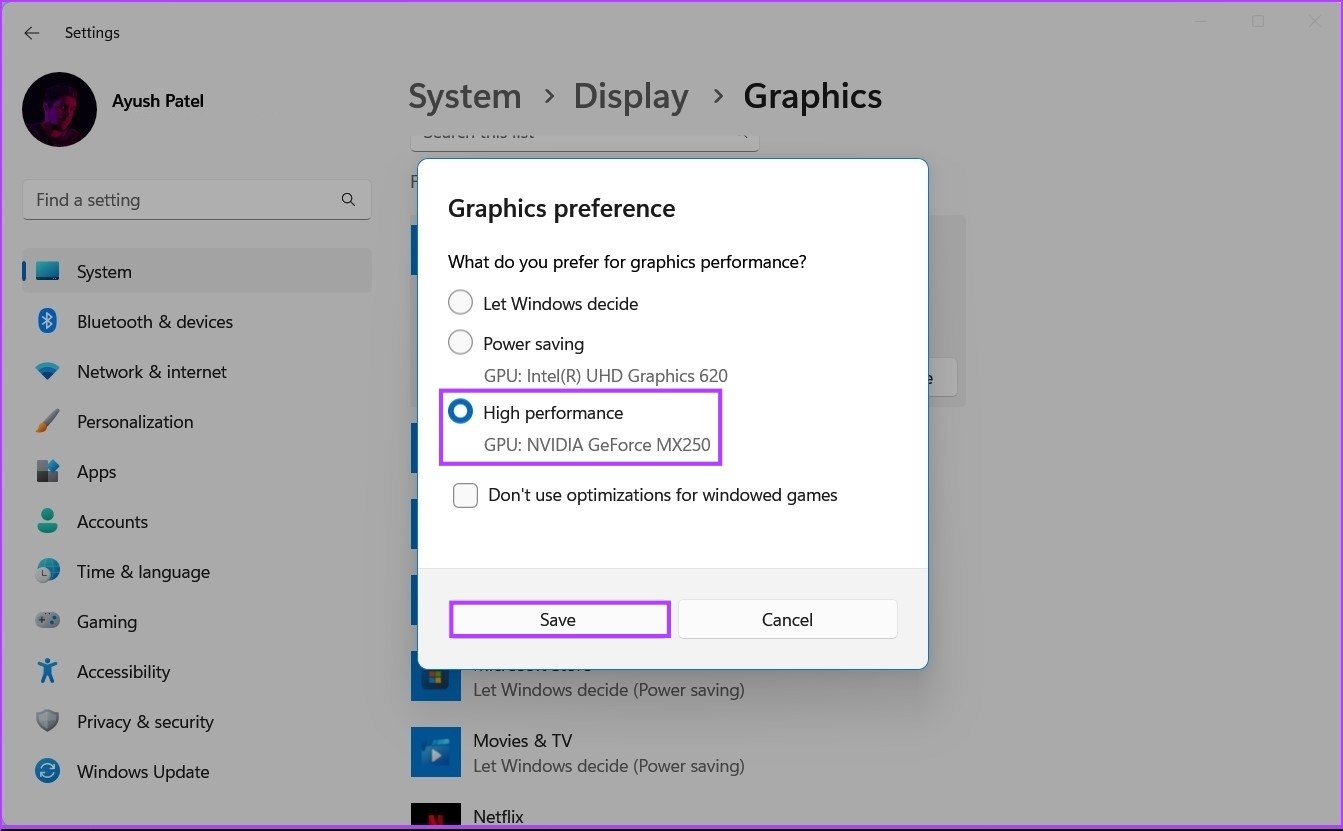
- In the Graphics preference dialog, select your preferred GPU and click Save.
- Power saving option – choosing the processor’s integrated graphics chip, which uses less power.
- High performance option – choosing a dedicated graphics chip that delivers better performance but consumes more power.
Leave A Comment?