Situatie
Solutie
How RAM Testing Tools Work
Your computer’s random access memory (RAM) is its working memory. Your computer’s operating system and applications are continually writing data to RAM and reading it back. For example, when you load a web page like this one, your web browser stores it in RAM while you’re reading it. When you launch a PC game, the game loads information from slower system storage (like a solid-state drive or hard drive) into much faster RAM.
If your computer’s RAM is faulty, this can cause problems. Your computer will save data to RAM and will find different data when it goes to read the RAM. This can lead to application crashes, system freezes, blue screens of death (BSODs), data corruption, and other problems.
These tools function by writing data to each sector of your computer’s RAM and then reading it back in turn. If the tool reads a different value, this indicates that your RAM is faulty.
The best RAM testing tools require you to reboot your computer into a special bootable system. This gets Windows (or another operating system) out of the way and ensures the tool has full low-level access to your RAM. There are tools you can run from within Windows, like HCI’s design Memtest, but they just won’t be as reliable. We don’t recommend them.
Why Test Your RAM?
The most common reason people test their computer’s memory is to resolve issues with repeated crashes. If you frequently get BSDOs a RAM test is a good way to diagnose issues. This is especially the case if the BSOD error message makes reference to computer memory. We’ve found faulty RAM to be to blame for specific error messages like the common “Page Fault in NonPaged area” error.
It’s also a smart move to run a memory test as soon as you install new RAM sticks. It’s not unheard of for manufacturers to ship out RAM (and other hardware) that’s dead on arrival, so putting your brand new RAM to the test right out of the box will let you spot manufacturer issues and get a replacement before the problem hardware interupts your gaming sessions.
By the way, though we’re showing you different memory testing tools, it’s not a bad idea to use both. Different software might be better or worse at detecting specific types of errors, so there’s a minor chance one will catch something that the other doesn’t. If you’ve got the time, we recommend getting a “second opinion” this way.
Option 1: Run the Windows Memory Diagnostic
Windows has a built-in RAM testing tool. It’s included on Windows 10, Windows 11, Windows 7, and all other modern versions of Windows.
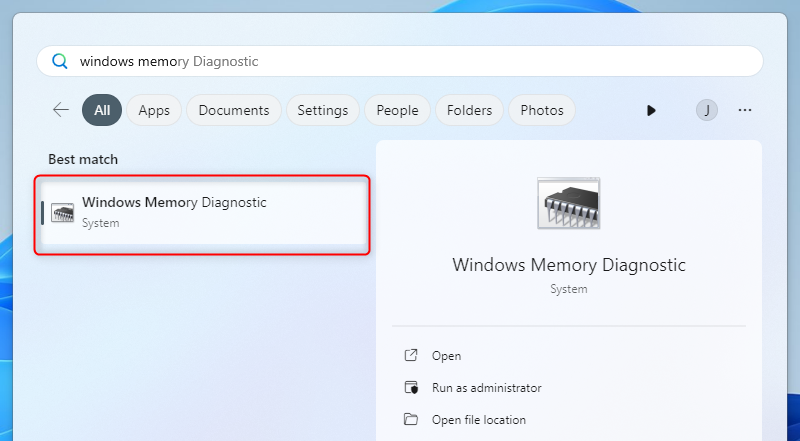
To launch the Windows Memory Diagnostic tool, open the Start menu, type “Windows Memory Diagnostic”, and press Enter.
- You can also press Windows Key+R, type “mdsched.exe” into the Run dialog that appears, and press Enter.
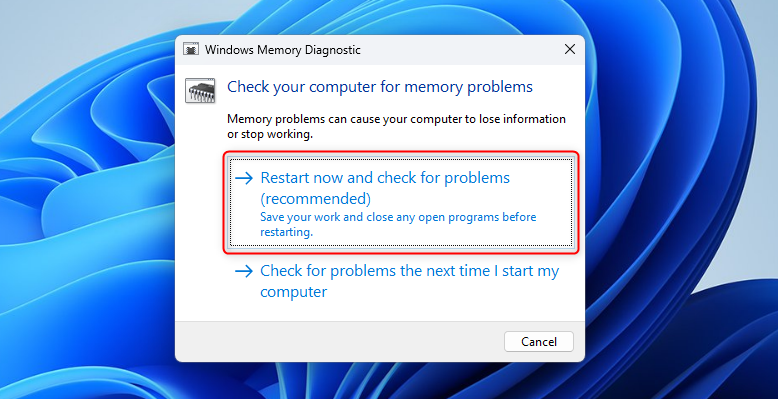
- You’ll need to reboot your computer to perform the test. While the test is happening, you won’t be able to use your computer.
- To agree to this, click “Restart now and check for problems (recommended).” Be sure to save your work first. Your computer will immediately restart.
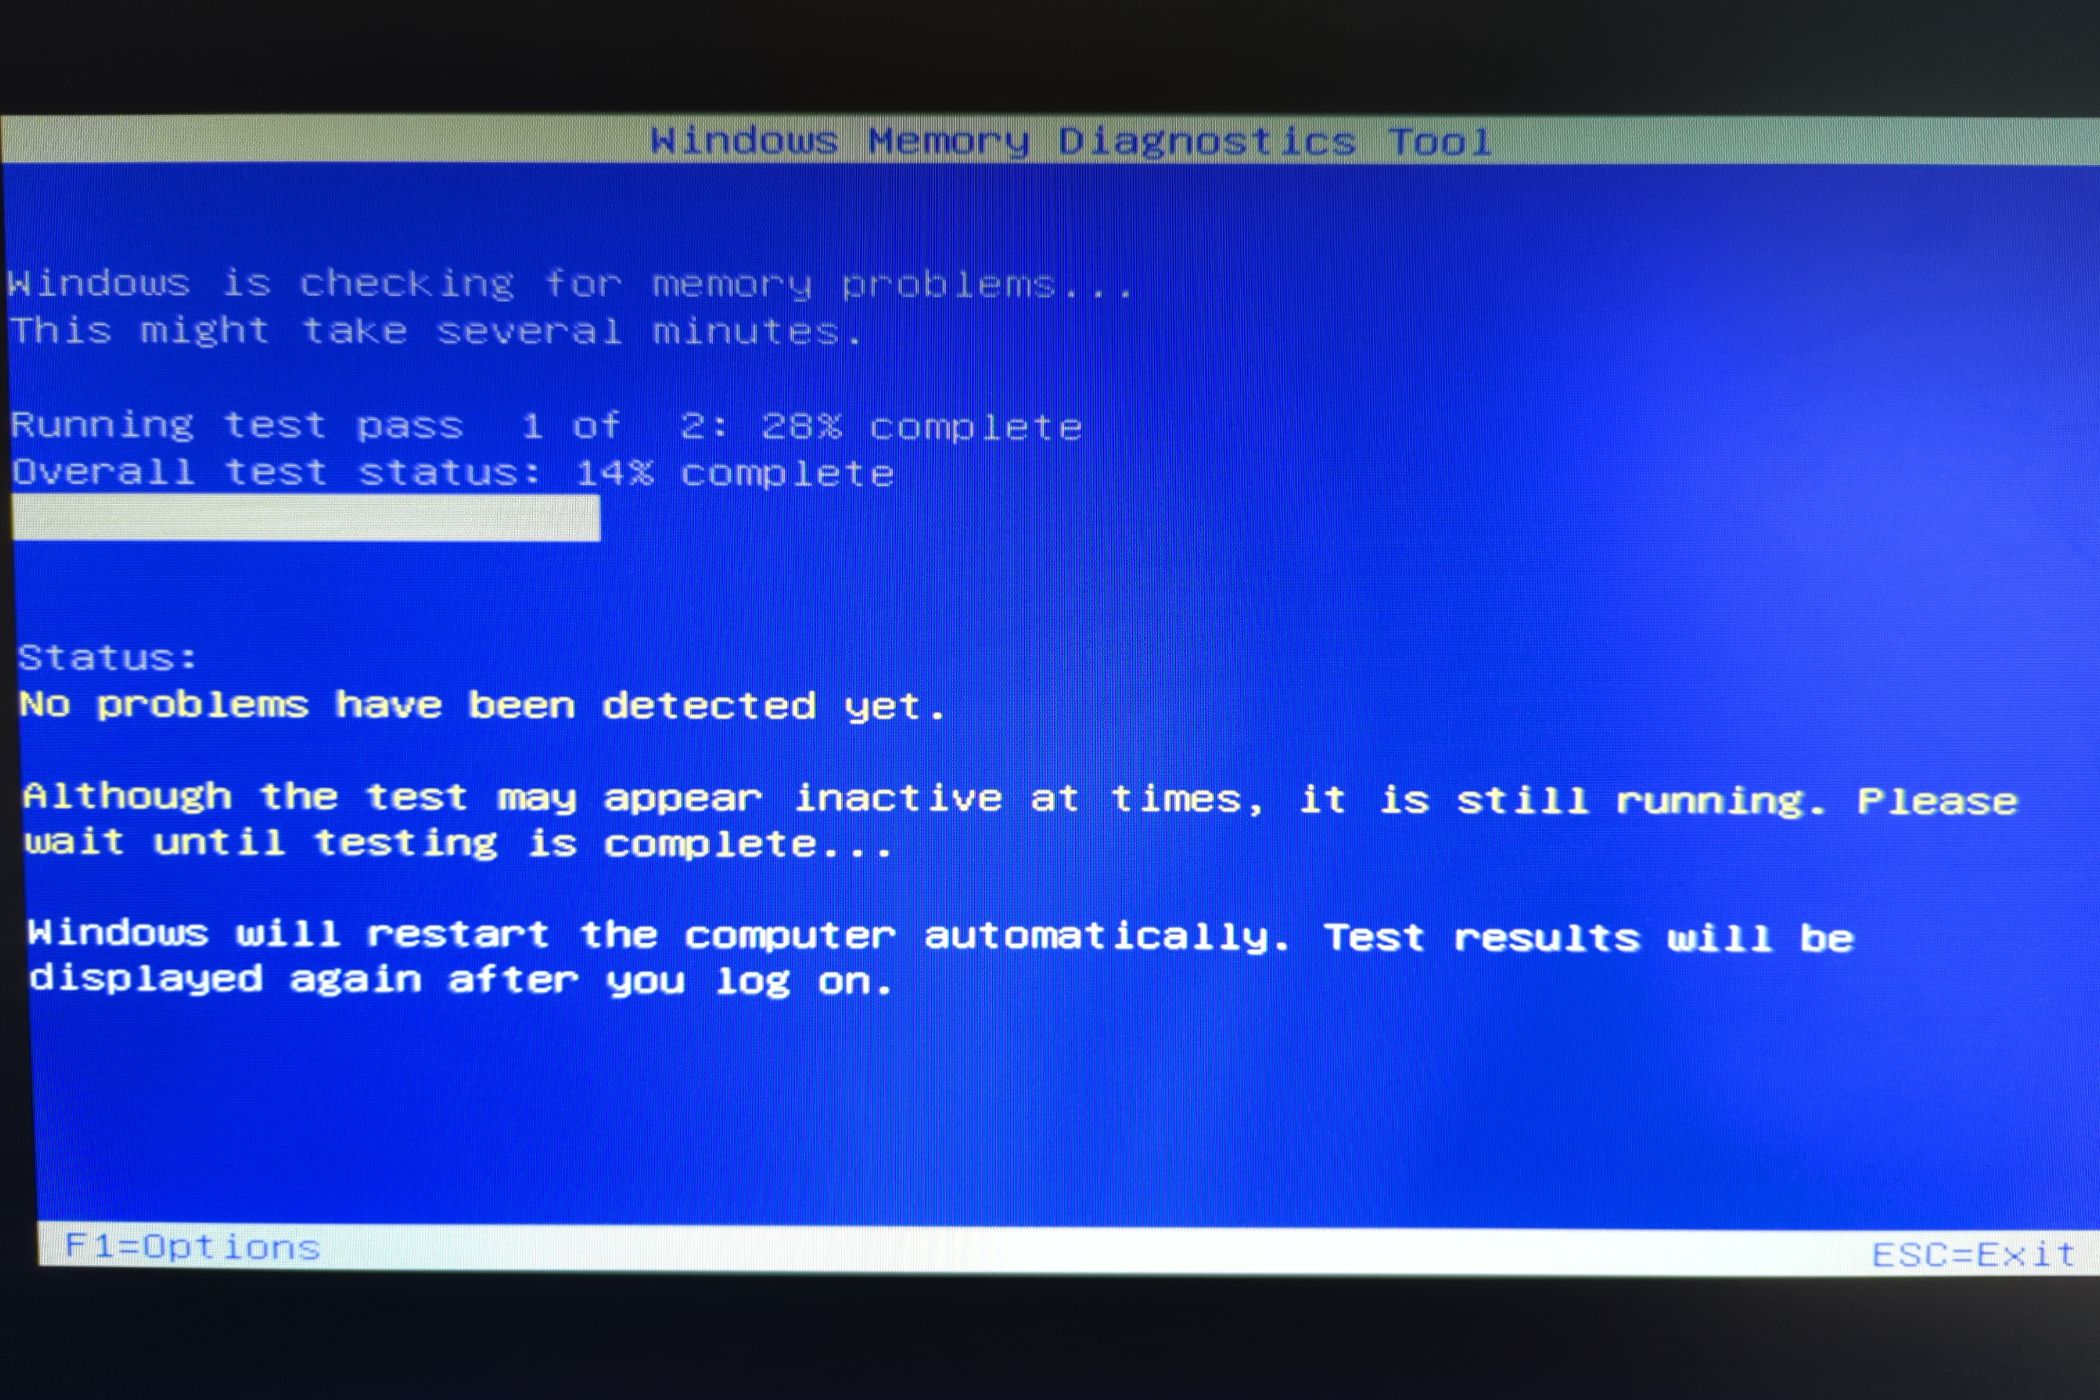
Your computer will restart and the Windows Memory Diagnostics Tool screen will appear. Just leave it be and let it perform the test. This may take several minutes. During this process, you’ll see a progress bar and a “Status” message will inform you if any problems have been detected during the process.
However, you don’t need to watch the test—you can leave your computer alone and come back to see the results later.
When it’s done, your computer will automatically reboot and return to the Windows desktop. After you log in, the test results will appear.
At least, that’s what the tool says is supposed to happen. The results didn’t automatically appear for us on Windows 10 and Windows 11. But here’s how to find them, if Windows doesn’t show you.
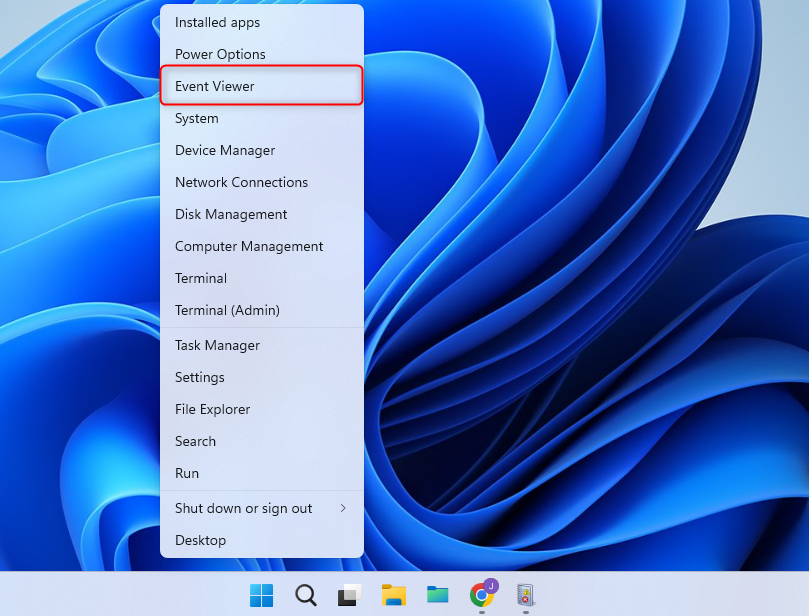
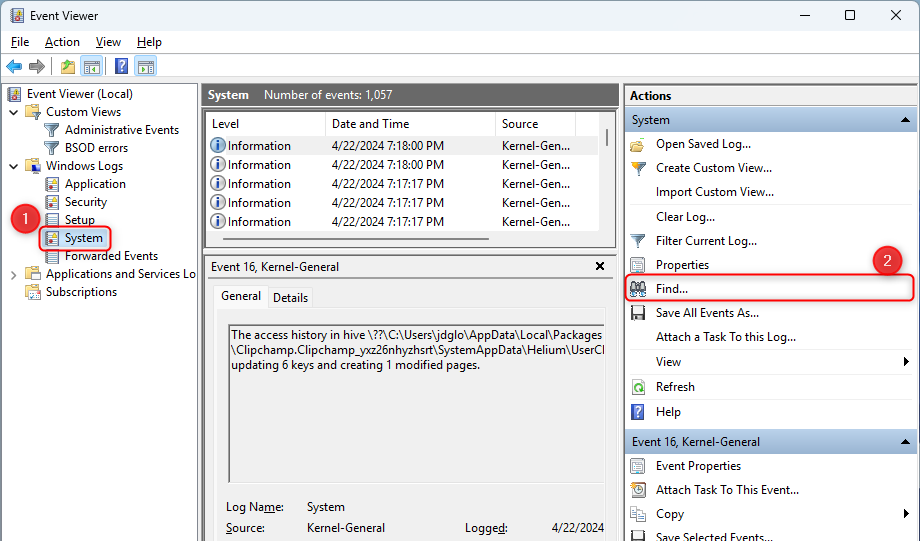
First, open the Event Viewer. Right-click the Start button and select “Event Viewer”. If you’re using Windows 7, press Windows Key+R, type “eventvwr.msc” into the Run dialog, and press Enter.
Navigate to Windows Logs > System. You’ll see a list of a large number of events. Click “Find” in the right pane.
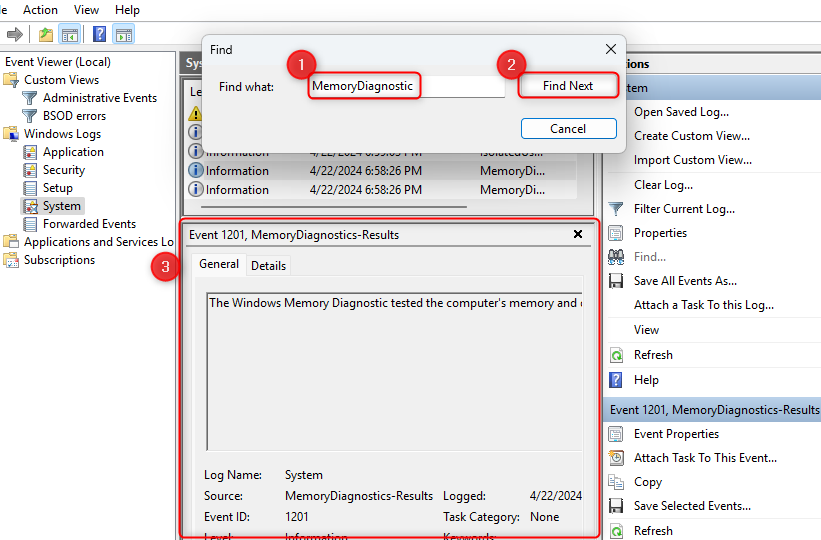
Type “MemoryDiagnostic” into the find box and click “Find Next.” You’ll see the result displayed, as well as additional details about your RAM, at the bottom of the window.
The text doesn’t wrap inside the window, so you can’t see it in the screenshot above, but in our case Windows returned a message stating no errors were found in our RAM.
Option 2: Boot and Run MemTest86
If you’re looking for a more powerful testing tool, you can download and use MemTest86. It performs a wider variety of tests and may find issues that the included Windows test won’t. The latest releases of this tool offer a paid version with more features, although the free version should do everything you need. You don’t need to pay for anything. MemTest86 is signed by Microsoft, so it will work even on systems with Secure Boot Enabled.
If you’re looking for another option, you could also try the free and open-source MemTest86+. However, we’ve used MemTest86 for a long time.
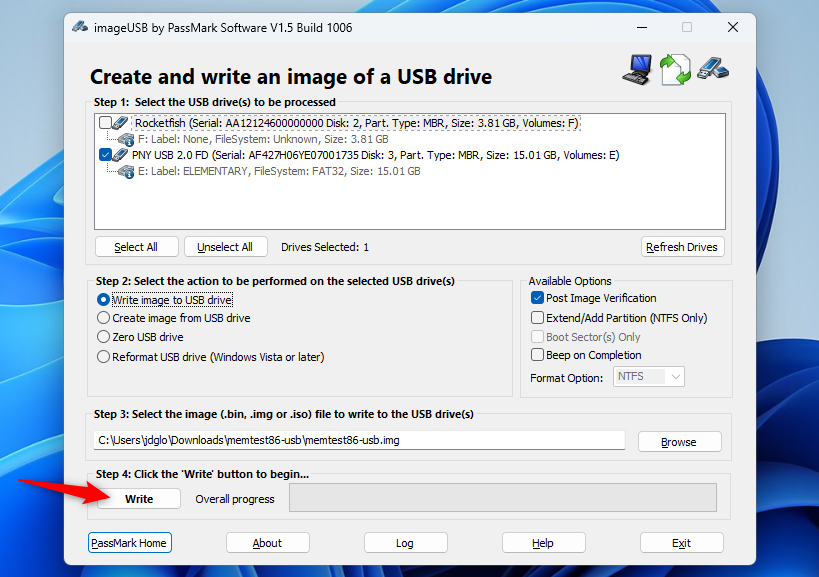
Both of these are bootable, self-contained tools. MemTest86 provides a USB image you can copy to a USB drive. Just run the EXE file included with the download and provide a spare USB drive to create a bootable USB drive.
Writing the MemTest86 image to a USB drive will erase its contents. Be sure you’ve backed up any important files on the drive first.
Once you’ve created bootable media, restart your computer and tell it to boot from the USB drive you copied the memory test tool to.
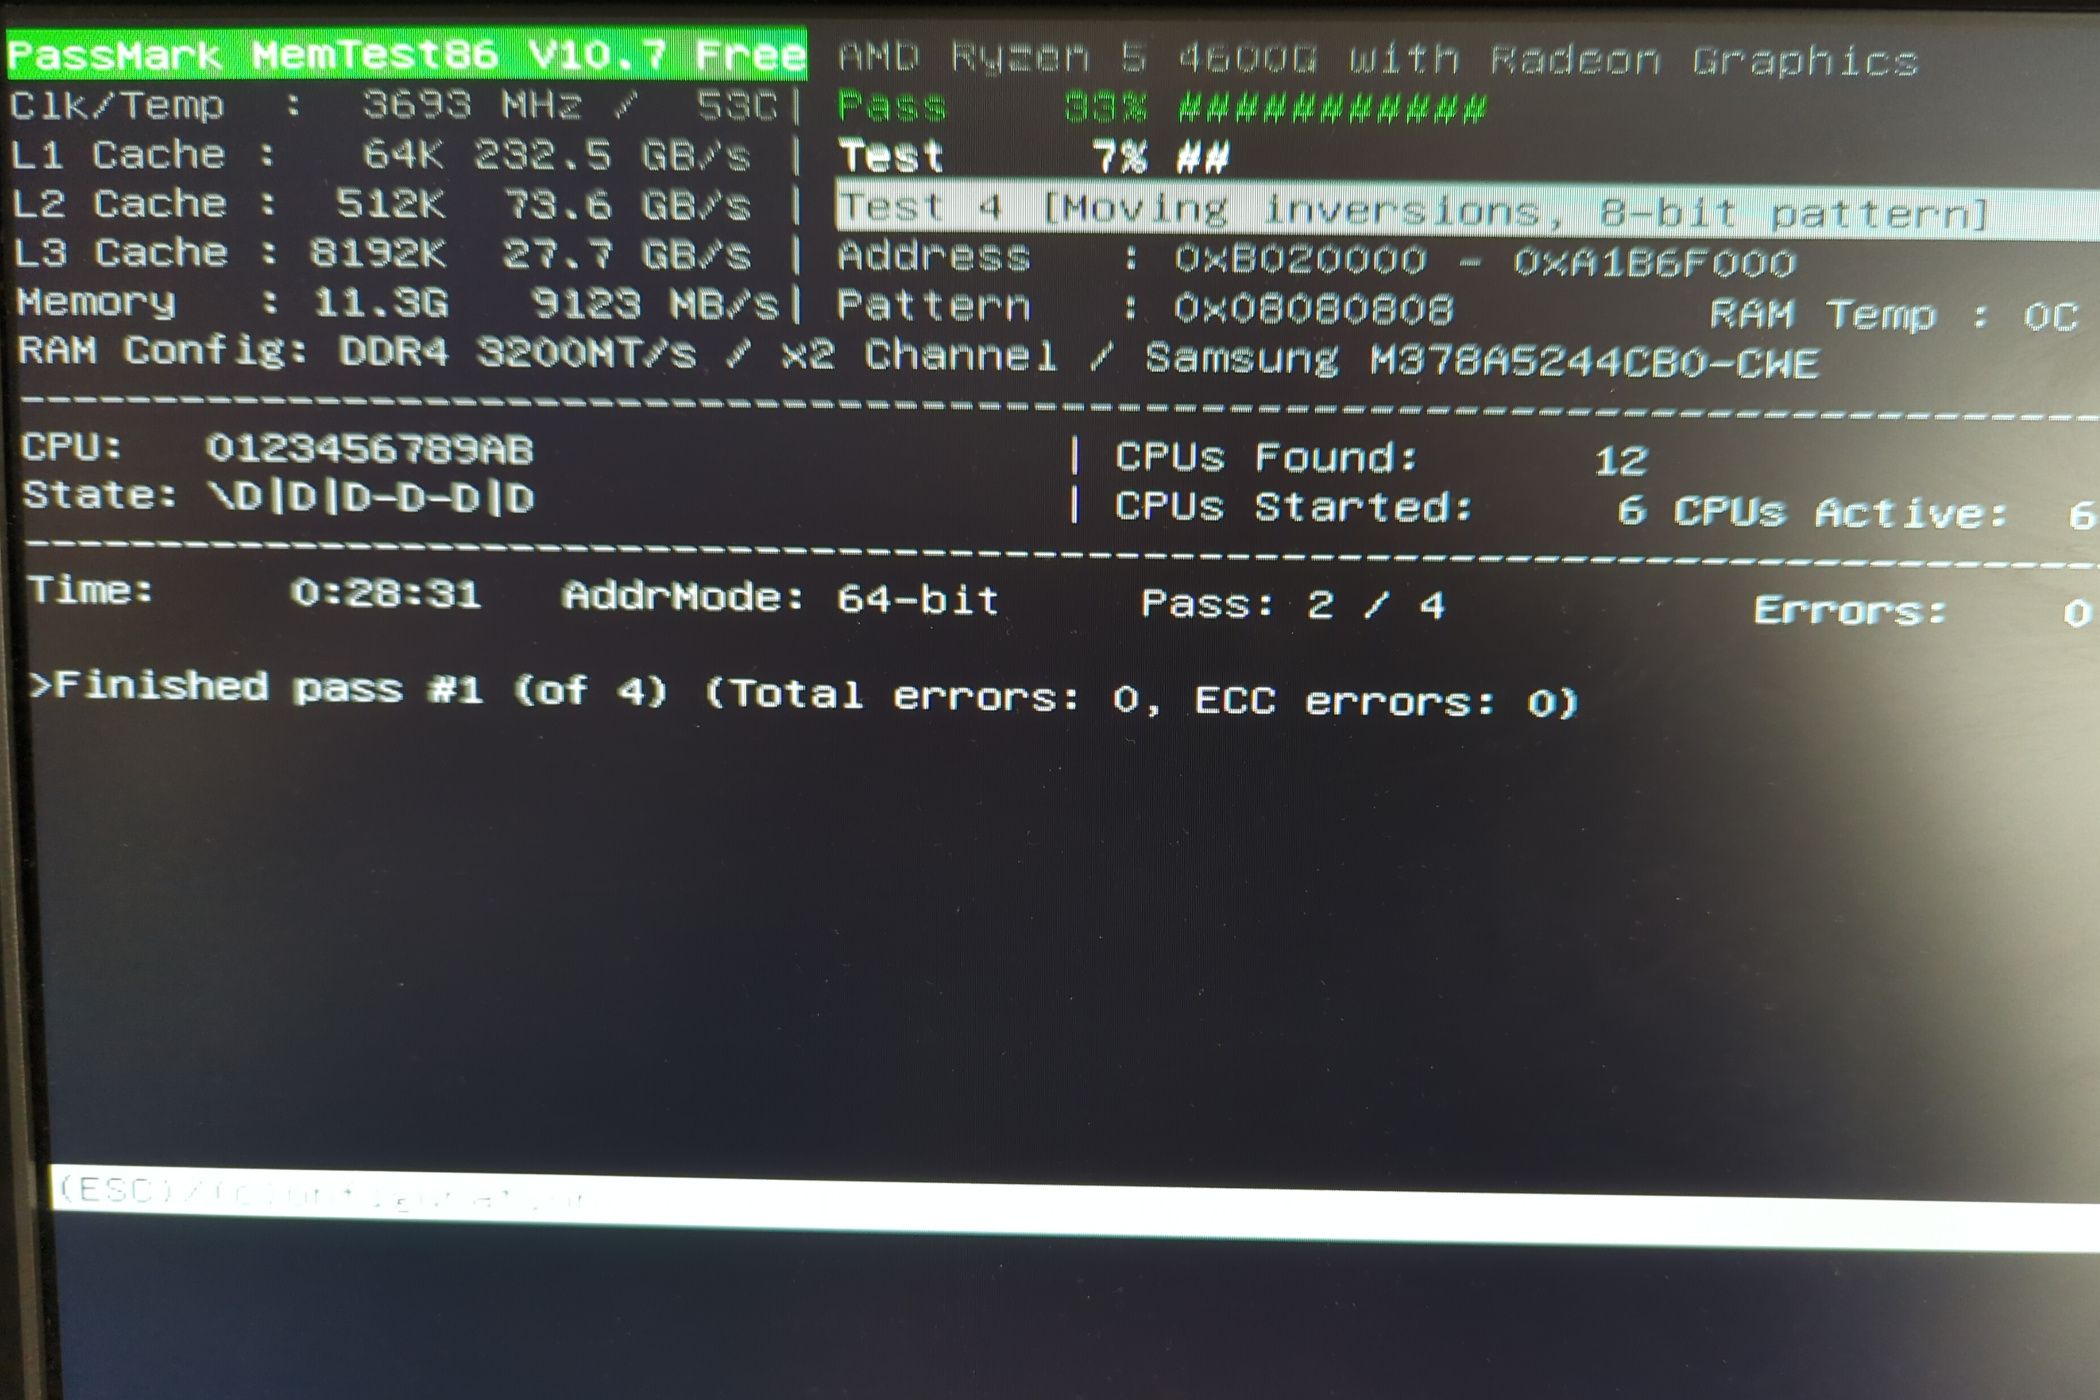
The tool will boot and automatically start scanning your memory, running through test after test and informing you if it finds a problem. It will keep running tests until you choose to stop it, allowing you to test how the memory behaves over a longer period of time. Information about any errors will be displayed on your screen. When you’re done, you can just press the “Esc” key to exit it and restart your computer.

Leave A Comment?