Situatie
When a business, organization, or individual wants to create a consistent document such as forms, letters, or mailing labels that are identical except for specific information, for instance, the name, address, or telephone number of the Recipient. To do this, you need to perform the Mail Merge process, which allows you to create a simple customized document.
Solutie
Pasi de urmat
How to use Mail Merge in Word
The Mail Merge Tools on the Mailing Tab of Microsoft Word allows you to perform Mail Merging. These tools are
- Start Mail Merge: The Start Mail Merge create one document and send it to multiple people. You can insert fields such as Name and Address. Word will make a copy for each Recipient and replace those fields with the person’s info.
- Select Recipient: Select Recipient allows you to choose the list of people you would like to send your document. Edit Recipient List: This changes your recipient list or chooses specific people to receive the mailing. In this tool, you can sort, filter, find and remove duplicates and validate the list’s addresses.
- How to set up a Manual Mail Merge for letters
To set up a Manual Mail Merge for a letter, you need first to create a blank document, go to the Mailing tab.
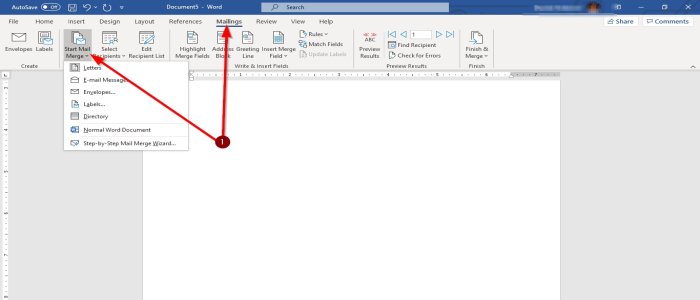
- Select Start Mail Merge, then select Letters.
- Click Select Recipients.
- A drop-down menu will appear; you can choose to select Type a New List, Use an Existing List, choose from Outlook Contacts.
- We are going to use Type a New List.
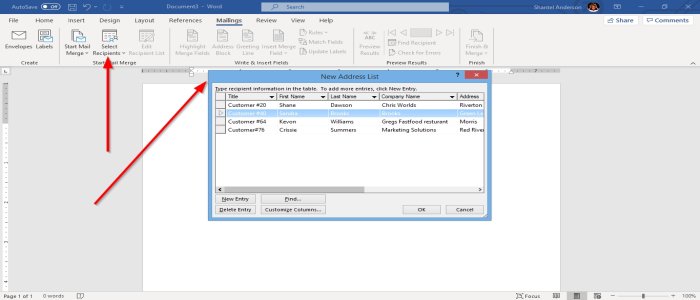
A dialog box labeled New Address List will pop up. In the dialog box, you can enter text into the rows and columns. On the left of the New Address List dialog box, some commands allow you to modify your list; these are called New Entry, Delete Entry, Find and Customize Columns.
To add a new row, click New Entry. To delete a row, select Delete Entry. To add, delete, rename, move up and down Columns, Select Customize Columns. Enter Data into your list, choose OK and Save your file. If you want to go back and edit your list click Edit Recipient List, now edit.
Now you can write or copy a letter into the document.
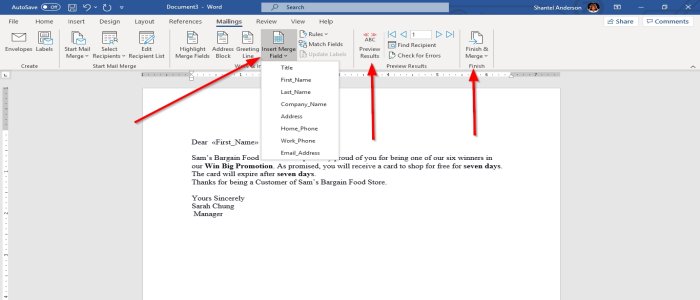
Place the cursor where you want to insert fields and select Insert and Merge Fields; choose the fields you want. You can see a preview of your Fields by clicking ABC Preview Results. To return to the documents showing the fields, click on the ABC Preview Results again.

Now select Finish and Merge. You can choose to Edit Individual Documents, Print Document, and Send Email Messages. Select your choice; then you will see the result.
Using the Mail Merge Wizard for the Letter
This time, we will create the mail merge by using the Step-By-Step Mail Merge Wizard, which is the easiest process in creating a Mail Merge.
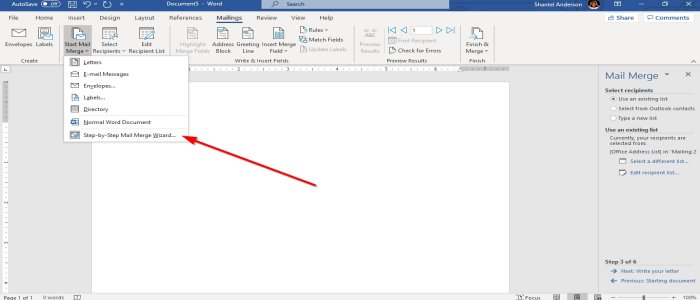
- Go to Start Mail Setup at the bottom of the Drop-Down Menu and select Step-By-Step Mail Merge Wizard.
- A Mail Merge Pane will appear on the right. Select a Document Type; we will Choose Letter. Now click Next.
- We are going to use the Current Document.
- Select Recipients: You can choose to type a new list, select from outlook contacts, and write a new list. We are going to an existing list.
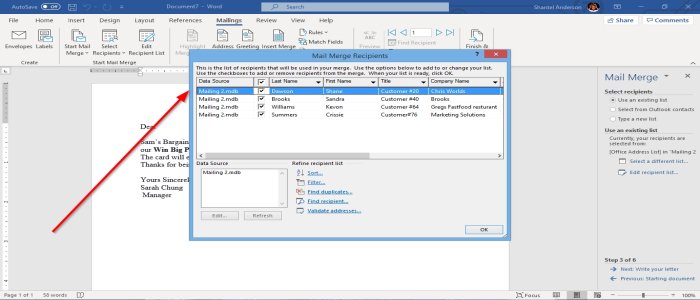
- Browse to select the file. Then Click Next, then OK. Mail Merge recipients will pop up
- You can choose to enable or disable the Recipients by ticking and unticking the Box; we will click OK, then Next.
- Write Your Letter. This showcase Add Recipient information to your letter. Place the cursor where we want the information to go.
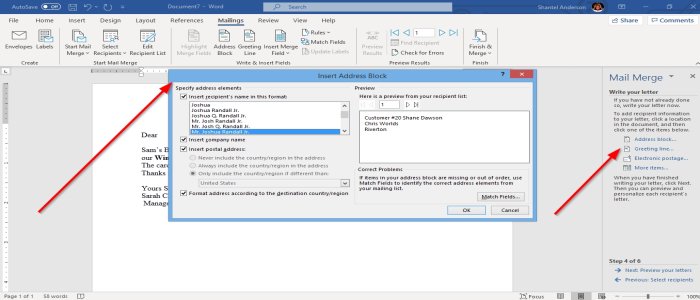
- We will use Address Block; an Insert Address Dialog Box will appear. You can choose the format you want it in.
- There is a Navigation Button on the right of the Insert Address Block window that allows you to move through the address block.
- Choose the address, then click OK. On the Mail Merge Pane you can also insert a greeting by clicking the Greeting Linechoose your selection, OK and then Next.
- Preview Your Letters. Under preview your letter paragraph, there is a navigation button that (<< Recipient>>) allows you to navigate your address block, then Next.
- Complete merge – You will see two choices either to Edit Individual or Print. Select Edit Individual.
Now we have a Mail Merge.
Leave A Comment?