

Mobile
iPhone 280 Solutii
Configurare cont email 10 Solutii
Instalare si configurare aplicatii specifice 80 Solutii
Sincronizare si migrare de date 13 Solutii
Securitate si criptare dispozitive 14 Solutii
Optimizare si curatare OS 11 Solutii
Windows Phone 24 Solutii
Android 481 Solutii
BlackBerry 16 Solutii
How to move your Android Auto taskbar to the side (or bottom)
Android Auto is quite literally the same Android that’s on your phone, but it doesn’t have the same level of customization. There are no alternate home screen launchers or icon packs. However, one thing you can do is move the taskbar—though the option is not easy to find.
The taskbar in Android Auto—the place where you see the clock, app shortcuts, assistant button, etc—can actually be in two locations. Depending on the size and aspect ratio of your vehicle’s display, you’ve either seen it at the bottom or side of the screen. It’s possible for you to choose the side, but it’s not clear in the settings.
“Quick Controls” have a sneaky second purpose
It determines more than it says
As I’ve alluded to, there’s not a simple setting labeled “Taskbar Location” that allows you to pick a side. Instead, where your taskbar sits actually depends on how Android Auto handles media playback controls.
In many vehicles, the Android Auto taskbar defaults to the bottom of the screen. That’s where it displays media controls—like play, pause, and skip—when you’re listening to music or a podcast. These media widgets are known in the settings as “Quick Controls,” and they’re only available in a horizontal layout.
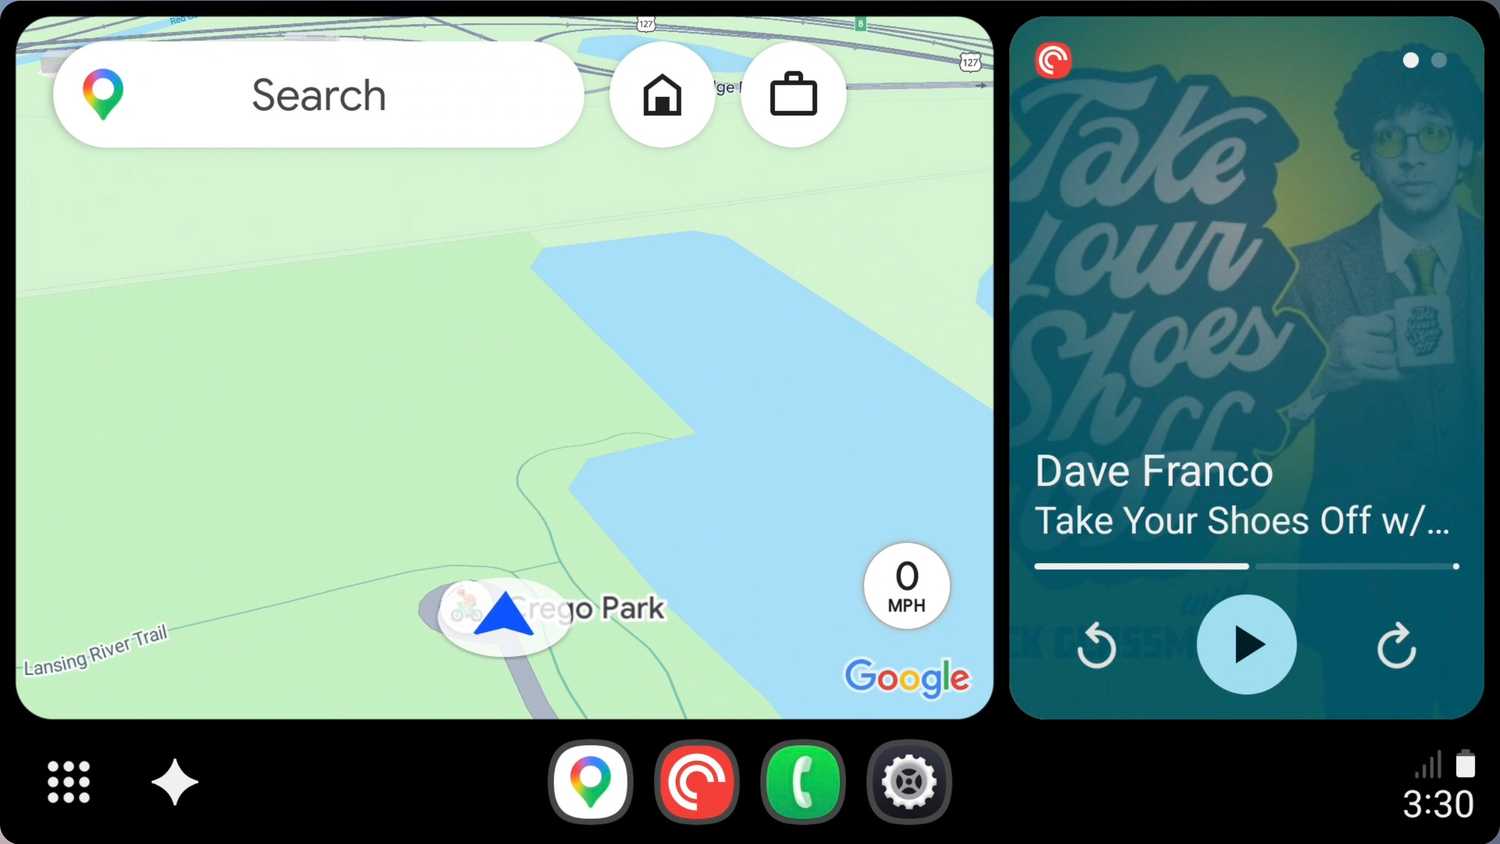
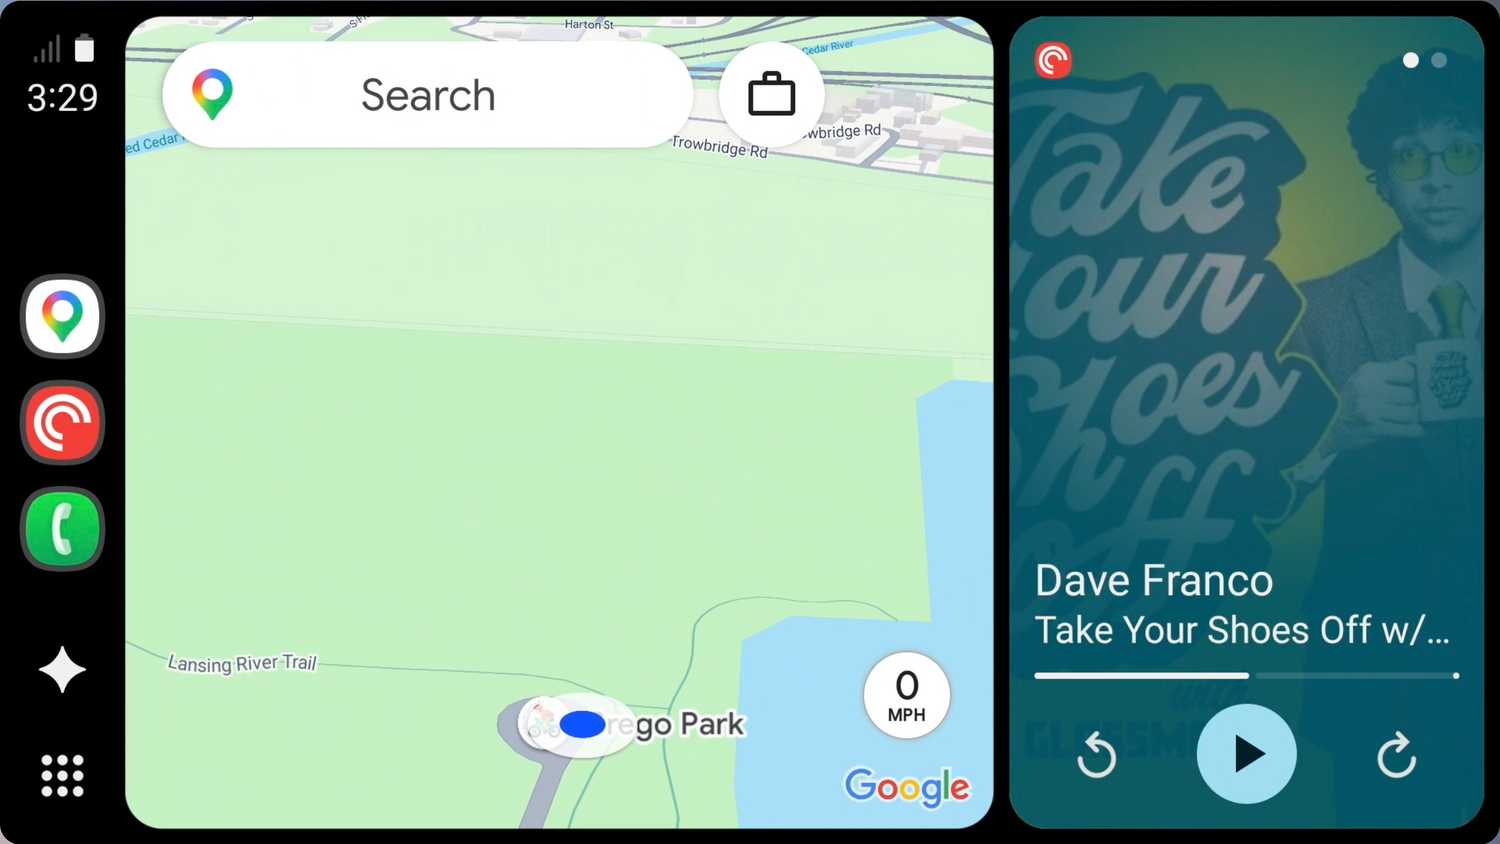
Because of that constraint, toggling Quick Controls also dictates where your taskbar can go. When Quick Controls are turned on, the taskbar must be at the bottom of the screen to fit the media widgets. When you disable Quick Controls, those buttons aren’t needed, and the taskbar moves over to the side of the display closest to the driver.
So, moving the taskbar ultimately comes with the choice of features or layout. Quick Controls are genuinely handy if you like keeping Google Maps expanded to full screen, but still want access to your music or podcasts. On the flip side, if you already run your display in split-screen mode or would like to maximize vertical screen space, the side taskbar is a better position.
How to move the Android Auto taskbar
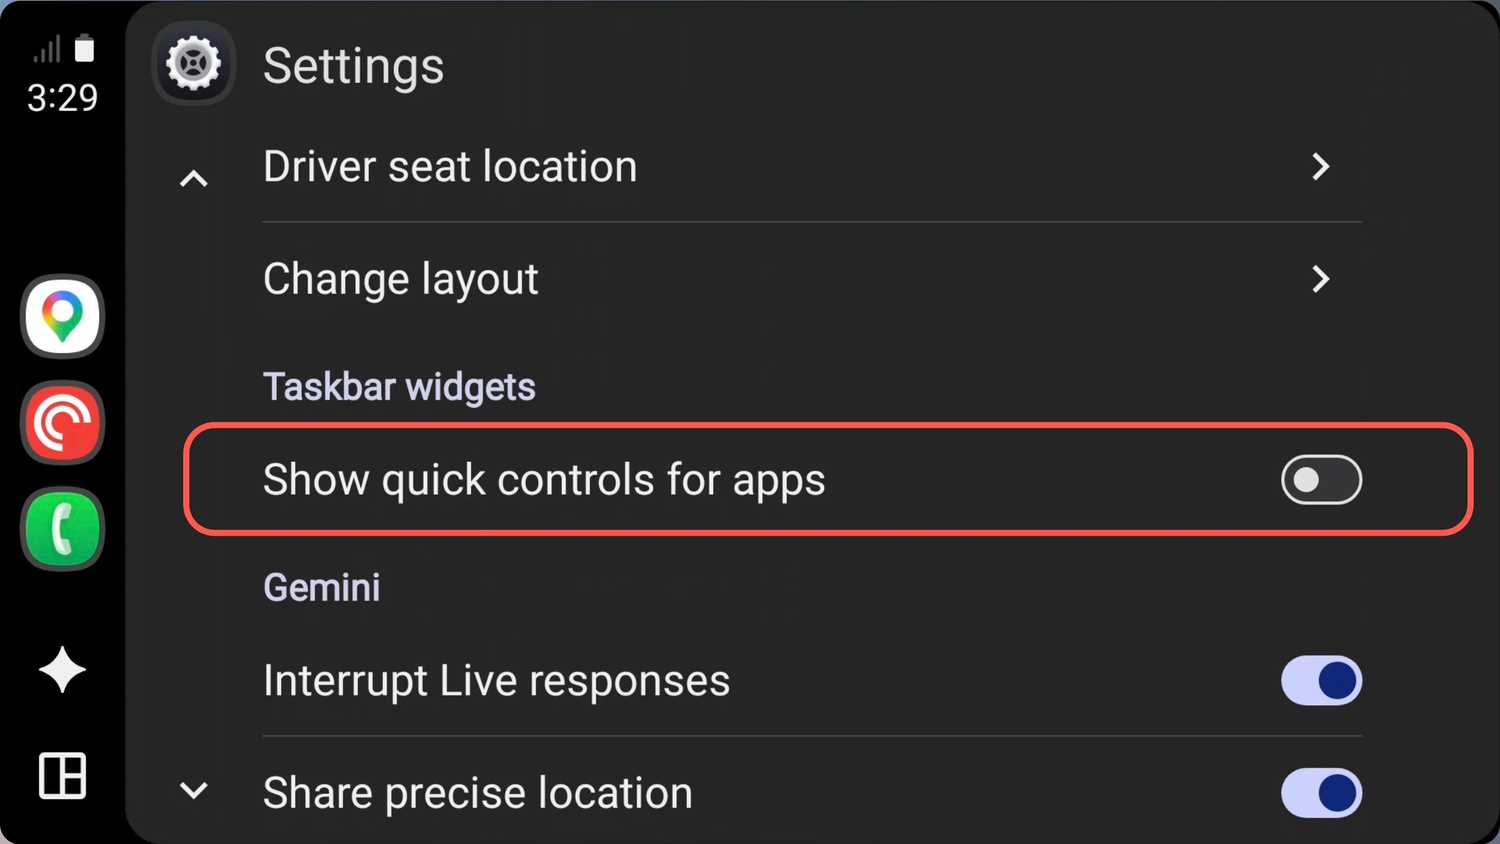
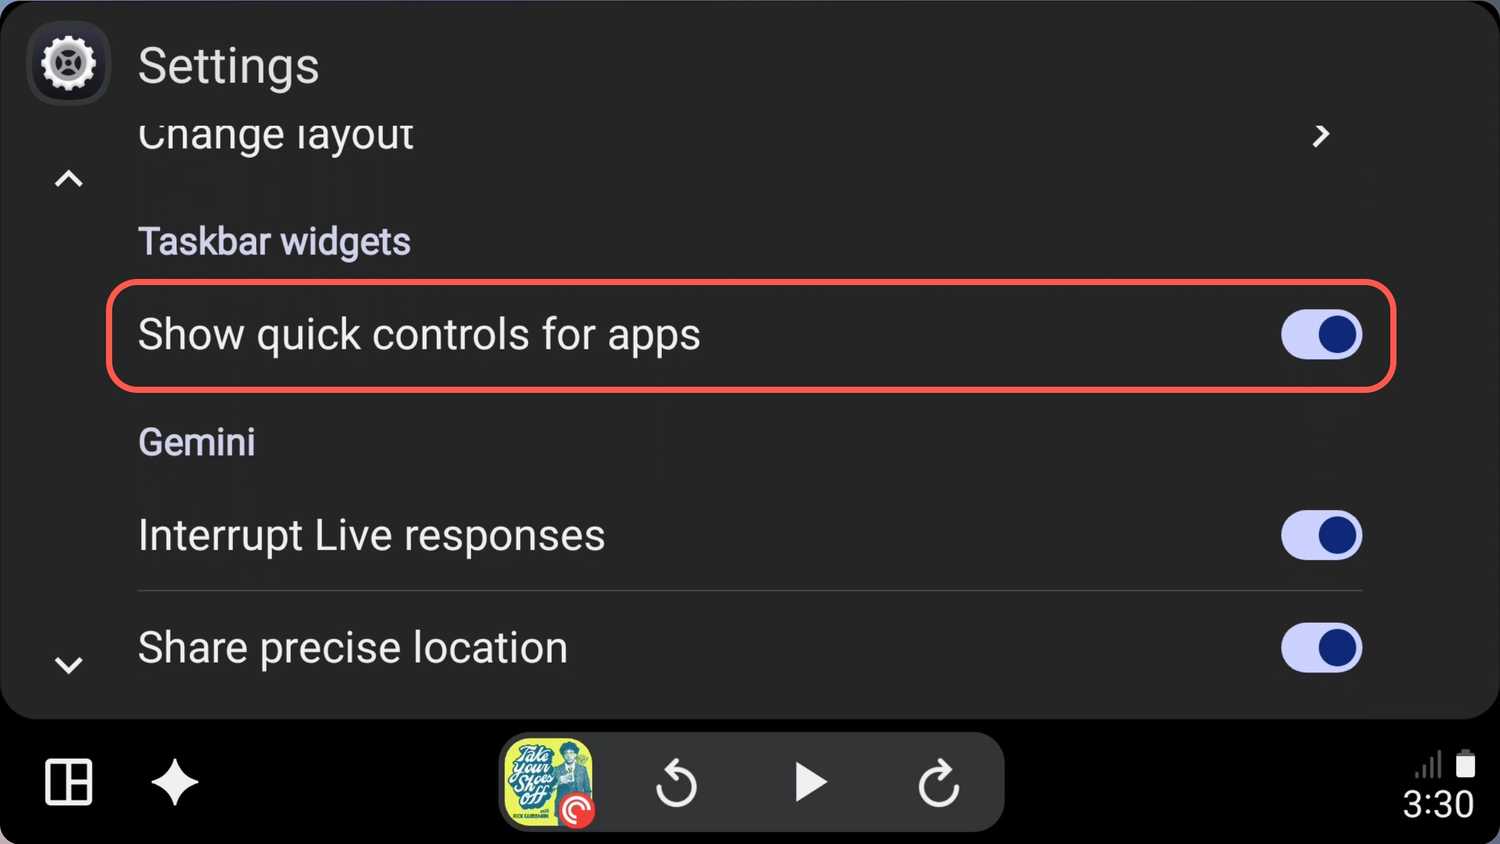
To shift the taskbar position, you’ll need to open the Settings app directly on your Android Auto display. This can’t be done from the settings on your phone. Scroll down until you see the toggle labeled “Show quick controls for apps.”
When switched on, it grounds your taskbar to the bottom of the screen with media controls attached. Switching the toggle off removes the extra widgets and slides the taskbar over to the side. It’s as simple as that.
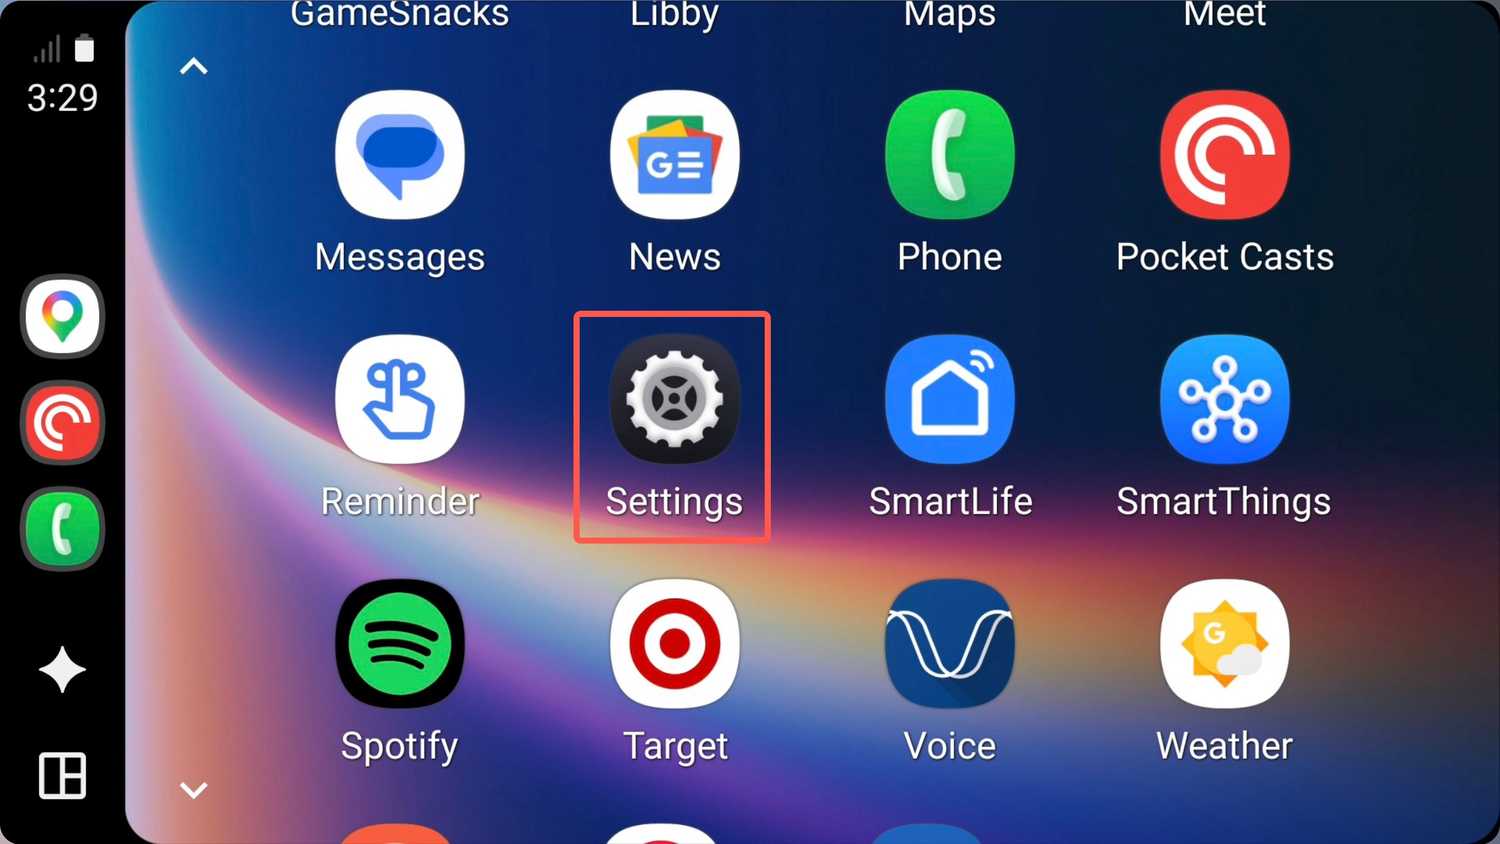
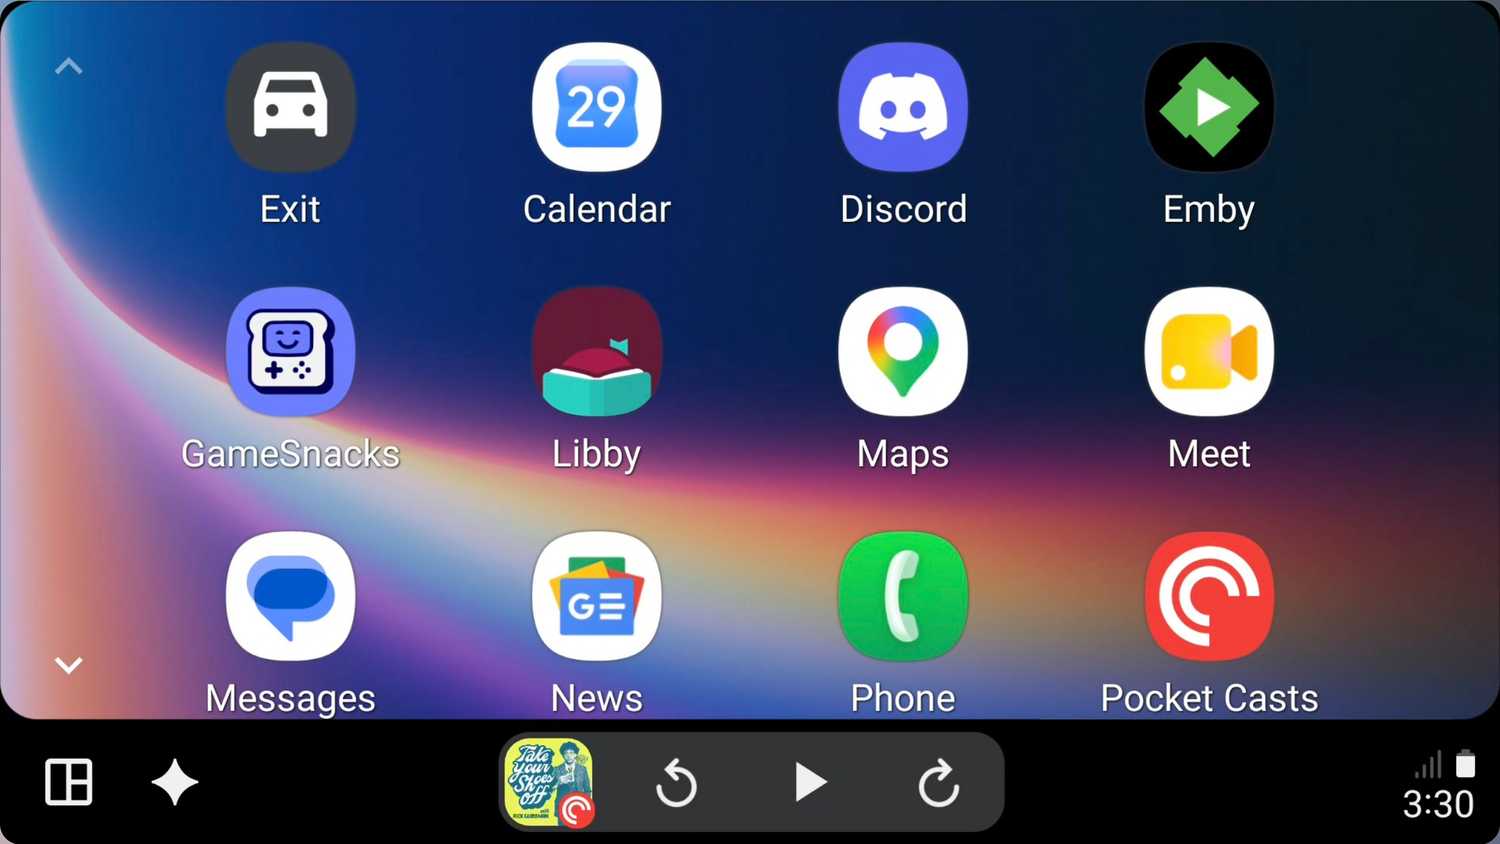
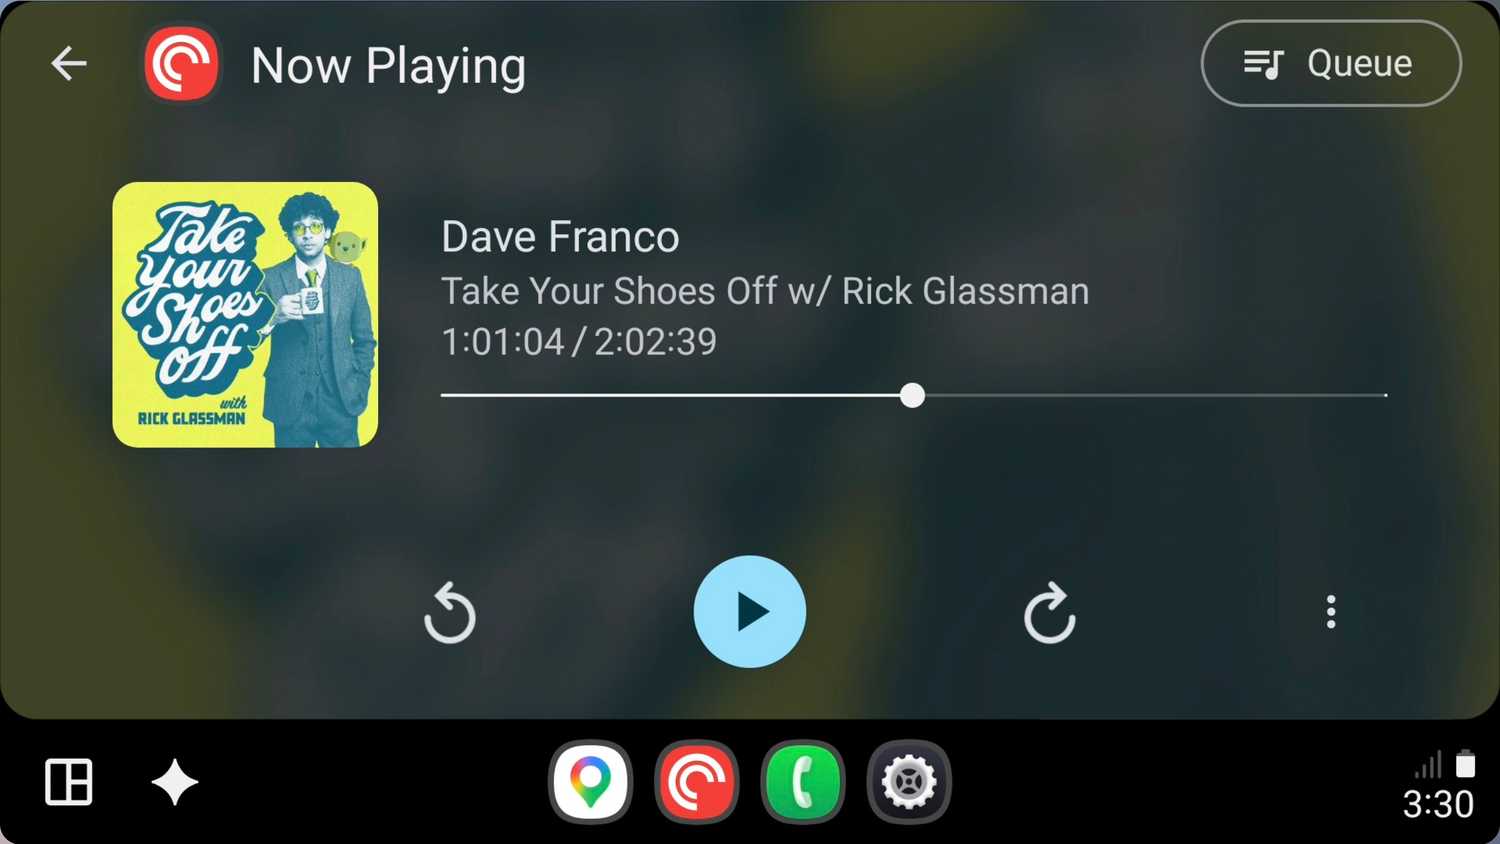
Having the taskbar stacked vertically on the side puts the primary app icons closer to the steering wheel, which is easier to reach while driving. Since split-screen mode already keeps the media app on screen, I don’t feel like I lose much without the Quick Controls.
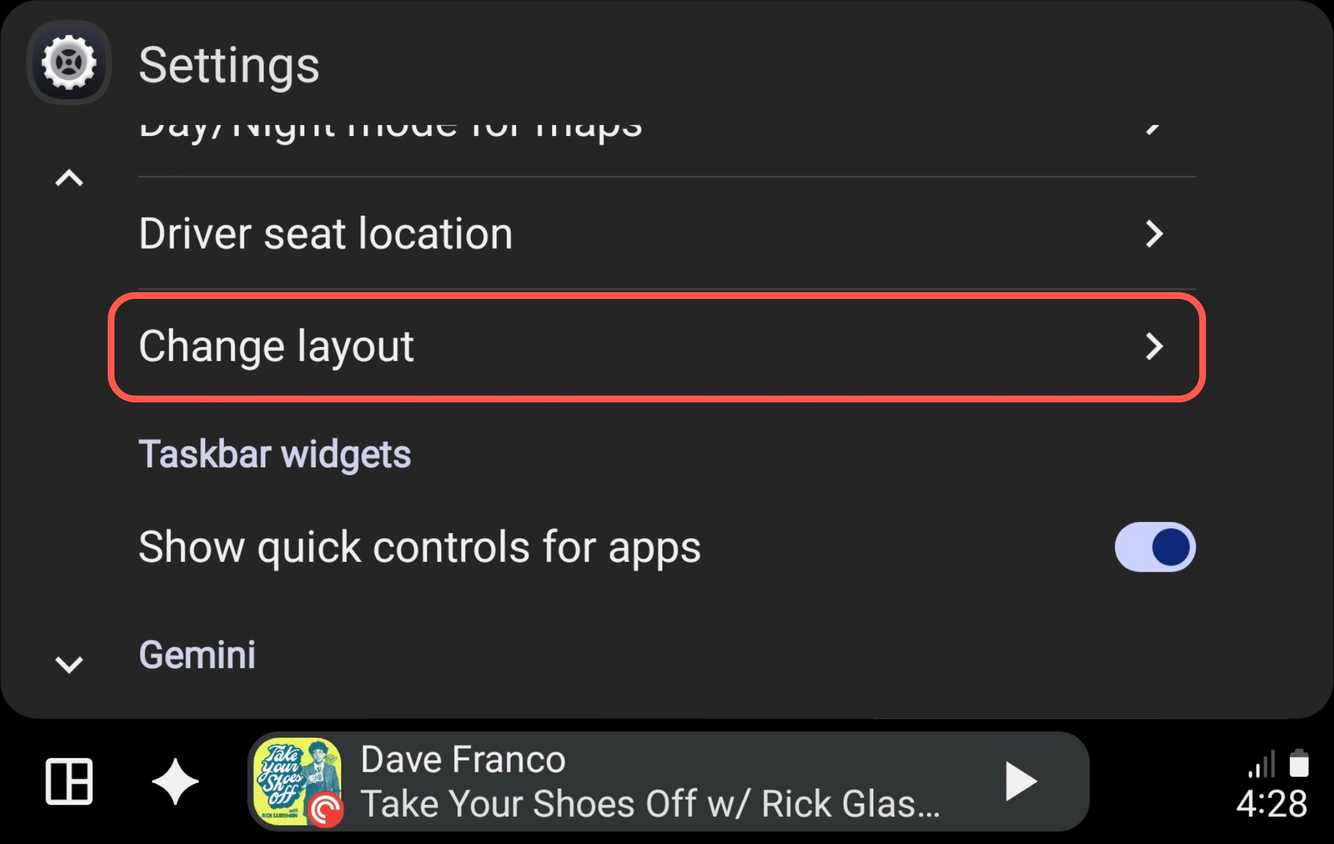
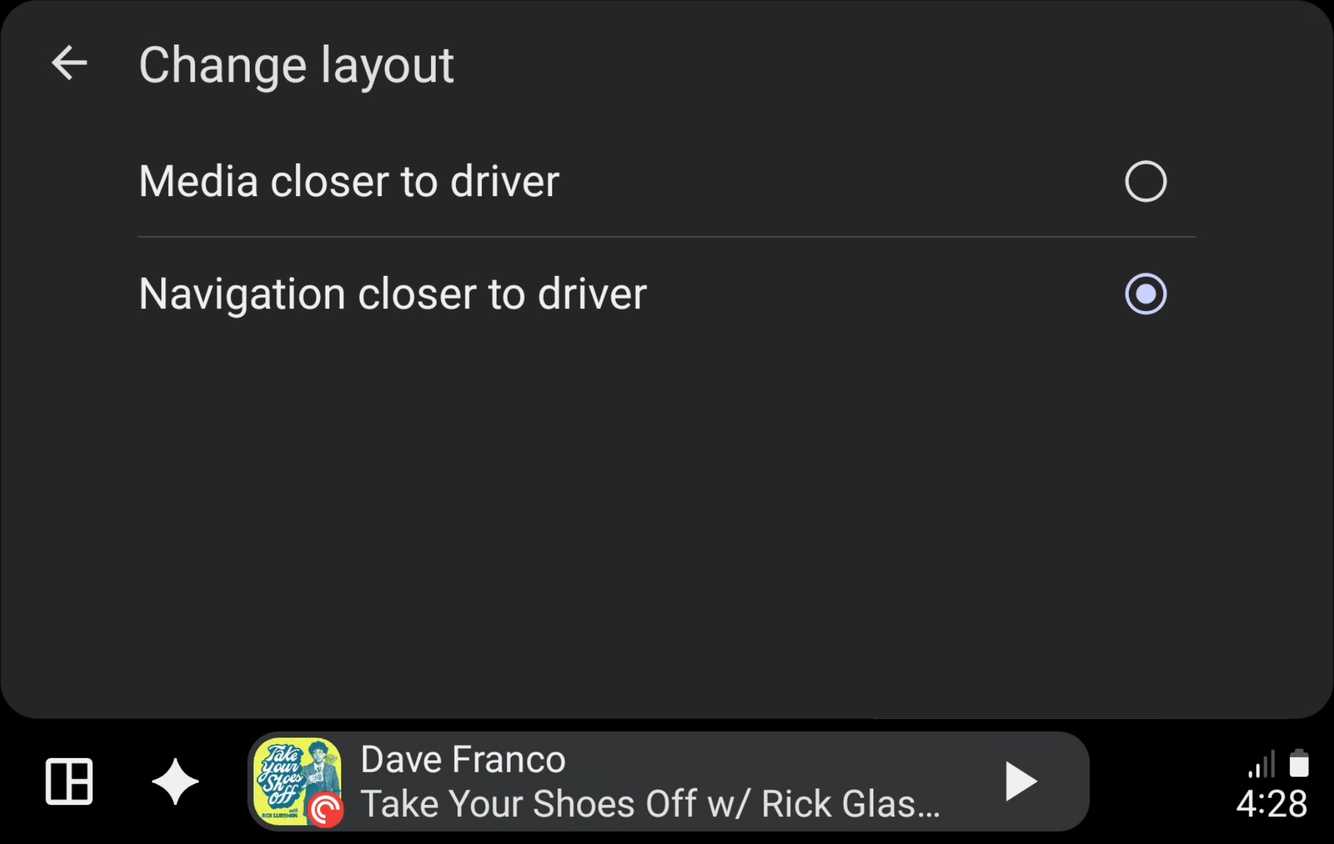
Speaking of media, there’s another option in the settings that lets you choose where the media app lives on the screen. You can decide if you want media or navigation close to the driver by going to Settings > Change layout.
Not a one-size-fits-all solution
As I said, screen size and aspect ratio play a part in this as well. For most standard displays, Quick Controls does indeed determine the taskbar position. However, for unconventional displays, it’s possible the taskbar may stay on the bottom even with Quick Controls disabled. You can toggle back and forth to see which layout suits your driving habits best.
[mai mult...]
Remediere probleme acces statie de lucru in domeniu
Pentru a reintroduce o stație de lucru (calculator) în domeniul Active Directory
nume.local, trebuie să parcurgi un proces în doi pași: mai întâi scoți calculatorul din domeniu trecându-l într-un grup de lucru (Workgroup), iar apoi îl adaugi din nou.Înainte de a începe, asigură-te că deții un cont de administrator local al calculatorului și un cont de administrator de domeniu (sau un utilizator cu drepturi de adăugare în domeniu).
Iată pașii detaliați:
Pasul 1: Scoaterea calculatorului din domeniu
- Apasă tastele Windows + R, scrie
sysdm.cplși apasă Enter (se va deschide fereastra System Properties). - În tab-ul Computer Name, fă click pe butonul Change… (Modificare).
- În fereastra nouă, la secțiunea Member of (Membru al), schimbă selecția de la Domain la Workgroup.
- Scrie orice nume generic pentru grupul de lucru (de exemplu:
WORKGROUP). - Apasă OK. Sistemul îți va cere credențialele unui administrator. Introdu contul și parola de administrator local al PC-ului (sau de domeniu).
- Va apărea un mesaj de întâmpinare: “Welcome to the WORKGROUP workgroup”. Apasă OK.
- Sistemul îți va cere să repornești calculatorul. Apasă Restart Now.
Pasul 2: Curățarea obiectului vechi din Active Directory
Dacă ai acces la serverul Domain Controller, este ideal să ștergi sau să resetezi contul vechi al calculatorului din consola Active Directory Users and Computers pentru a evita conflictele de securitate. Dacă nu ai acces, poți trece direct la Pasul 3 (Windows va încerca să suprascrie obiectul existent).
Pasul 3: Re-introducerea în domeniu
- După repornire, loghează-te pe calculator folosind contul de administrator local.
- Asigură-te încă o dată că IP-ul DNS al plăcii de rețea este setat corect pe IP-ul serverului (așa cum am configurat anterior).
- Apasă din nou Windows + R, scrie
sysdm.cplși apasă Enter. - Fă click pe butonul Change….
- La secțiunea Member of, selectează din nou Domain și scrie numele complet:
nume.local - Apasă OK.
- Pe ecran va apărea o fereastră care îți cere numele de utilizator și parola. Introdu aici contul de Administrator al domeniului (sau un utilizator autorizat din companie).
- Dacă totul este în regulă, vei primi mesajul: “Welcome to the nume.local domain”.
- Apasă OK și confirmă repornirea calculatorului (Restart Now).
După această ultimă repornire, utilizatorul își va putea folosi din nou contul de companie pentru a se loga pe calculator.
Functionalitatea Night Light nu se propaga pe toate monitoarele
In anumite situatii, instrumentul Night Light utilizat la reducerea oboselii oculare prin scaderea temperaturii de culoare (indepartarea partiala si sau totala a nuantelor/pixelilor/culorilor de albastru si verde) se va activa pe un singur monitor/principal.
[mai mult...]Cum folosim Calendly?
Ne aflam in situatia in care dorim sa folosim serviciul Calendly, dar nu stim cum.
Mai jos regasim un tutorial cu toti pasii necesari: