Dezactivare Auto-play pentru dispozitive de stocare media
Vrei sa dezactivezi functia de Auto-Play pentru dispozitivele de stocare media, cum ar fi stick-uri USB sau DVD-uri pe un computer cu sistem de operare Windows?
[mai mult...]Soluții pentru problemele tale IT

Vrei sa dezactivezi functia de Auto-Play pentru dispozitivele de stocare media, cum ar fi stick-uri USB sau DVD-uri pe un computer cu sistem de operare Windows?
[mai mult...]Eroarea “Page Fault in Nonpaged Area” în Windows (10/11) este un Blue Screen of Death (BSOD) care indică o problemă cu memoria RAM, cu driverele sau cu fișierele de sistem. Apare atunci când sistemul încearcă să acceseze o parte de memorie care ar trebui să fie întotdeauna disponibilă, dar nu este.
1. Repornește computerul
Uneori, eroarea este temporară. Dacă se repetă, treci la pașii următori.
2. Verifică memoria RAM (Memory Diagnostic Tool)
Apasă Win + R, tastează mdsched.exe, apasă Enter.
Alege Restart now and check for problems.
Sistemul se va restarta și va verifica automat RAM-ul.
Dacă apar erori, poate fi necesar să schimbi modulul de memorie defect.
3. Rulează comenzi de reparare Windows
Deschide Command Prompt ca Administrator și rulează, pe rând:
A. Verificare fișiere corupte:
B. Reparare imagine Windows:
4. Verifică driverele instalate recent
Apasă Win + X → Device Manager
Verifică dacă ai semne de eroare galbene
Actualizează sau dezinstalează driverele suspecte (ex: placa video, rețea, antivirus, periferice).
Dacă eroarea a apărut după instalarea unui driver, revin-o la versiunea anterioară:
Clic dreapta pe driver → Properties → tab-ul Driver → Roll Back Driver
5. Dezactivează temporar antivirusul terț
Unele soluții de securitate pot provoca conflicte. Încearcă să îl dezactivezi temporar sau să îl dezinstalezi și să testezi sistemul.
6. Verifică hard disk-ul
Deschide Command Prompt ca Administrator și rulează:
Apasă Y când ți se cere să ruleze la următoarea repornire.
Repornește PC-ul → analiza durează ceva timp.
7. Dezactivează gestionarea automată a memoriei virtuale
Win + R → scrie sysdm.cpl → Enter
Mergi la tab-ul Advanced → secțiunea Performance → Settings
Tab-ul Advanced → Virtual memory → Change
Debifează Automatically manage paging file size
Selectează discul C: → alege Custom size
Inițial: 1024 MB
Maxim: 4096 MB
Apasă Set → OK → Repornește PC-ul
8. Resetează BIOS-ul sau actualizează-l
Intri în BIOS → opțiune „Load Setup Defaults”
Dacă ai overclocking activat → dezactivează-l
9. Resetare Windows (ultimă soluție)
Settings → System → Recovery → Reset this PC
Alege opțiunea Keep my files pentru a păstra datele.
1. Repornește în Safe Mode (Modul de siguranță)
Dacă nu mai poți intra normal în Windows:
Repornește computerul de 2-3 ori forțat → vei ajunge în Recovery Mode
Alege: Advanced Options → Startup Settings → Restart
Apasă F4 pentru Safe Mode (sau F5 pentru Safe Mode with Networking)
2. Actualizează sau reinstalează driverele
A. Prin Device Manager:
Apasă Win + X → Device Manager
Extinde secțiunile: Display Adapters, Network Adapters, Audio, etc.
Clic dreapta pe fiecare → Update Driver → Search Automatically
B. Reinstalează driverele problematice:
Dacă știi ce driver a cauzat BSOD-ul (ex: rețea, grafică), fă:
Clic dreapta → Uninstall device
Repornește → Windows îl reinstalează automat
3. Verifică actualizările Windows
Uneori patch-urile Windows rezolvă aceste conflicte:
Start → Settings → Windows Update
Apasă Check for updates și instalează tot
4. Rulează comenzi pentru verificare fișiere sistem
Deschide Command Prompt ca Administrator și rulează:
Apoi rulează:
5. Verifică RAM-ul (Memorie defectă poate cauza această eroare)
Apasă Win + R → scrie mdsched.exe → Enter
Alege: Restart now and check for problems
Lasă testul să ruleze (durează câteva minute)
6. Verifică fișierul minidump pentru detalii (opțional)
Folosind aplicația BlueScreenView sau WinDbg, poți identifica driverul exact care a provocat BSOD-ul.
7. Dezinstalează software recent instalat
Dacă eroarea a apărut după instalarea unui nou software (antivirus, VPN, etc.), încearcă:
Win + R → appwiz.cpl → Dezinstalează acel software
Repornește
8. Resetează Windows dacă nimic nu funcționează
Mergi la: Settings → System → Recovery
Alege: Reset this PC → păstrează fișierele → Windows se reinstalează fără a-ți șterge datele.
1. Verifică întrerupătorul fizic sau tasta de activare cameră
Unele laptopuri Lenovo au un buton fizic de protecție a camerei (lângă cameră – un slider mic). Asigură-te că este deschis (poziție ON).
Alte modele folosesc o tastă funcțională:
Caută o tastă cu o pictogramă de cameră (de obicei F8 sau F4)
Apasă Fn + F8 sau doar F8 pentru a activa camera
2. Activează accesul la cameră în Windows
Intră în Setări → Confidențialitate și securitate → Cameră
Asigură-te că:
Accesul la cameră este activat
Permite aplicațiilor să folosească camera este activat
Verifică și aplicațiile individuale (ex: Zoom, Teams, Skype)
3. Verifică în Device Manager (Manager de dispozitive)
Apasă Windows + X → Device Manager
Extinde secțiunea Cameras sau Imaging Devices
Clic dreapta pe cameră:
Selectează Enable device (Activează dispozitivul) dacă apare dezactivat
Selectează Update driver (Actualizează driverul) → Search automatically (Caută automat)
4. Dezactivează „Camera Privacy Mode” din Lenovo Vantage
Descarcă și deschide aplicația Lenovo Vantage (din Microsoft Store)
Mergi la Device Settings → My Device Settings
Dezactivează opțiunea Camera Privacy Mode
5. Verifică setările antivirus / firewall
Unele soluții antivirus blochează camera. Verifică:
Setările antivirus (ex: Bitdefender, Avast, Norton)
Dezactivează temporar protecția pentru cameră
Adaugă aplicațiile de tip Zoom/Teams pe lista de excepții
6. Repornește serviciul de cameră (Windows Services)
Apasă Windows + R, scrie services.msc → Enter
Găsește serviciul: Windows Camera Frame Server
Dă clic dreapta → Restart
7. Reinstalează driverul camerei
Mergi în Device Manager
Clic dreapta pe cameră → Uninstall device (Dezinstalează)
Repornește laptopul → Windows va reinstala automat driverul
Dacă nu, mergi pe site-ul Lenovo, caută modelul tău și descarcă driverul pentru cameră manual.
8. Testează camera
Apasă Windows + S → scrie „Camera” → deschide aplicația de cameră
Dacă funcționează aici, dar nu în alte aplicații, problema e de permisiuni sau blocaj antivirus.
1. (For W11 latest update 22H2) Press Windows key + E to open up File explorer This opens up File explorer which now includes tabs
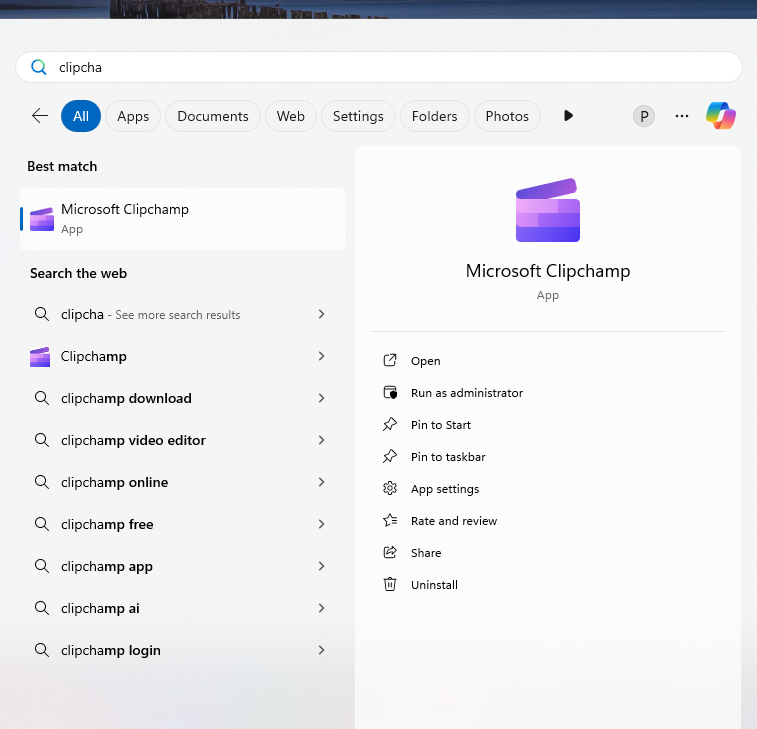
2. Go to the Start button and search for “ClipChamp”
 W11 22H2 comes with a free and fully functional video editor, you can also record your screen and camera at the same time.
3. Press Windows key + Ctrl + L at the same time, it will open up “Live captions” and you will now see captions for any audio that’s playing on your computer.
![]()
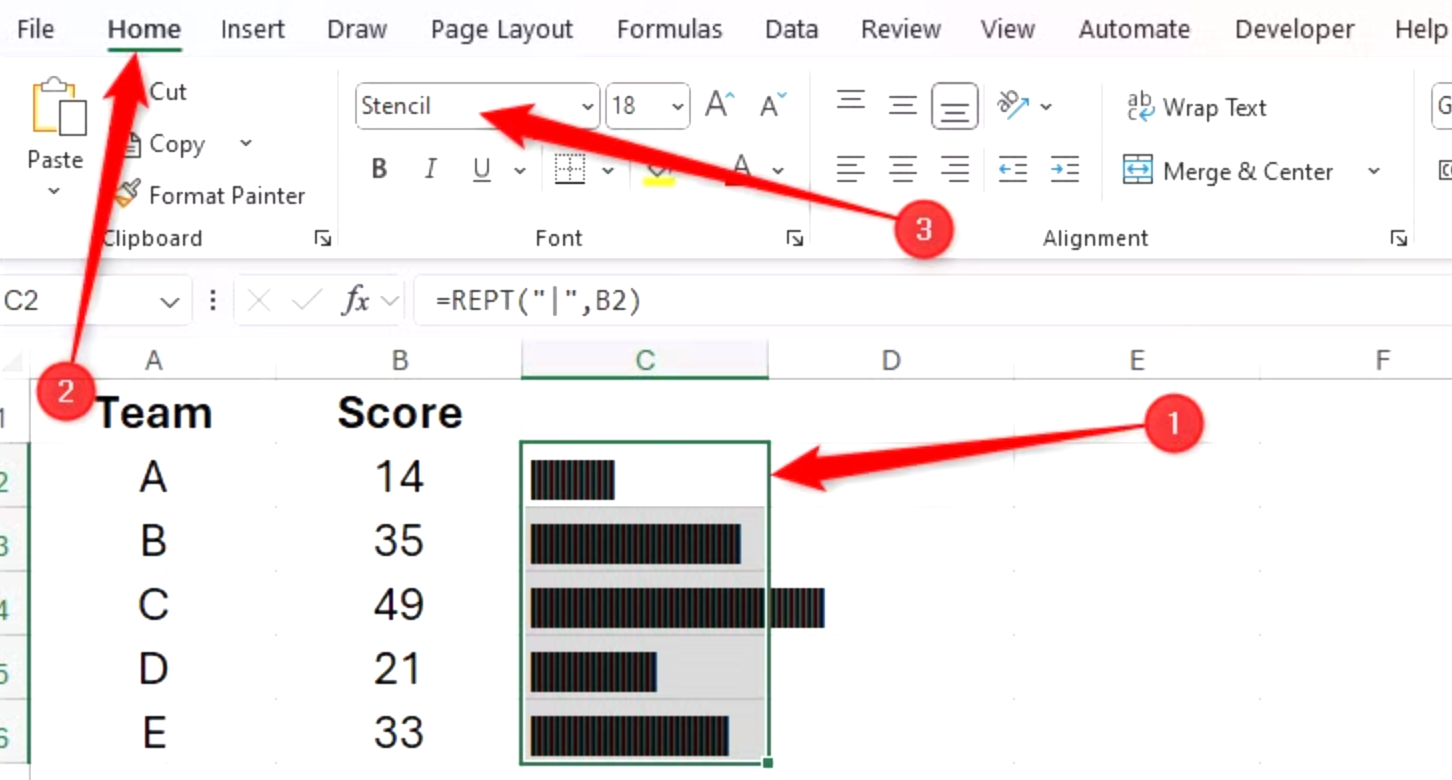
Another way to create in-cell bar charts is to use the REPT function, which repeats a specified character a given number of times.
In the cell next to the first value you want to visualize, type:
=REPT("|",x)

and press Ctrl+Enter.
In this formula, “|” is the vertical glyph character (enclosed in double quotes) often accessed by pressing Shift or Fn at the same time as the relevant key, and x is a reference to a cell containing a numerical value. Here, the formula references cell B2 and so returns 14 vertical glyphs.
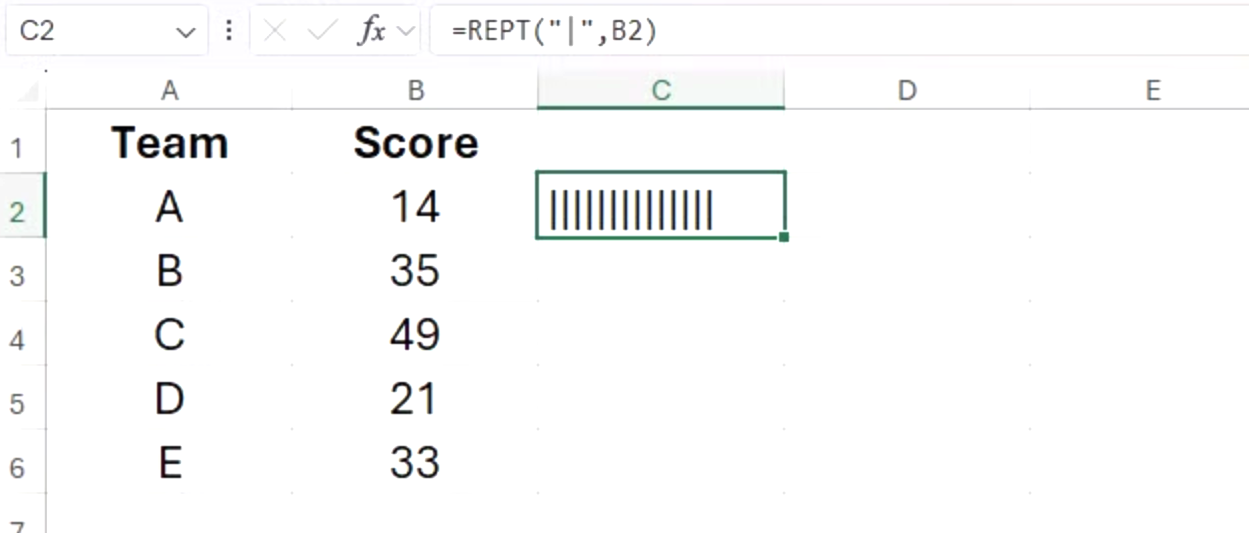
Double-click the fill handle of that cell to repeat the formula down the column.
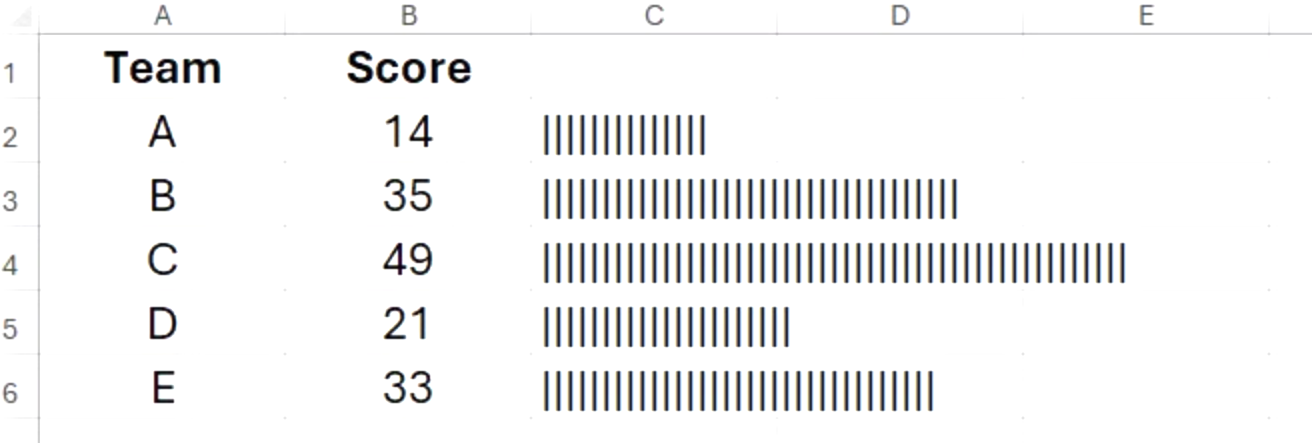
At the moment, the data is visualized as a tally graph, as the default fonts in Excel place small spaces between each character. To fix this, select the relevant cells, and in the Home tab on the ribbon, select a typeface that doesn’t separate characters with a space, like “Stencil” or “Playbill.”
Where data bars adjust to the column width, bar charts created using the REPT function expand or contract dynamically, regardless of the width of the cells they occupy.
[mai mult...]