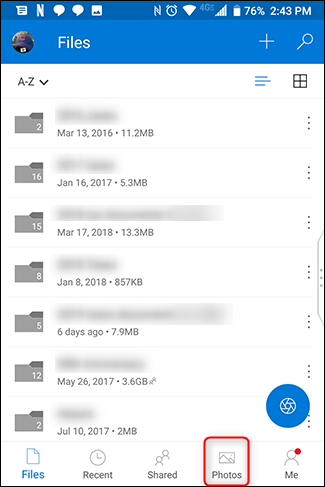
Situatie
Your photos and videos are precious memories, and you don’t want to lose them. Here are four mostly-free services you can use to automatically backup your photos and videos and access them from anywhere.
If you’re like most people, your phone is your primary camera. As such, it contains highlights of your life or your children’s lives, and you don’t want to lose those memories. If your phone gets lost, stolen, or broken, all of your photos and videos may go with it. But there are a few services out there, most of which are free, where you can safely store your photos and videos in the cloud. One of the best parts about cloud storage is you can pull up those photos or easily share them from anywhere.
Solutie
Google Photos
Google Photos is one of the best and easiest ways to keep your Android photos safe. Most devices get unlimited storage of photos and videos, with a small caveat: your photos and videos will be saved at a “high resolution,” instead of the original resolution. Google uses machine learning to decrease the size of these photos and videos while still retaining a high level of detail and clarity—most users won’t even notice the difference. The one exception here is for Pixel phones (minus the 3a), which get free, unlimited storage at the original resolution.
If you don’t have a Pixel phone and aren’t happy with the “high quality” option, Google allows you to store photos and videos at their original quality using the available storage space on your Google Drive account. The free plan offers 15 GB, which seems like a lot, but if you’re a shutterbug, you could suck up that space quickly. You can, however, purchase more Drive storage.
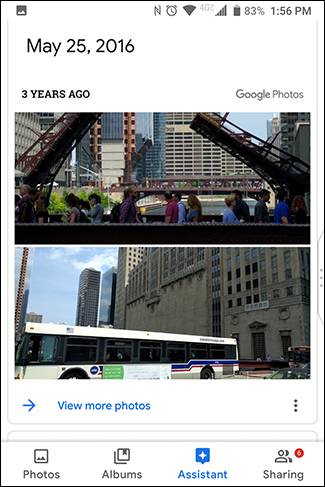
Aside from the benefit of offering free, unlimited storage, Google Photos also comes with an Assistant that can help you get more out of your photos. It can automatically suggest filters for your photos—but note the original photo is not affected. It can show you memories like “On this day two years ago” kinds of stuff. Plus, Google Photos allow you to search for faces it recognizes are close to you (if you don’t find that too creepy). It can also search for places or things like “New York” or “statues.”
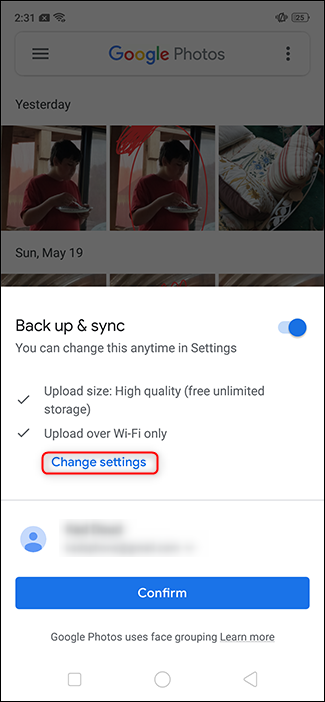
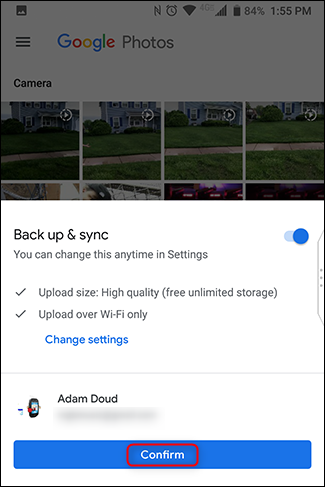
Your phone should have Google Photos pre-installed, but if not, you can download the app from the Google Play store. Open the app, and you’ll be asked to sign in to your Google account. By default, it will use the main Google account on the phone. You’ll also see the upload and storage settings. By default, it uses the “High quality” option (again, save for Pixel phones, which get unlimited storage at the original quality) and will use Wi-Fi data only. To change those settings, tap “Change Settings.”
Select the options you want and tap the back arrow in the upper left corner.
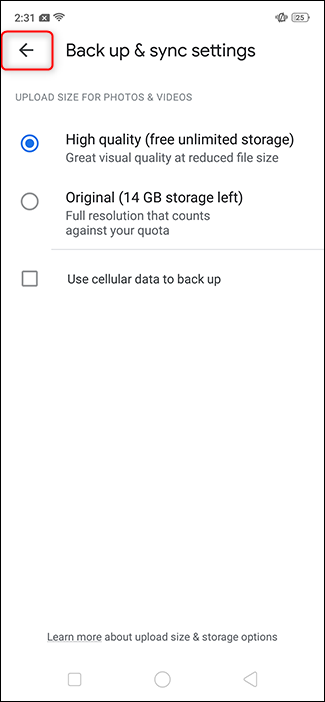
Tap “Confirm.”
That’s it! Your phone will start uploading any photos on your device automatically and in the background. In the future, if you make a new on-device folder (e.g., Instagram, screenshots, etc.), you’ll be prompted to upload those photos as well. Going forward, any time you log into Google Photos on any phone, or at photos.google.com, you’ll see all of your photos.
OneDrive
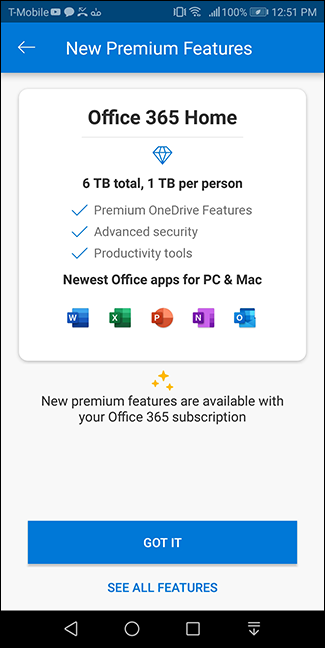
OneDrive is Microsoft’s personal cloud storage space, and it can automatically upload and store your photos for you as well. Unlike Google Photos, OneDrive doesn’t offer free photo storage, so anything you upload counts against your quota. Search functionality in the app is pretty limited, though the service allows you to tag photos, which can help with organization if you’re so inclined. On the plus side, for $9.99 per month, the 1TB plan comes bundled with Office 365 which gives you access to the Microsoft Suite of Office software–Word, Excel, Powerpoint, etc. That’s a pretty solid deal.
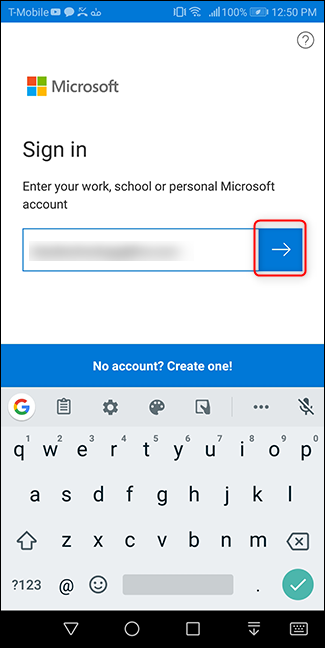
To get started, download the OneDrive app and tap “Sign In.”
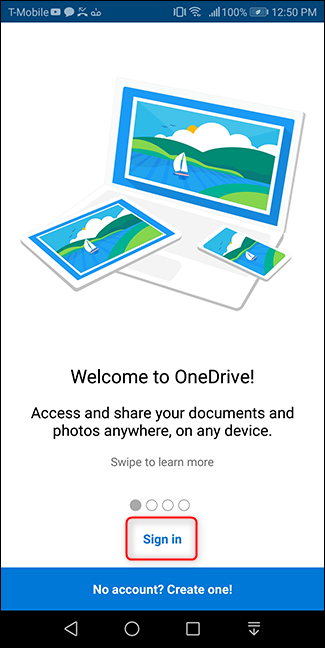
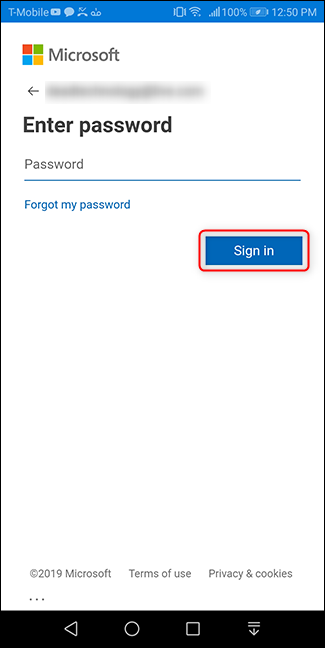
Log in with your Microsoft account.
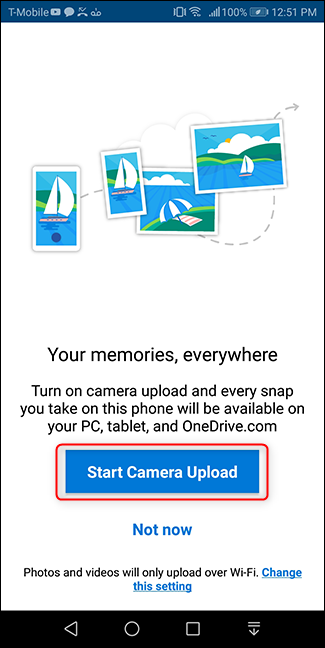
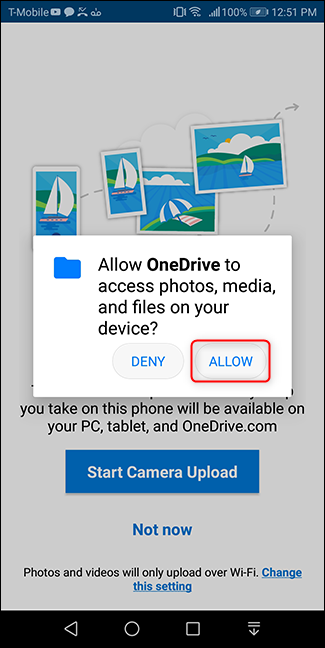
Assuming this is the first time you’ve opened the app, right after you sign in, you’ll be asked to upload your photos. Tap “Start Camera Upload.” Then tap “Allow” on the permission screen that opens.
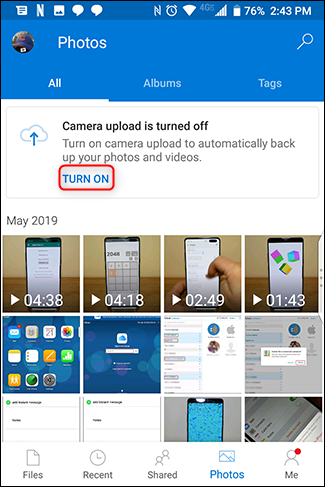
If you have logged in previously, but aren’t using the photo backup feature, starting that process is also very easy. Open the app and tap the “Photos” button at the bottom. Then, tap “Turn On” at the top of that screen.
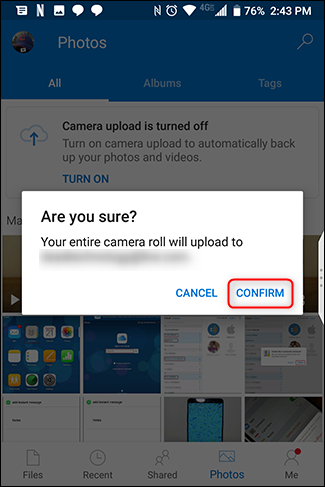
Confirm you want to backup your photos to OneDrive. Then confirm again, to ease Microsoft’s insecurity.

And you’re done! Your photos will sync to OneDrive > Pictures > Camera Roll automatically and in the background, do you don’t even have to think about it. The easiest way to see them is by tapping the “Photos” button in the app.

If you want to adjust photo sync settings in the app, tap the “Me” button in the bottom left corner of the app. Then tap “Settings.”
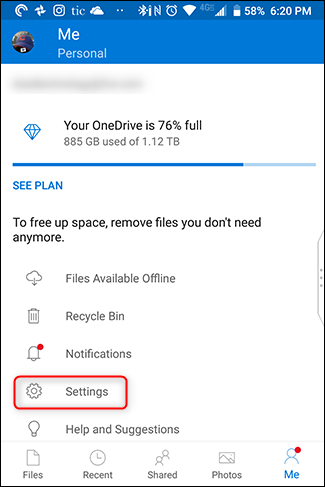
Then tap “Camera Upload.”
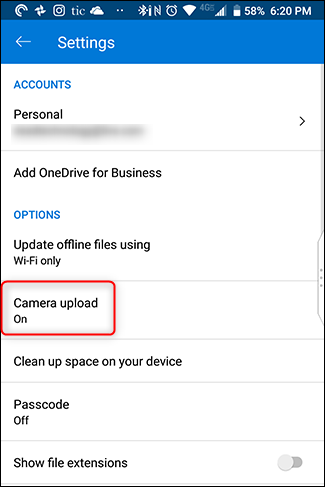
Adjust the settings, and you’re good to go.
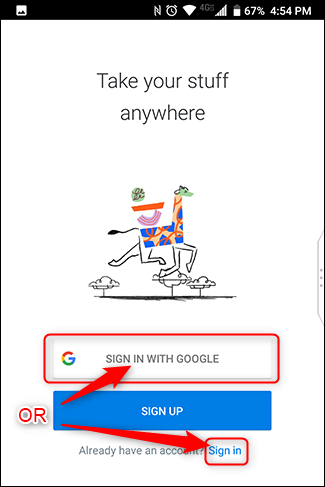
Dropbox
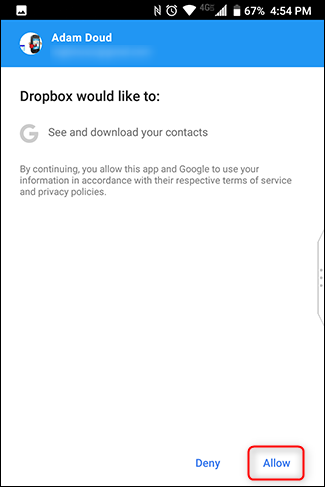
Dropbox is one of the oldest names in cloud storage, for a good reason—it’s quite fast and easy to use. When you first download the app, log in with your account. On the next screen, tap “Allow.”
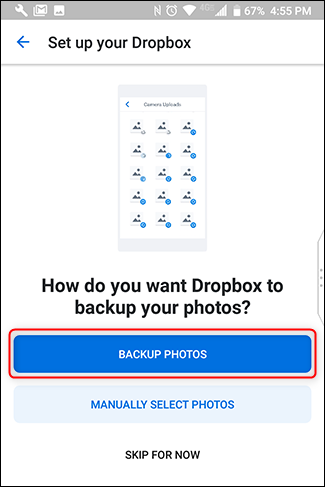
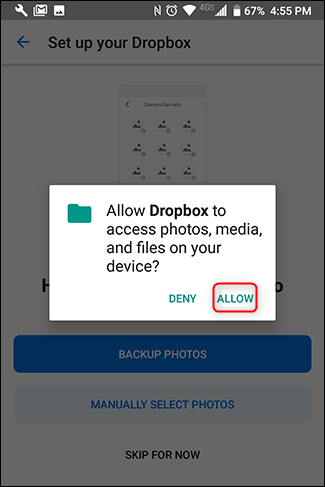
During setup, Dropbox will offer to back up photos. Tap “Backup Photos.” (Yes, it should read “back up” instead of “backup,” but what can you do?) Then tap “Allow” in the permissions box that opens.
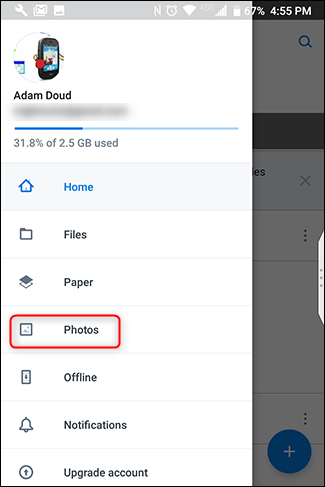
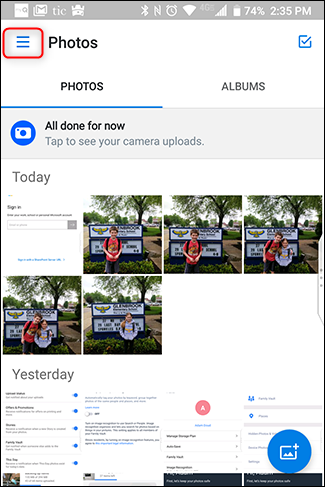
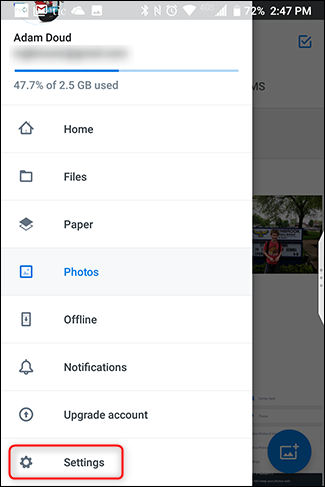
If you’re already a Dropbox user and want to start using it to back up photos, tap the hamburger button in the upper left corner. Then tap “Photos.”

At the top, tap the button that reads “Turn on Camera Uploads.”

If your device is on Wi-Fi and the battery is not low, Dropbox will automatically start syncing your photos.
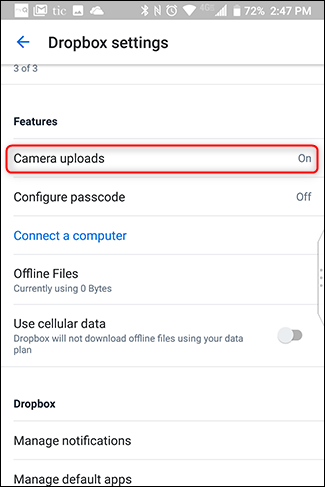
To adjust sync settings, tap the Hamburger Button > Settings.
Tap “Camera Uploads.”
That’s all there is to that. Dropbox doesn’t offer any free storage for photos, so anything you upload will count against your quota. You get a meager 2 GB for free, after which you’ll need to shell out the money for one of the paid tiers.
Leave A Comment?