Situatie
Compatibility mode is a Windows 11 feature that simulates older Windows versions for your programs. This allows you to run old software on your Windows 11 machine. Since the feature is built into the operating system, you don’t have to download or install anything to use it.
Note that the feature doesn’t change your apps in any way. Instead, it just offers an older Windows version environment for your apps to work in. This mode is app-specific, meaning it’s only applied to the apps you choose. Your other apps continue to work outside of this mode.
If you’re experiencing compatibility issues with your apps or games, try using compatibility mode to fix those issues. Some common problems include an app refusing to launch or displaying unsupported errors, where compatibility mode can help.
Solutie
Pasi de urmat
Right-click your app or game’s icon and choose “Properties.” On the open window, access the “Compatibility” tab. Here, turn on the “Run This Program in Compatibility Mode For” option. From the drop-down menu, select the Windows version under which you want to launch your program. Your options are Windows 8, Windows 7, Windows Vista, Windows Vista (Service Pack 1), and Windows Vista (Service Pack 2).
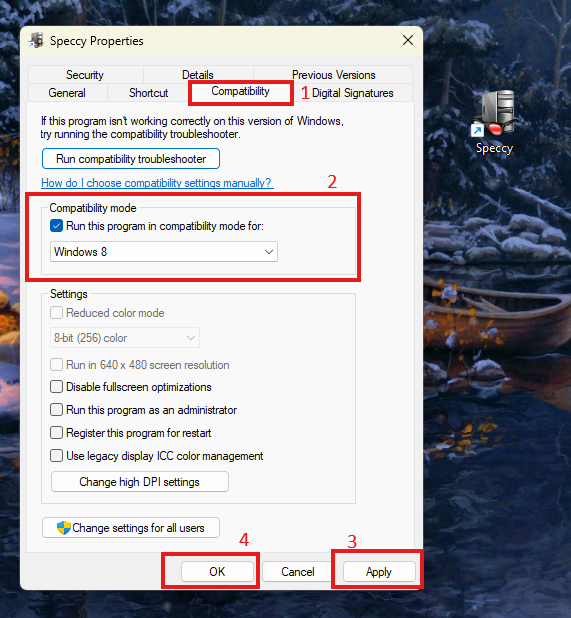
Optionally, you can configure other compatibility options on the same window. Those options are:
- Reduced Color Mode: This mode helps use 16-bit color schemes for old programs
- Run in 640 x 480 Screen Resolution: This reduces the screen resolution for very old apps and games
- Disable Fullscreen Optimizations: This option fixes display performance issues.
After making changes, at the bottom of the window, click “Apply” followed by “OK”.
To launch your program in compatibility mode, double-click the program’s shortcut. It will run according to the settings you’ve configured above. In the future, to disable compatibility mode, right-click your program and choose “Properties.” Access the “Compatibility” tab and turn off “Run This Program in Compatibility Mode For.” Then, choose “Apply” followed by “OK”.
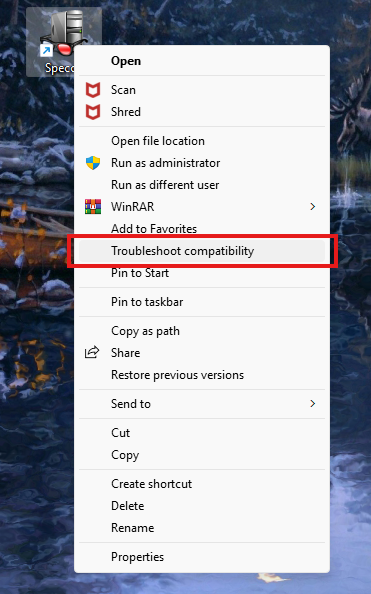
Windows 11 has a compatibility troubleshooter that allows you to find and fix compatibility issues with your programs. You don’t have to configure any options manually, as this tool does that for you. To use it, right-click your app or game and choose Show More Options > Troubleshoot Compatibility.
If you don’t see that option, right-click your program and choose “Properties.” Open the “Compatibility” tab and select “Run Compatibility Troubleshooter”.
If you’re trying to use an extremely old app or game, you’re better off running it in a virtual machine. In this case, you’ll use Windows 7 or Windows XP in your virtual machine to run the program. Setting up a virtual machine isn’t as difficult as you might think.
If there’s no updated version, consider getting an alternative to your app. There are many programs that will do the same job as the one you’re trying to run. This lets you get your tasks done without much hassle on your Windows 11 computer.