

Stații de lucru
OS - Windows 9179 Solutii
Reguli si plangeri 11 Solutii
OS - OS X 410 Solutii
Reguli de configurare 12 Solutii
Licentiere 18 Solutii
Securitate 182 Solutii
Copie de rezerva (Backup) 68 Solutii
Antivirus 72 Solutii
Aplicatii specifice 5303 Solutii
Hardware 291 Solutii
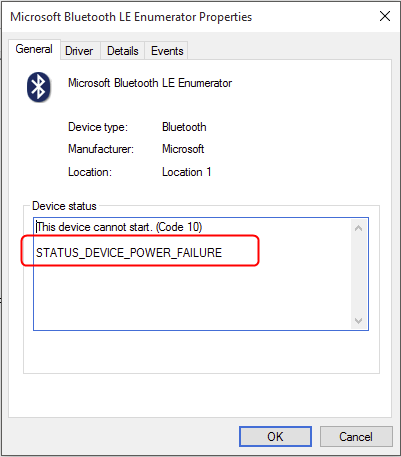
How to Fix STATUS_DEVICE_POWER_FAILURE Error in Windows 10 / 11 via Device Manager
How to fully close discord
Restarting Discord isn’t as straightforward as restarting any other app. This is because Discord continues to run in the background even if you’ve closed it.
[mai mult...]How to Transfer iPhone Text Messages to Android
Switching from an iPhone to an Android phone is not as difficult as you might think. The most tedious part is transferring all your personal stuff. We’ll show you how to move your iPhone SMS messages to Android, including iMessages.
Along with photos and videos, text messages are probably one of the things you care about the most when switching phones. Nobody wants to lose all of their conversations—some of which may be very important. The good news is you don’t have to. The first thing we need to do is prepare your iPhone to transfer text messages. To do that, we simply need to make sure you’re syncing your messages with iCloud.
- First, open the “Settings” app.

Tap your profile at the top of the screen.

Select “iCloud.”

Scroll down and make sure “Messages” is toggled on.

Transfer Text Messages from iPhone to Samsung Galaxy
Samsung offers an app called “Smart Switch” that you can use to move text messages (and other stuff) from your iPhone to a Galaxy phone. You’ll need the little USB-C to USB-A adapter that came with your Samsung phone. If you don’t have one, you can buy a cheap USB-C to USB-A adapter online.
First, open the “Smart Switch” app on your Galaxy phone—download here—and select “Recieve Data.”

Select “iPhone/iPad” as the source.

Plug the adapter into your Samsung phone and then connect it to your iPhone with the USB Lightning cable.

Smart Switch will begin “Searching for Data to Transfer.” When it’s done, you’ll see a list of things you can transfer from your iPhone. Select “Messages” and anything else you might want and tap “Transfer.”

This process can take a while depending on what you’re transferring. You can select “Keep Screen On” to ensure it’s not interrupted.

After it’s done, you can tap “Next.”

The next screen will remind you to turn off iMessage on your iPhone to make sure you get all messages.

That’s all there is to it! You can skip through the next few screens and you’ll see all your conversations —including iMessage—from your iPhone in your default texting app.
Transfer Text Messages from iPhone to Google Pixel
Samsung Smart Switch is a great tool because you can use it at any time. Google Pixel phones don’t have that option. You can only transfer data from a secondary phone during the initial setup process. So if your Pixel is already set up, you’re stuck with putting your data in the hands of a third-party app or resetting your phone.
Regardless, we’ll show you how it’s done. Go through the Pixel setup process and connect to your mobile network or Wi-Fi. Tap “Next” when it asks if you want to copy apps and data.

The next screen will instruct you to turn on your iPhone and unlock the screen. Tap “Next.”

Now we’ll need the USB-C to USB-A adapter that came with your Pixel phone. If you don’t have one, you can find them for cheap online. Plug it into your Pixel and then connect it to your iPhone with the USB Lightning cable. Tap “Next.”

Sign in with your Google account to continue with the setup.

The next screen will ask what you want to copy from your iPhone. Select “Messages” and anything else you’d like, then tap “Copy.”

You’ll be given the option to “Continue” with setup or leave and finish it later. Tap “Continue.”

Continue with setup until you get to the “Your Phone’s Almost Ready” screen. Tap “Done” to finish up.

The next screen will instruct you to turn off iMessage on your iPhone to ensure you don’t miss any messages.

How to Use Google Password Manager on Android
A password manager is a great thing to use if you want to keep your passwords secure and easy to remember. Google’s Password Manager built-in to Chrome is a popular option and it works on Android too. While we don’t necessarily recommend everyone use their browser’s password manager, it’s better than nothing. Plus, Google’s password manager has gotten a lot better over the years. If you use it in Google Chrome on your computer, you should use it on Android, too.
Before we get started, we’ll need to make sure you have Google’s password manager set as your “Autofill” service on your Android device. This will ensure that the passwords you save will automatically generate when you need to log in to an app or website.
Swipe down once or twice (depending on your phone) from the top of the screen and tap the gear icon to open the Settings.

Scroll down to the “Passwords & Accounts” section. On a Samsung Galaxy device, you’ll need to go to General Management > Passwords and Autofill.

Now select whichever service is listed under “Autofill Service.” It may already be “Google.”

Choose “Google” from the list if it’s not already selected.

Next, go back to the previous “Passwords & Accounts” screen. You’ll see “Google” listed under “Passwords.” Tap it.

This is the Google Password Manager. You can search through your saved passwords to edit the details or delete outdated ones. You’ll need to enter your security method to access any of the passwords.

At the top of the screen, you’ll see the “Password Checkup” tool. You can run this to see if any of your passwords should be improved for security.

Lastly, we’ll take a peek at the settings. Tap the gear icon in the top right corner.

Here’s where you can decide if you want Google to offer to save passwords when you enter them in apps and websites in Chrome. You can choose to automatically sign in to websites and get alerts when your passwords have been compromised.

And if you want to use the Password Manager a lot, you can add a shortcut to the home screen.

That’s all there is to the Google Password Manager. It’s not the best or most secure password manager out there, but it’s probably the easiest to use if you’re a Chrome and Android user.
[mai mult...]How to Set Up Shadowsocks With Outline
Shadowsocks is a tool that uses the SOCKS5 proxy to reroute and disguise internet traffic and thus get past censorship blocks. It was developed initially by a Chinese programmer and is thus particularly useful in getting past the Great Firewall of China, though we’ve received reports you can use it for bypassing other regimes’ blocks, too.
- How to Set Up Shadowsocks the Easy Way
Assuming you want to give Outline a shot, though, let’s get started with downloading the program. For this. For this, go to the Outline website and click on “get Outline.” The next page will show you download links for both the Manager and the Client, for now just install the Manager.

Once downloaded, open the program (for Linux you need to open the .AppImage file) and you’ll be met with a screen where you can choose the cloud service or server you’re using to route your traffic through. We’re using DigitalOcean for ours, but there are plenty of other options. DigitalOcean is the easiest option by far, though; you don’t even need to have a server ready.

In most cases, you’d have to set up your server beforehand, but using DigitalOcean all you need to do is link Outline to your account and the hard work is done for you. Just follow the on-screen prompts to authorize Outline to access your hosting account, all you need to do is choose a server location.

If you’re in China, Singapore is probably your best bet, though Bengaluru in India is a good alternative; we went with Amsterdam. Whichever location you go with, just click “set up Outline” in the top right when you’re done and the program will get started. The setup process will take a few minutes.

Once it’s done setting up, you’ll be greeted by Outline’s connection center, where you can set up connections—both your own as well as those of whomever you want to share the connection with—and track data usage. In the top right, you can also go to the settings screen to find information about the server as well as tweak functions to your liking. In our case, though, we want to hook up a device to the server, so we need to click on the icon next to “my access key.”

You’ll get a pop-up, just click “connect this device” and then make sure to copy the secure key in the next screen. After that, you’ll go to a third screen where you need to install the Outline Client. Just click “install outline” and the download will automatically start.

Once it’s downloaded, go to your downloads folder and open up the installer for the client. If it’s on the same device as the Outline Manager, the key will be automatically detected. Otherwise, you can enter it manually (in the image below, we’ve blanked part of the secure key.) Then hit “Add Server.”

Then all you need to do to connect to your new Shadowsocks server is to hit “Connect.”

You should now be able to access the internet through your new server. If you want to connect any other devices—including mobile devices, as Outline will work on Android and iOS as well—you should install the Outline Client on that device and enter the secure key. You can also create new secure keys if you want to spread security credentials around among friends and family, it’s up to you. Either way, you should now be able to browse the free internet.
[mai mult...]