OS - Windows
Depanare VPN 4 Solutii
instalare printer 50 Solutii
Optimizare pc 50 Solutii
Optimizare PC 104 Solutii
Scanare cu malwarebyte 4 Solutii
shareuire si mapare 15 Solutii
adaugare la domeniu 5 Solutii
Migrare profil 9 Solutii
Instalare/reinnoire certificate 2 Solutii
Personalizare sistem operare 274 Solutii
Configureaza si verifica setarile de boot 11 Solutii
Transfer de date 21 Solutii
Configurare OS 109 Solutii
Reparare OS 47 Solutii
Punct de restaurare OS 8 Solutii
Windows Event Viewer 6 Solutii
Reinstalare/reconfigurare VPN 8 Solutii
Optimizare client e-mail 12 Solutii
Optimizare PC 30 Solutii
Optimizare PC 20 Solutii
Reinstalare / Reconfigurare VPN 6 Solutii
Reinstalare OS 32 Solutii
Reparare sistem de operare 45 Solutii
Programare sistem operare 12 Solutii
Puncte de restaurare sistem de operare 14 Solutii
Instalare imprimanta 44 Solutii
Mapare si partajare 13 Solutii
Modificari firewall 12 Solutii
Migrare profil 8 Solutii
Transferuri de date 33 Solutii
Upgrade sistem operare 12 Solutii
Windows Event Viewer 7 Solutii
Verificare HDD 32 Solutii
Spatiu partitie 31 Solutii
Scanare cu MalwareBytes 5 Solutii
Setari servicii sistem operare 43 Solutii
Setari retea sistem operare 25 Solutii
Setari partitii 19 Solutii
Actualizare sistem operare 15 Solutii
Clonare HDD 11 Solutii
Compatibilitate program 13 Solutii
Instalare / Reinnoire Certificate 6 Solutii
Configurare si verificare setari de BOOT 15 Solutii
Configurare Sistem de operare 1460 Solutii
Identificare DLL-uri lipsa 2 Solutii
Depanare 1059 Solutii
Editarea politicilor de grup ale sistemului de operare 13 Solutii
Drivere 50 Solutii
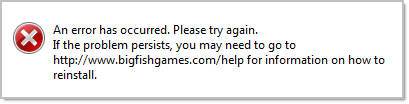
Error When Opening Big Fish Games App (Game Manager)
How to fix Discord stream stuck on loading

How to fix ASUS USB2.0 Webcam Issue
How to Generate SSH keys in Windows 10 and Windows 11

If part of your life includes logging in to a remote server be it for a self-hosted blog, a Nextcloud installation, or sending your latest changes to GitHub, you need SSH keys. In Windows 10 and 11 we are spoiled for choice when it comes to generating new keys. Here’s how to create all the SSH keys you’ll ever need using three different methods. We’ll show you how to generate your initial set of keys, as well as additional ones if you want to create different keys for multiple sites.
Option 1: Generate Keys in the Command Line
Windows 10 has had a built-in OpenSSH client since the April 2018 update. Windows 11 also comes with this feature built-in. To use it open the Windows Command Prompt by hitting the Windows key and typing “cmd”.
Tip: If you use the command line often, we’d highly recommend installing Windows Terminal from the Windows Store (installed on Windows 11 by default). It’s a tabbed program that can run the Command Prompt, PowerShell, and the Windows Subsystem for Linux all in one window. It also has fun features like setting background images.
Whether you use Command Prompt or Windows Terminal, type ssh-keygen and hit Enter. This will automatically generate the SSH keys. In our tests on Windows 11, it created a 2048-bit RSA key. If you’d like to use a different algorithm—GitHub recommends Ed25519, for example—then you’d type ssh-keygen -t ed25519.

After you type your command hit Enter, and then you’ll be prompted to give your key a name and save it in a specific location. If you use the defaults then it will save your keys in C:\User[YourUserName].ssh —assuming the C drive is where your user account is stored.

Next, you’ll be asked to enter a passphrase. We highly recommend you do this to keep your key secure. If you’re worried about forgetting your password check out this round-up of the best password managers on Review Geek. If you really don’t want a passphrase then just hit Enter.

That’s it your keys are created, saved, and ready for use. You will see you have two files in your “.ssh” folder: “id_rsa” with no file extension and “id_rsa.pub.” The latter is the key you upload to servers to authenticate while the former is the private key that you don’t share with others.

Note: If you can’t see your “.ssh” folder in File Explorer, check out our tutorial on how to show hidden files and folders in Windows.
If you wanted to create multiple keys for different sites that’s easy too. Say, for example, you wanted to use the default keys we just generated for a server you have on Digital Ocean, and you wanted to create another set of keys for GitHub. You’d follow the same process as above, but when it came time to save your key you’d just give it a different name such as “id_rsa_github” or something similar. You can do that as many times as you like. Just remember that the more keys you have, the more keys you have to manage. When you upgrade to a new PC you need to move those keys with your other files or risk losing access to your servers and accounts, at least temporarily.
Option 2: Generate Keys in WSL

If you’re a WSL user, you can use a similar method with your WSL install. In fact, it’s basically the same as with the Command Prompt version. Why would you want to do this? If you primarily live in Linux for command line duties then it just makes sense to keep your keys in WSL.
Open up Windows Terminal or the built-in Ubuntu command prompt (assuming you installed Ubuntu Linux). Then it’s very similar to Windows. Unlike Windows, it’s best to specify whether you want an RSA key or something like Ed25519.
Say you wanted to create an RSA-4096 key. You’d type in the following command:
ssh-keygen -t rsa -b 4096
If you wanted Ed25519 then the recommended way is as follows:
ssh-keygen -t ed25519 -C "your@email.address"
It’s recommended to add your email address as an identifier, though you don’t have to do this on Windows since Microsoft’s version automatically uses your username and the name of your PC for this.
Again, to generate multiple keys for different sites just tag on something like “_github” to the end of the filename.
Option 3: Generate Keys With PuTTY
For years, the old school PuTTY program was a popular way to communicate with a server in Windows. If you’ve already got this program on your system it also offers a method for creating SSH keys.
PuTTY comes with a number of helper programs, one of which is called the PuTTY Key Generator. To open that either search for it by hitting the Windows Key and typing “puttygen,” or searching for it in the Start menu.

Once it’s open, at the bottom of the window you’ll see the various types of keys to generate. If you’re not sure which to use, select “RSA” and then in the entry box that says “Number Of Bits In A Generated Key” type in “4096.” Another alternative is to select “EdDSA,” and then from the drop-down menu that appears below it make sure “Ed25519 (255 bits)” is selected.

Now, all you have to do is click “Generate,” and PuTTY will start working. This shouldn’t take too long depending on the strength of your system, and PuTTy will ask you to move your mouse around inside the window to help create a little more randomness during key generation.
Once that’s done click “Save Public Key” to save your public key, and save it where you want with the name “id_rsa.pub” or “id_ed25519.pub” depending on whether you selected RSA or Ed25519 in the earlier step.

Then to get your private key it takes an extra step. By default, PuTTY generates PPK keys for use with the PuTTy client. If you want OpenSSH, however, at the top of the window select Conversions > Export OpenSSH Key and then save the file as “id_rsa” or “id_ed25519” with no file ending.

Generating SSH keys is really easy whichever method you choose. We’d recommend going with the Windows Command Prompt option unless you already have PuTTY installed, or prefer Linux and understand that system.
[mai mult...]How to Hide Your WhatsApp Status From Specific Friends
Unlike Facebook, WhatsApp doesn’t allow you to limit specific status updates to select folks. However, you can limit who all can see your status updates. To get started, open the WhatsApp app on your iPhone or Android.
![]()
Tap on the “Settings” button in the bottom-left on iPhone. On Android, you’ll have to tap the three vertical dots and select “Settings.”

Select “Account.”

Next, tap “Privacy.”

Then tap “Status.”

Select the “My Contacts Except” option, and you’ll then need to pick the specific friends from whom you want to hide your future WhatsApp status. You can scroll and select the contacts or search for them by name.

Tap “Done” after you’ve selected the relevant contacts.

Now select the “Status” button in the bottom-left corner, tap on your profile icon and add a new status to test the new changes.

Besides that, you can also disable read reciepts to stop those friends from knowing that you’ve read their messages.
[mai mult...]