Cum sa activezi functia Image Preview pentru a afisa imaginile intr-un folder din Windows 10
Cum sa activezi functia Image Preview pentru a afisa imaginile intr-un folder din Windows 10
[mai mult...]Soluții pentru problemele tale IT
Cum sa activezi functia Image Preview pentru a afisa imaginile intr-un folder din Windows 10
[mai mult...]Our last article on how to reset your Ubuntu password easily through the grub menu was quite popular, so I’ve decided to make a series on all the different ways to reset your password on either Linux or Windows… today’s lesson is how to use the Live CD to reset the password.
Note that we’ll also cover how to protect yourself against somebody else resetting your password, so stay tuned!

Of course, this method will also work if you’ve installed your Ubuntu Live CD to a thumb drive.
Resetting the Password
You’ll want to boot from your Ubuntu Live CD, choosing “Try Ubuntu without any change to your computer” from the boot menu.

Once the system boots, open up a new Terminal window from Applications \ Accessories and then type in the following command:
sudo fdisk -l
This command is used to tell what device name the hard drive is using, which in most cases should be /dev/sda1, but could be different on your system.

Now you’ll need to create a directory to mount the hard drive on. Since we’re actually booting off the live cd, the directory doesn’t really get created anywhere.
sudo mkdir /media/sda1
The next command will mount the hard drive in the /media/sda1 folder.
sudo mount /dev/sda1 /media/sda1
Now it’s time for the command that actually does the magic: chroot. This command is used to open up a shell with a different root directory than the current shell is using, and we’ll pass in the folder where we mounted the hard drive.
sudo chroot /media/sda1
Now you should be able to use the passwd command to change your user account’s password, and it will be applied to the hard drive since we are using chroot.
passwd geek
Note that you’ll have to type your username after the passwd command in order to change the right password.

Now you should be able to reboot your system and log yourself in with your new password.
[mai mult...]Firestarter is an easy to use firewall for Ubuntu that includes a GUI administration tool. Installation of this firewall is as easy as using it. In this HowTo we will cover how to install the firewall.
Open a terminal window, and type in the following command:
sudo apt-get install firestarter
After the installation is finished, you can find the administration GUI at System \ Administration \ Firestarter:

When you launch the GUI for the first time, it will take you through a setup wizard:

Click forward, and you will be able to select the network device. If you are using DHCP for your machine, make sure you select that checkbox here:

Click Forward, and then Forward again. You will see the final screen of the wizard:

Click the save button and you will see the normal GUI screen:

This GUI is accessible from the tray icon, shown here:
![]()
The firewall is now installed. The firewall will continue running whether or not you are running the GUI, but the GUI will not be started up automatically unless you add it to the startup list using this path:
[mai mult...]sudo /usr/sbin/firestarter

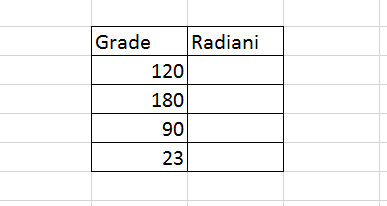
Se doreste transformarea din grade in radiani.
O conexiune la internet poate fi uneori imprevizibilă și o scădere bruscă a conexiunii în timpul descărcării unui fișier mare poate fi frustrant. Cu toate acestea, Google Chrome vă permite să reluați descărcările dacă se opresc în mod neașteptat.
[mai mult...]